Package and Install Your Extension in HELIO
In the last step, you've built a custom traffic light element. Now it's time to package it up and see it come alive in HELIO. In this step, you'll build your extension, import it into a project, and test it with real data.
1. Build the Extension
Time to compile your TypeScript code into a format HELIO can understand. Run the following command:
This script creates a bundled JavaScript file in the lib/ directory:
lib
What Gets Built?
The build process transforms your TypeScript code into optimized JavaScript and bundles all dependencies into a single file that HELIO can load. This file contains everything your extension needs to run.
Under the hood, Rollup handles the bundling process – you can customize this behavior through the Rollup config file if needed, but the defaults work great for most extensions.
What's Rollup?
Rollup is a JavaScript module bundler that takes your TypeScript code (and any dependencies) and packages everything into a single, optimized JavaScript file. Think of it as a smart packer that:
- Compiles your TypeScript to JavaScript
- Resolves all your imports and dependencies
- Removes unused code (tree-shaking)
- Optimizes the output for performance
The template comes pre-configured with a solid Rollup setup, so you can focus on building your extension rather than configuring build tools.
2. Open the IDE and Create a Project
- Download and Start the HELIO IDE
If you haven't already, you'll need the HELIO IDE up and running. If you haven't set it up yet, check out the Download HELIO guide. Once that's done, go ahead and:
- Start HELIO
- Open the IDE
- Sign Into the HELIO IDE for the First Time
- Create a Project
Extensions live inside projects, so you'll need one to test your traffic light
element. If you don't have a project yet, follow the
Create a New Project page and create a new project
using the Empty HMI template.
Testing Sandbox Project
Consider creating a dedicated "SDK Testing" project where you can safely experiment with extensions without affecting production work.
3. Import Your Extension
Now for the good part: getting your extension into HELIO.
- Navigate to Settings
With your project opened in the Project Editor, head to the Settings View.
- Locate the Extensions Section
Look for the Extensions section. This is where you manage all custom extensions for a project.
- Upload Your Extension
Click the option to add a new extension and upload the built
my-extension.js file from your lib/ directory.
Wanna Update Your Extension?
You made changes to your code? Just rebuild the extension with npm run build and upload the new file again. HELIO will use the updated
version.
Extensions Are Installed Per-Project
If you want to use your traffic light element in multiple projects, you'll need to import it into each one. This gives you precise control over which projects use which extensions.
- Save Your Project
Make sure to save your project after you've uploaded your extension.
4. Test & Play
Time to see your creation in action! Let's set up a quick test page to see the traffic light respond to data.
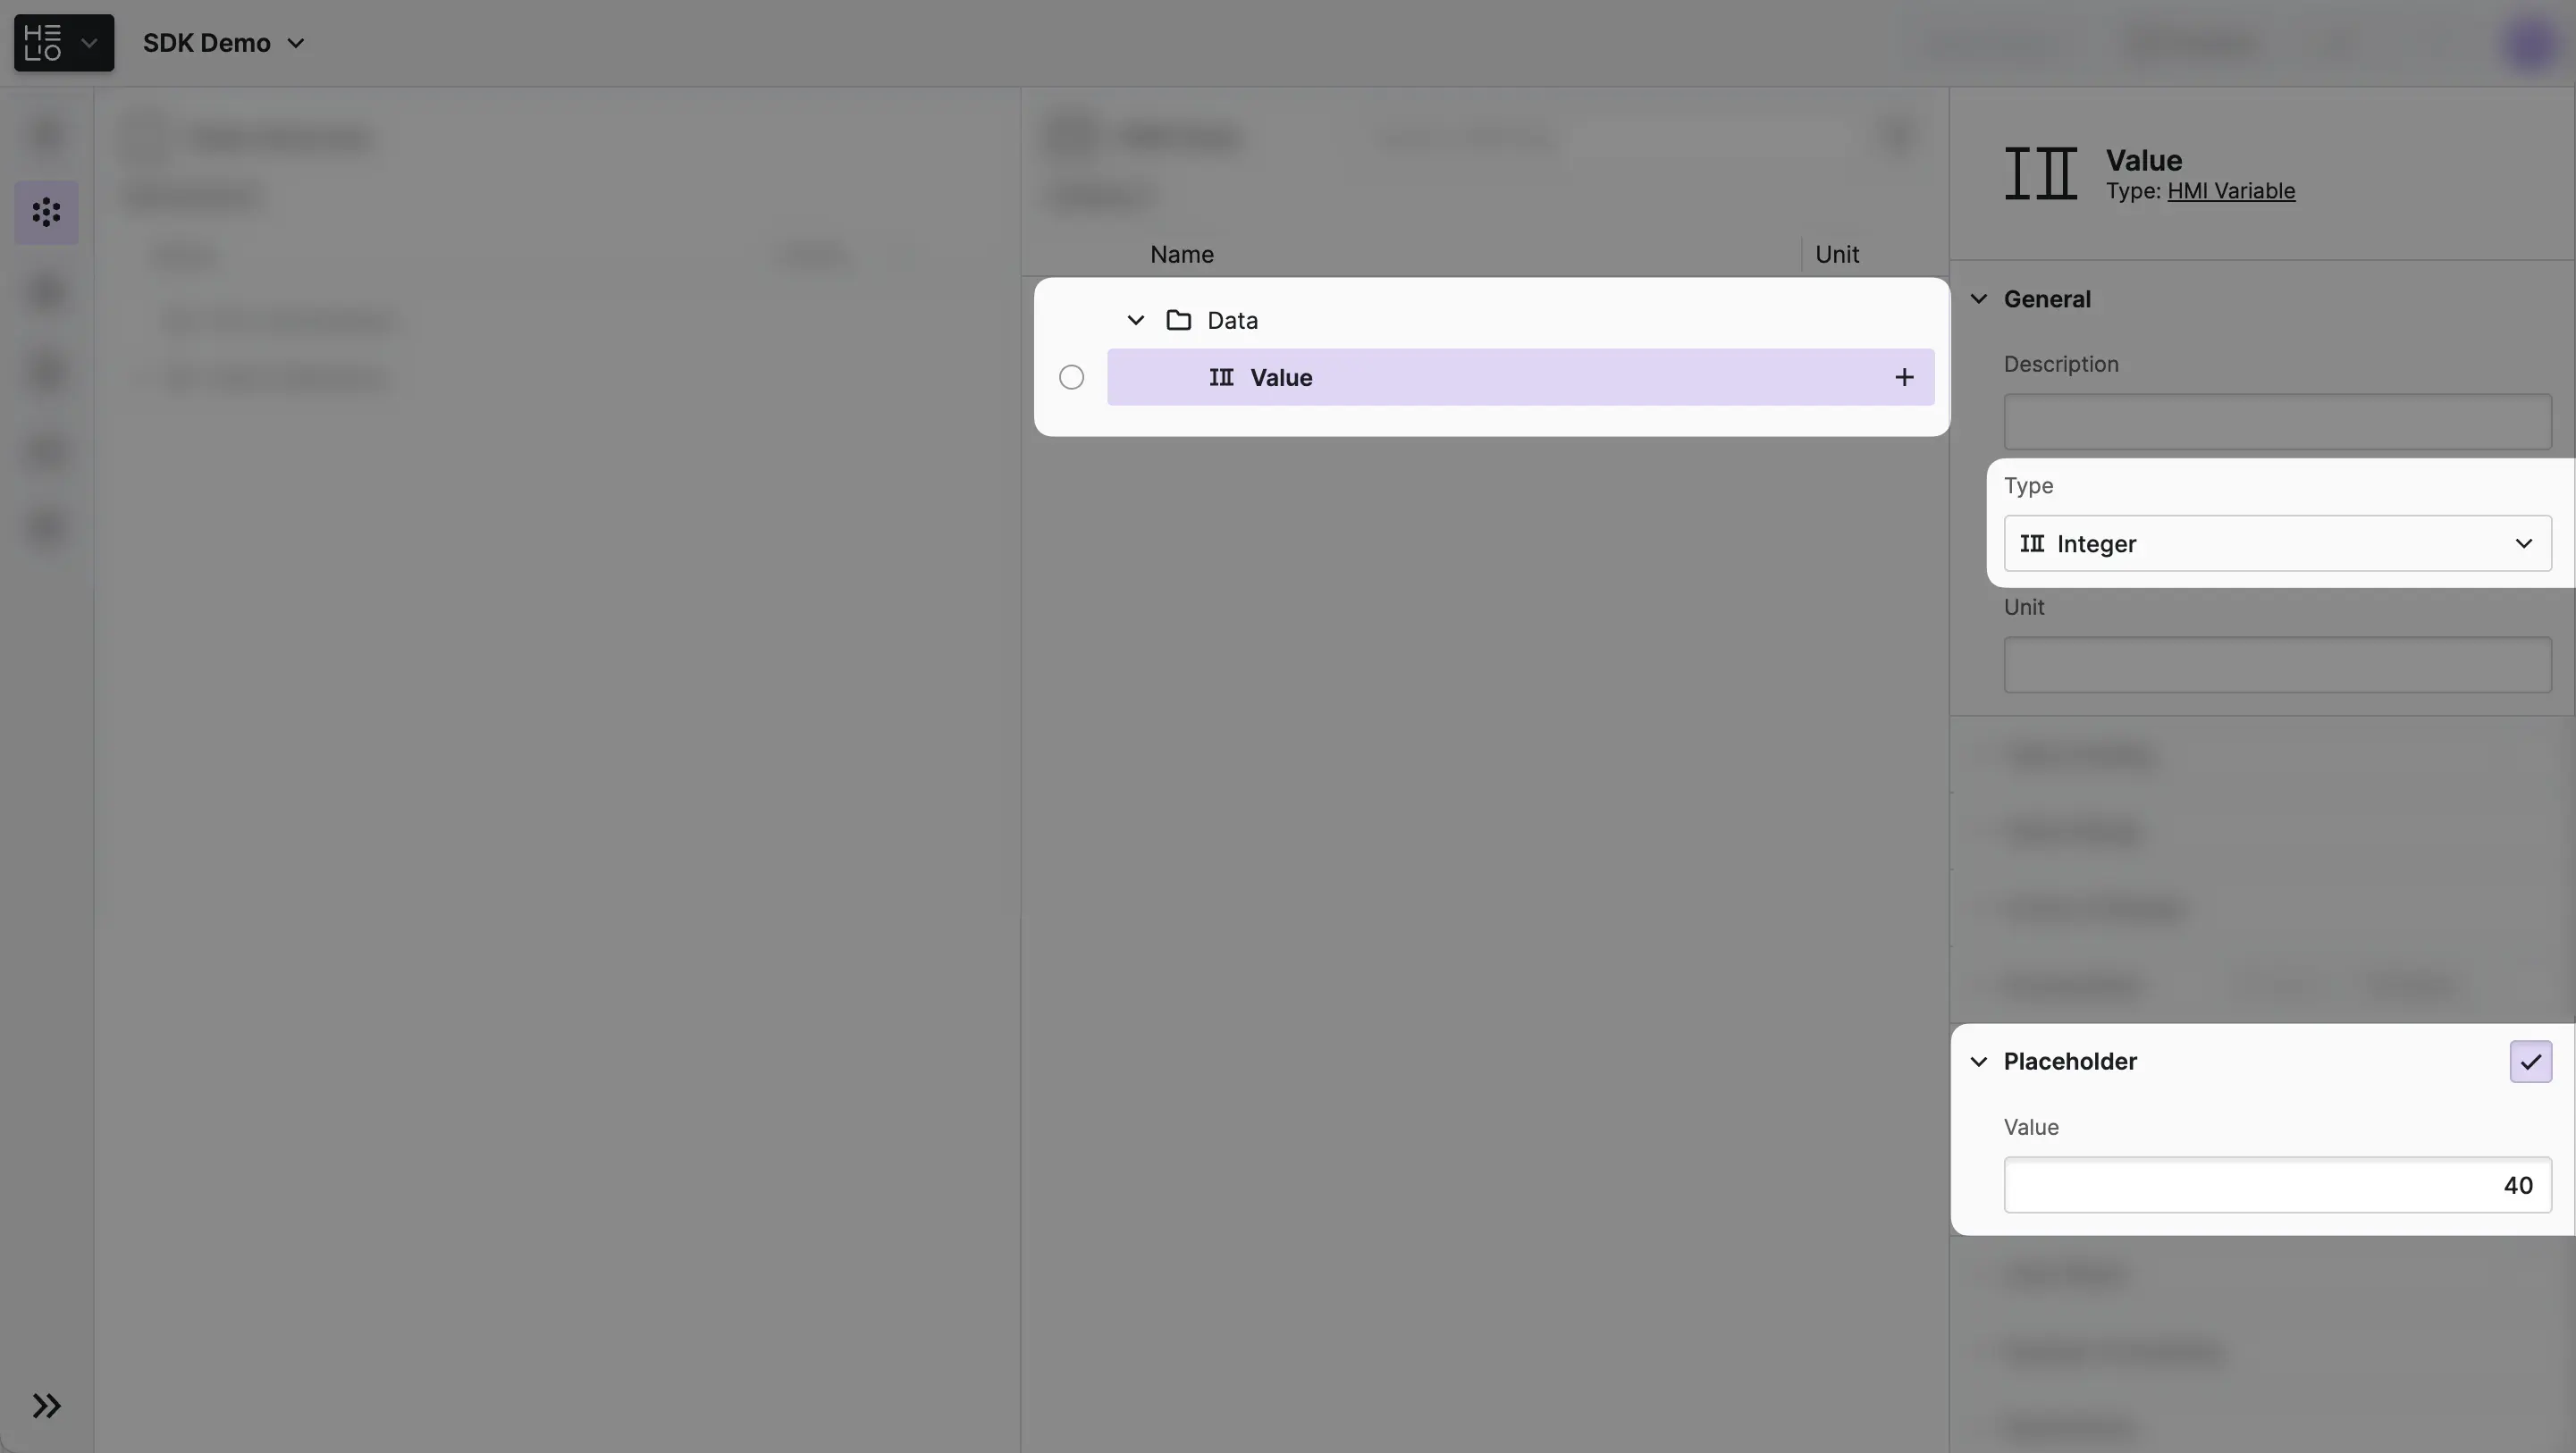
- Create a Data Variable
First, create a
Data Variable Types called Value of type
Integer in your project using the Data View. Set a
placeholder value for it, maybe 90. That'll simulate the data that could
come from a PLC or other data source.
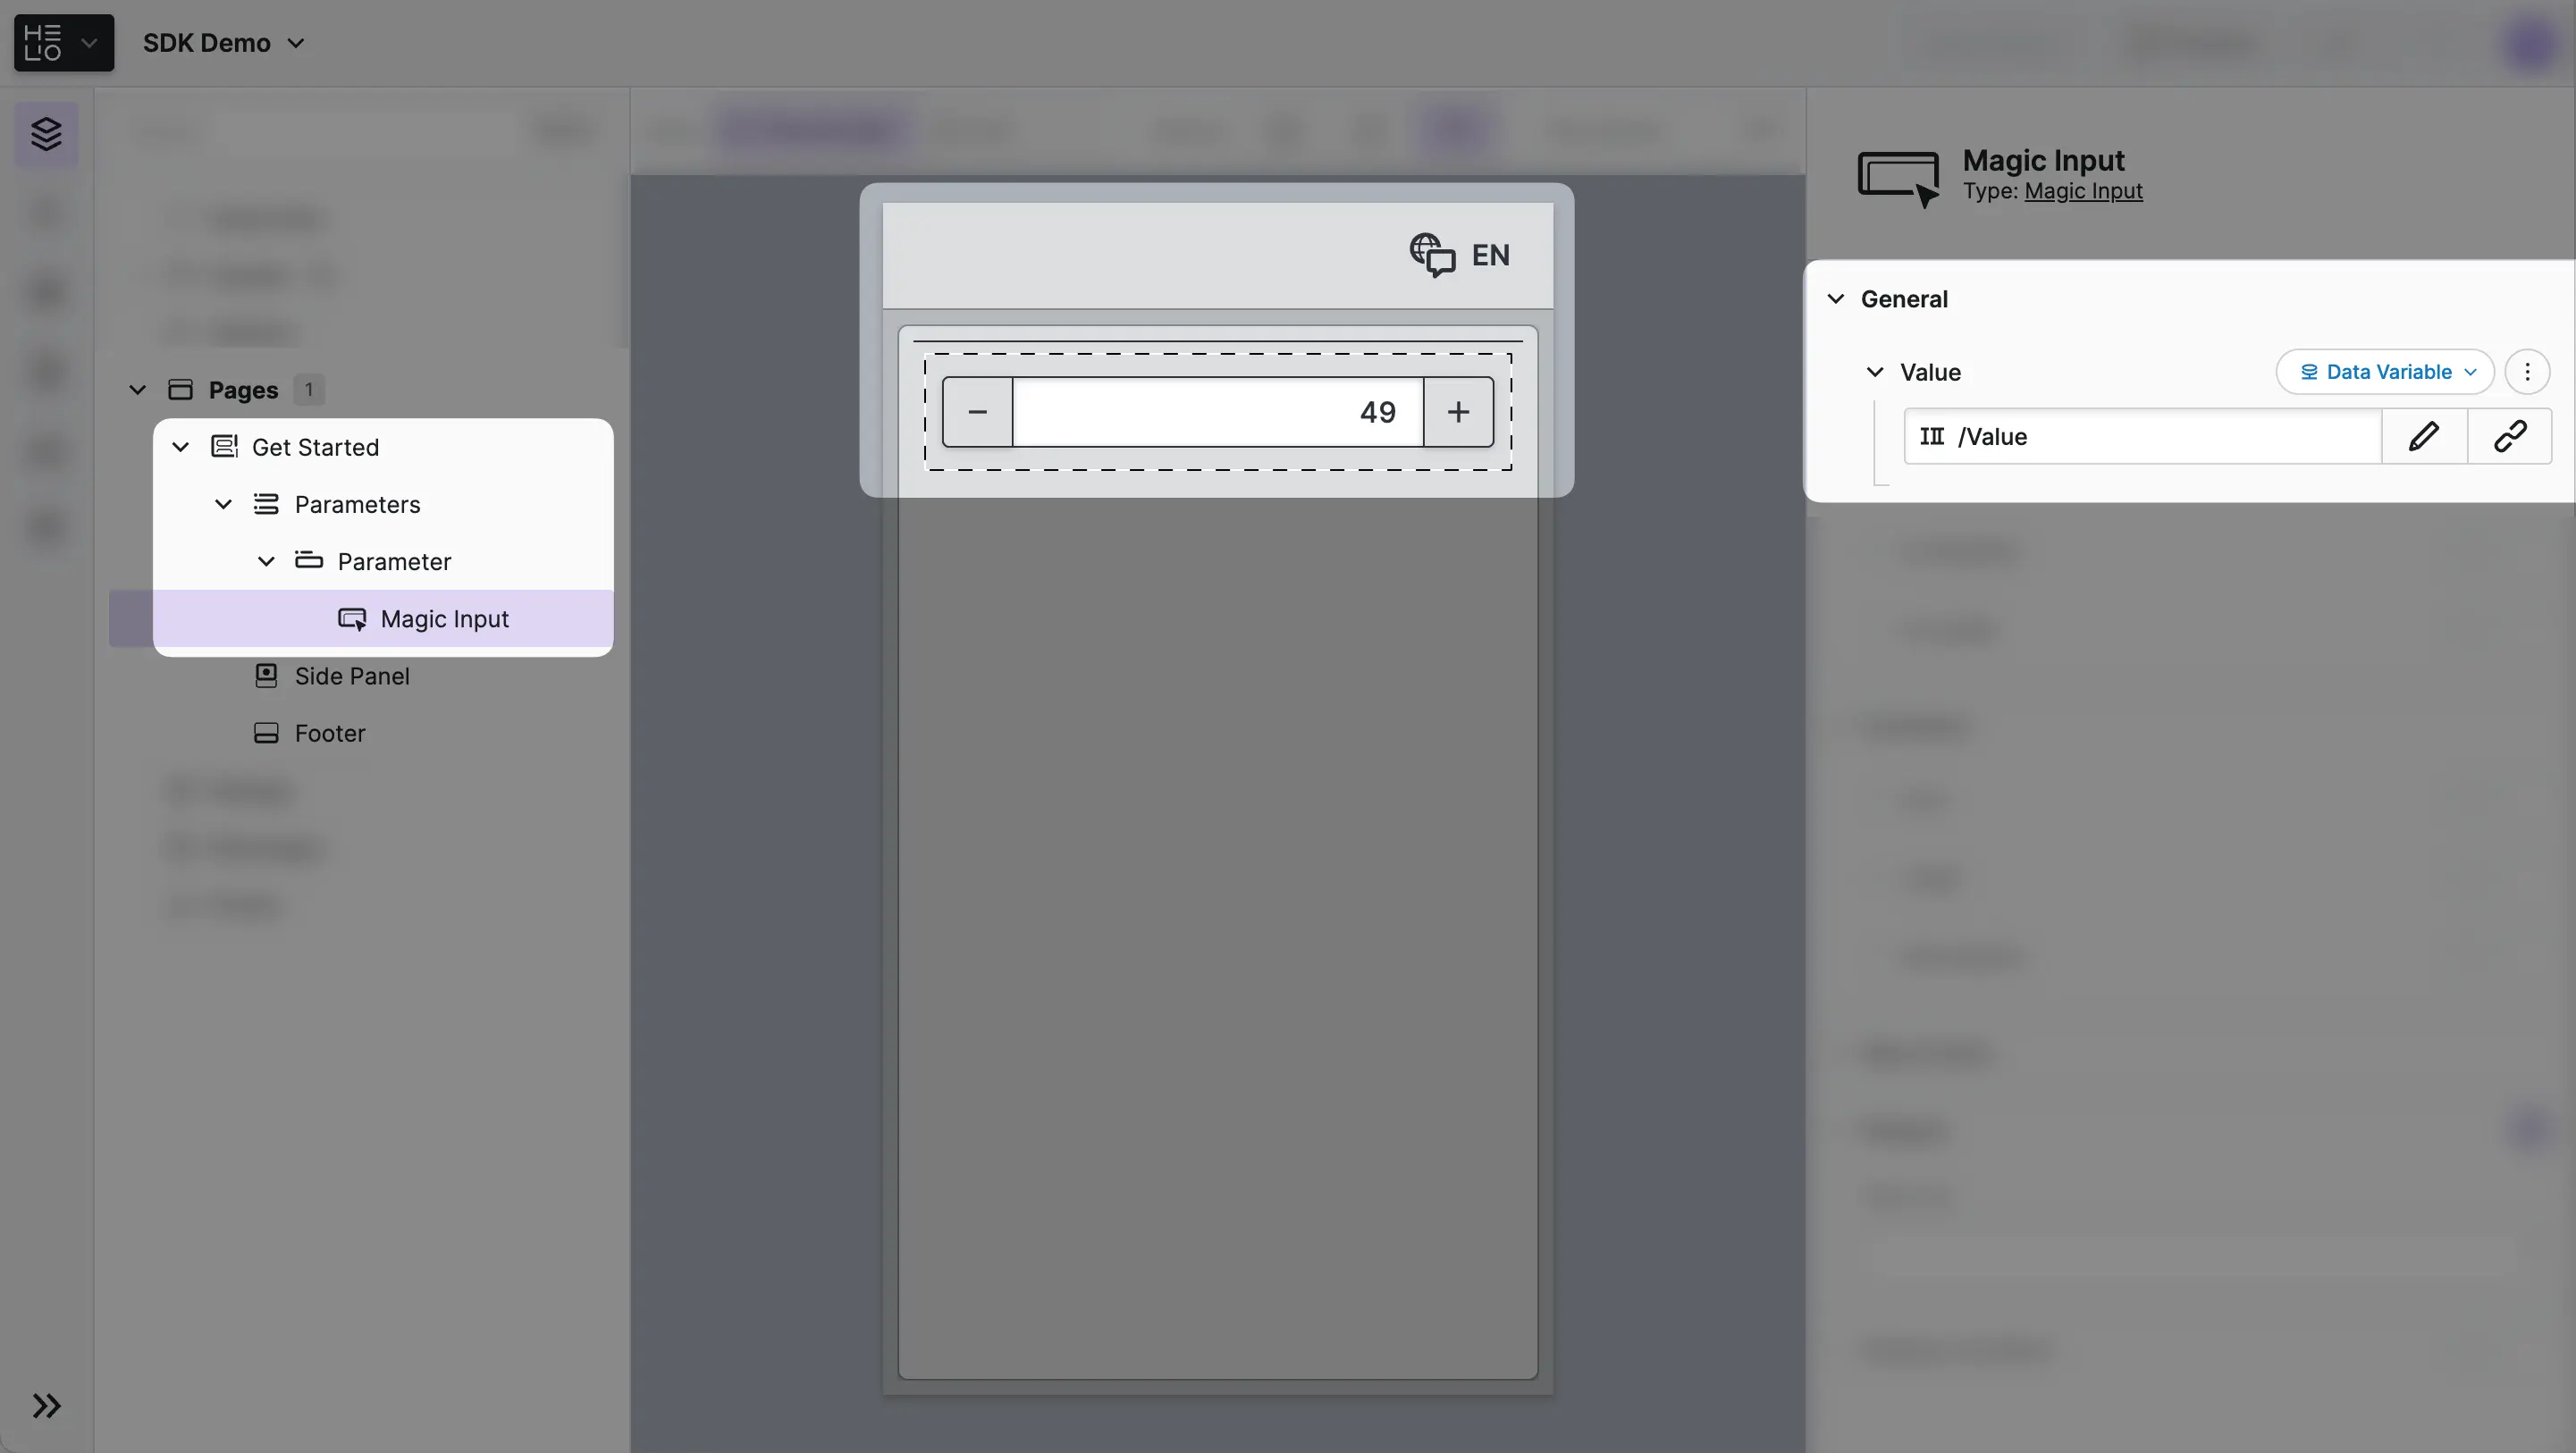
- Set Up a Parameter Page
Create a new Parameter Page and add two components:
- A Parameter that will contain all of our elements.
- Add a Magic Input for adjusting the value.
Connect its
Valueproperty to theValuevariable, so you can start changing it when you turn onTest-Mode.
- Add Your Element
Next, you'll add your element using the same dialog that you used to create your Magic Input.
- Select the
Parameterand click the "Add" button that appears on the right side of it. - Scroll through the list to find your
Traffic Lightright next to all of the rest of HELIO's built-in elements.
Noticed Its Description?
That's the description you provided when you were calling the createElement() function to define your element in the extension code, right?
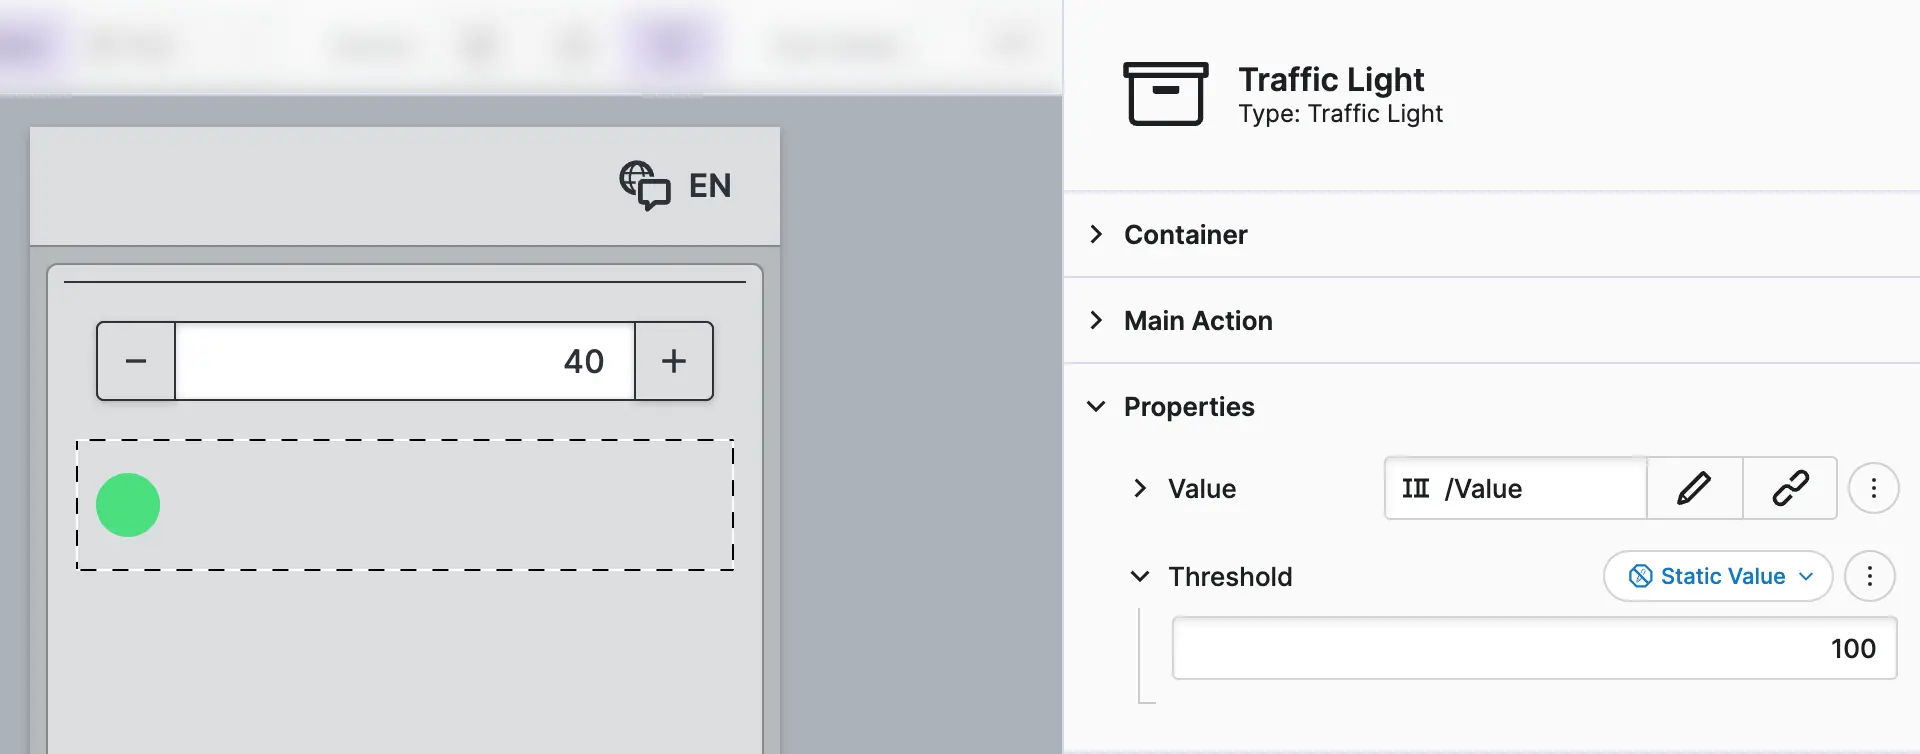
- Configure Your Element
Finally, add your new Traffic Light element to the Parameter and connect
its Value property to the same variable.
Please note that the Threshold property has already been set to a
Static Value with a value of 100.
- Play Around
Now comes the fun part! You can now start testing your element.
- Turn on the
Test-Mode - Adjust the value of the
Magic Inputand watch your traffic light element respond. - Try values above and below your threshold (default is 100) and see the color change in real-time.
This simple test setup mirrors how your extension would work with actual
PLC data. The element responds to data changes the same way it would in
a production HMI. You would simply need to Create a Connection to Your PLC
and connect your Value variable, and you're done!
Check this out! You have just created, packaged, and deployed your first HELIO extension. Your own traffic light is now part of your HELIO toolbox and can be used together with all built-in components.
You have gone through the entire process: from setting up your development environment to executing your custom element in HELIO. You now know how to create, package, and test extensions
What's next? Add more complexity to your element, define custom Actions, or define your first Dynamic Properties.