Start HELIO
Once you've downloaded HELIO, the next thing you want to do start it on your development PC or the target device. Since HELIO is a web application, it might feel a little different from traditional desktop tools at first. But don't worry, HELIO likes to think different but the startup process is actually very simple.
The HELIO Runtime is a tiny web server that serves both the HMIs and the HELIO IDE as web applications. The great thing about this: you can run all of HELIO using a simple browser, no heavy-weight installations needed! Let's see how this is done depending on the operating system or ecosystem you're targeting.
- On Windows
- On Linux
- On macOS
- On ctrlX OS
- On NOA Devices
- Extract the
HELIO.ziparchive
Since HELIO does not require any installation, you are basically done after extracting it. What you get is the so called HELIO Runtime Directory. Just move this directory from your Downloads folder to a safe location on your hard drive.
Where to store the Runtime Directory?
- Don't worry too much about where to store the HELIO Runtime Directory before your first run.
- HELIO stores its data in the HELIO Data Directory. So it is totally safe to move the Runtime later on.
- If you want to keep things tidy you can learn about some best practices on the Multiple Runtime Versions page.
- Start
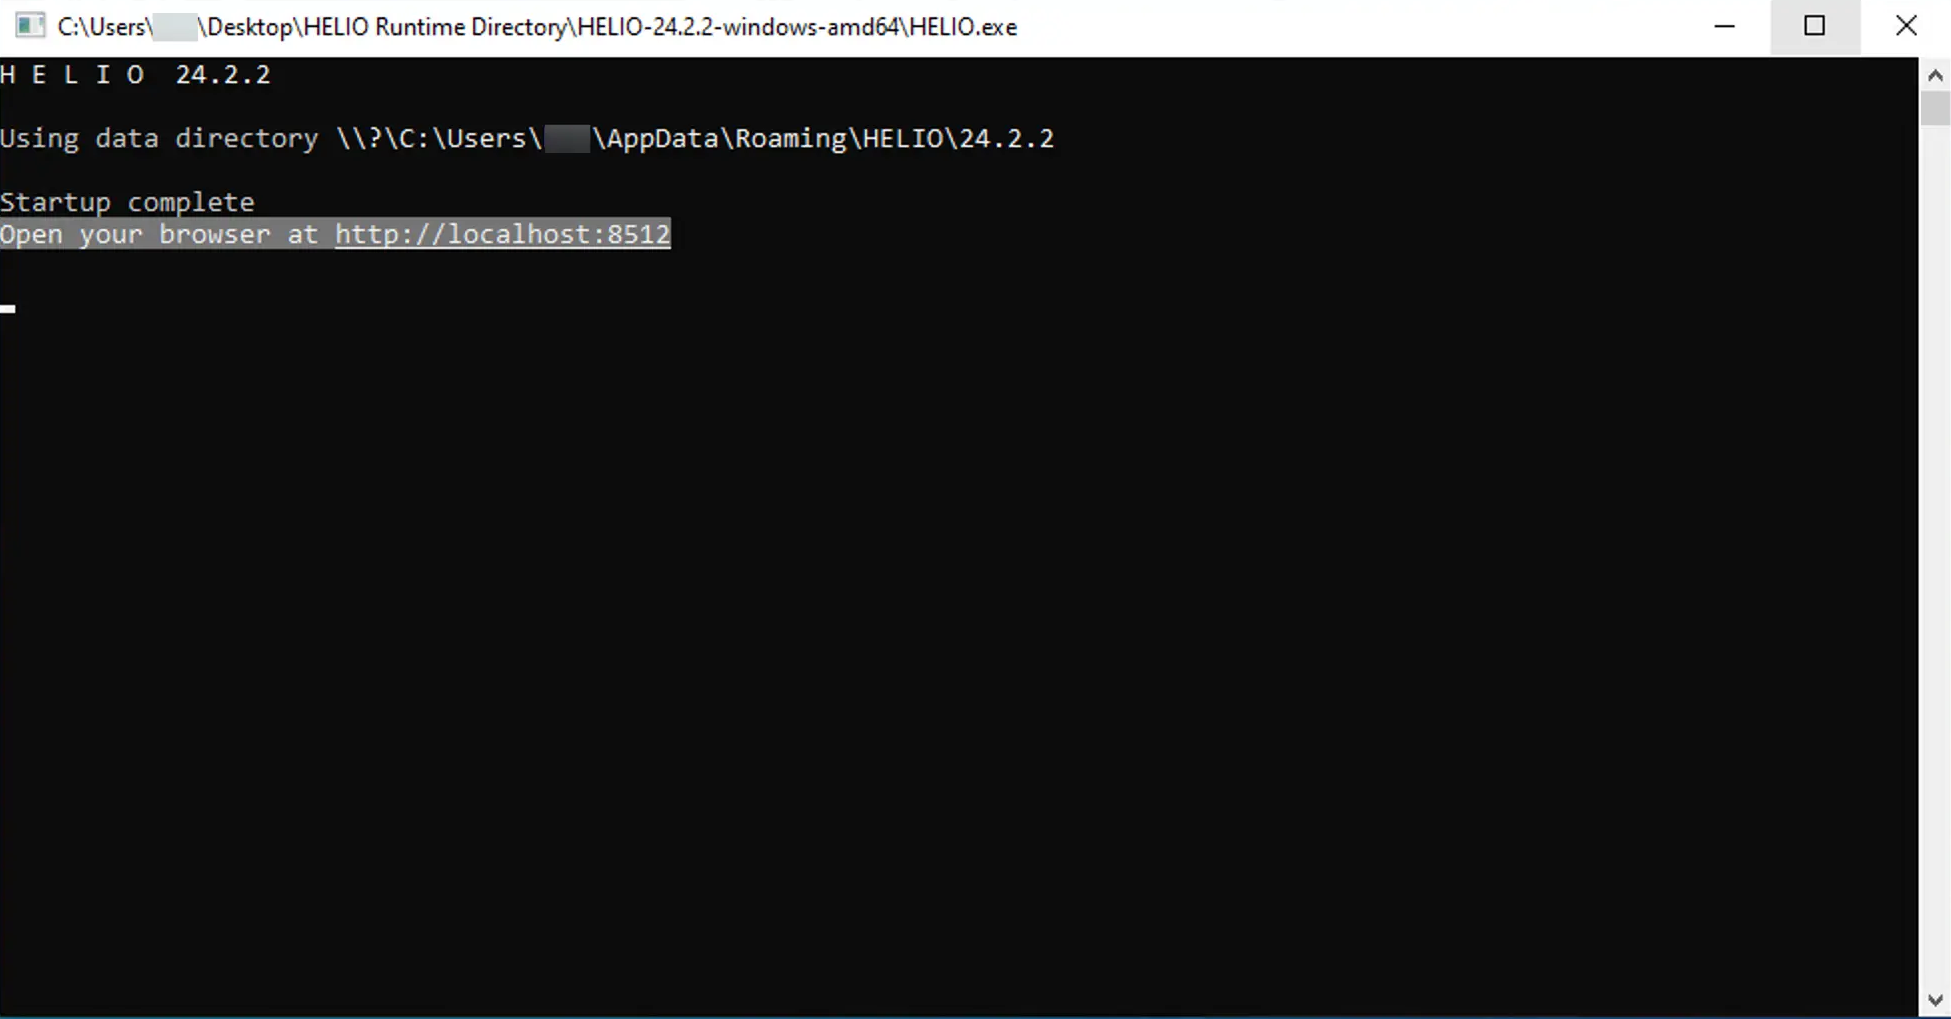
HELIO.exe
HELIO will be executed inside a new Terminal Window that should look like this:
Keep This Window Open
…as long as you want to use HELIO HMIs or the HELIO IDE.
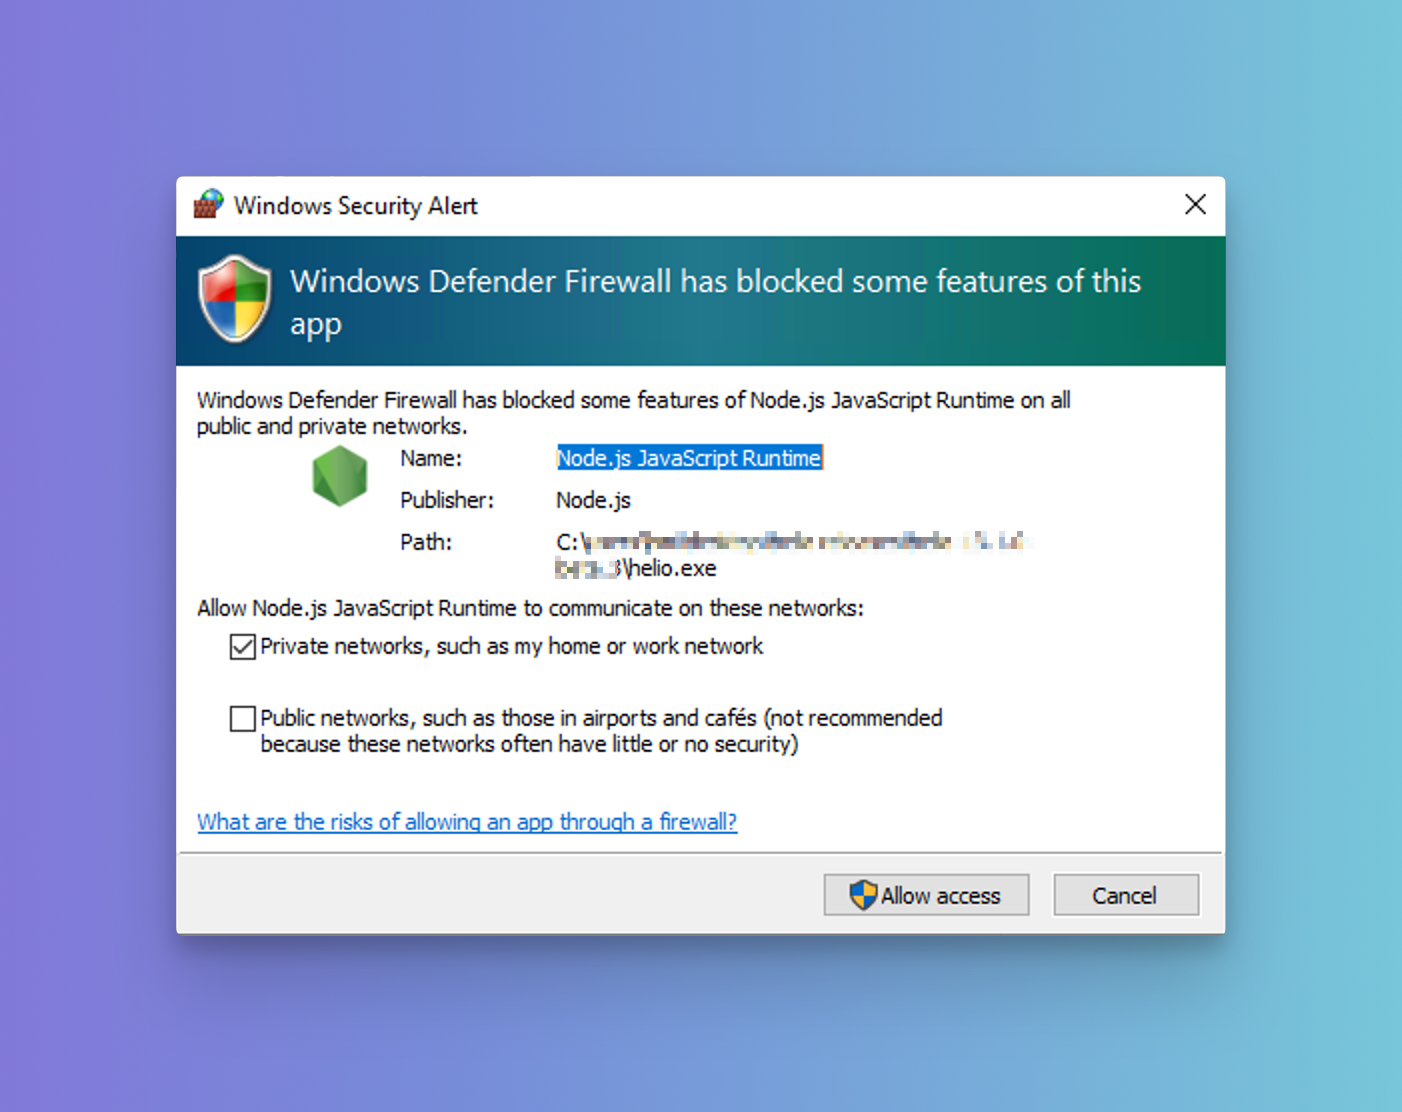
Having trouble with the Windows Firewall?
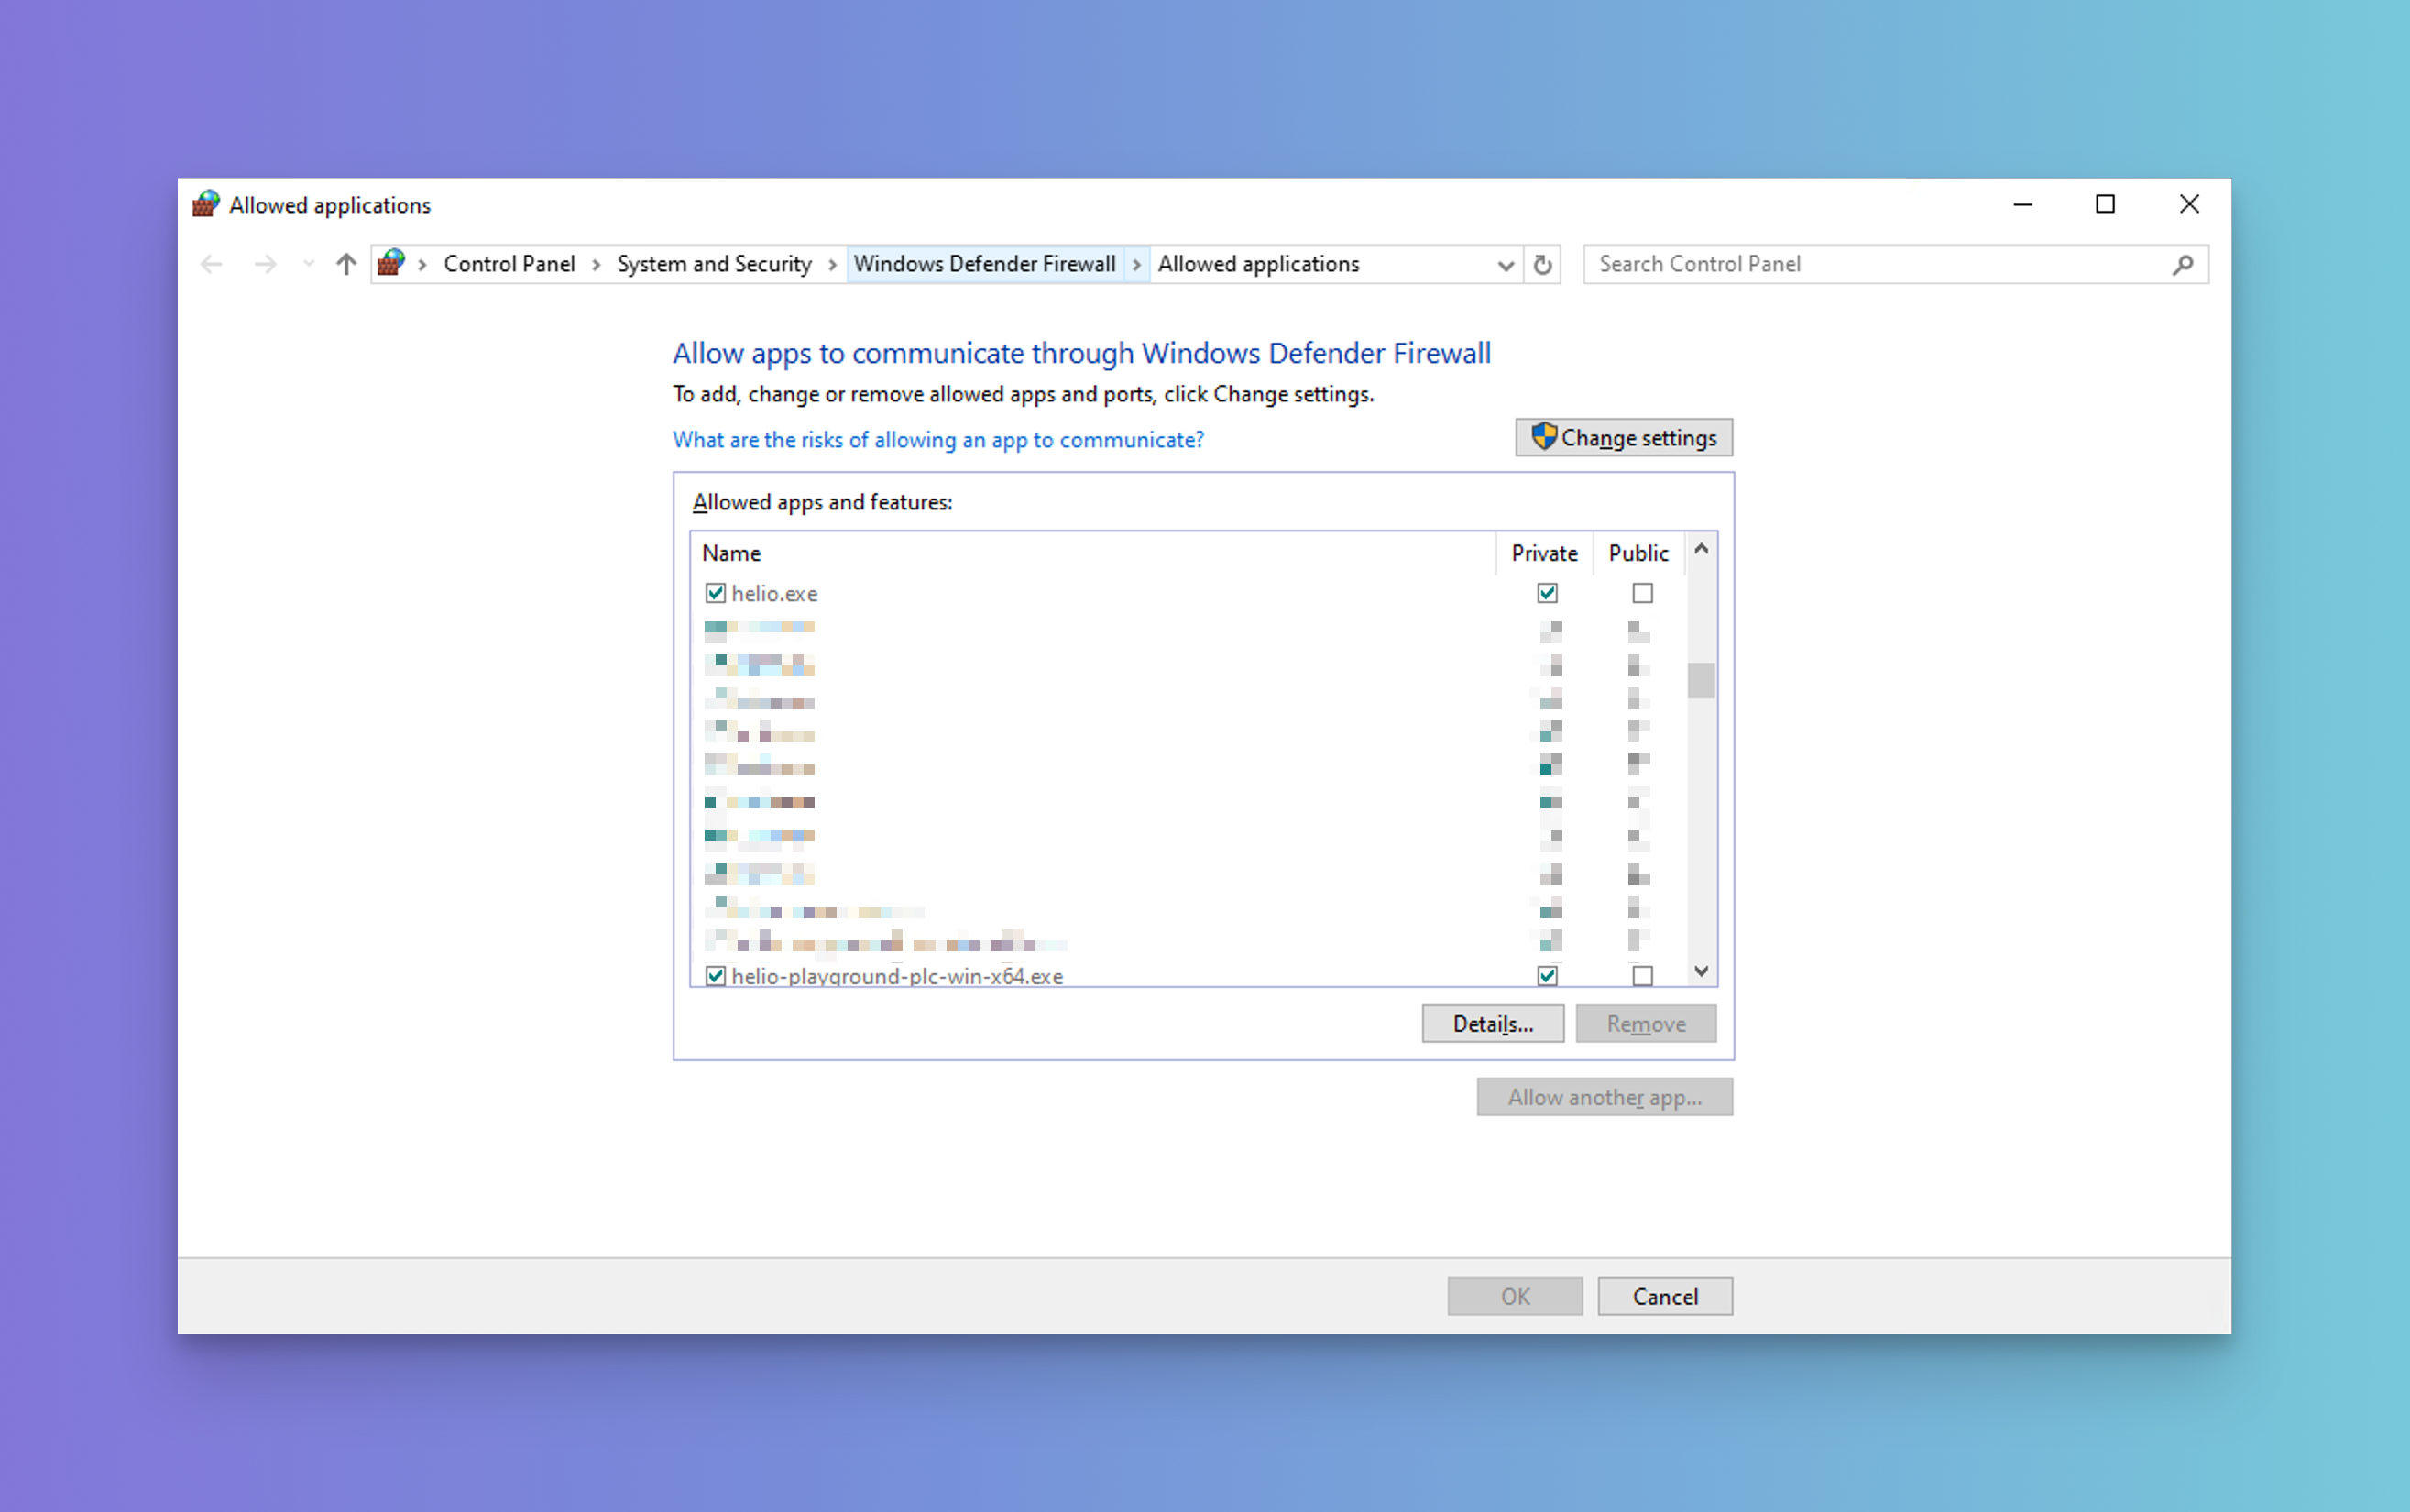
Adjust the Firewall Later
You can also change these settings later. Refer to the Microsoft Documentation to find out where to locate the Firewall settings.
Need More Control?
Learn more about HELIO's Command Line Parameters.
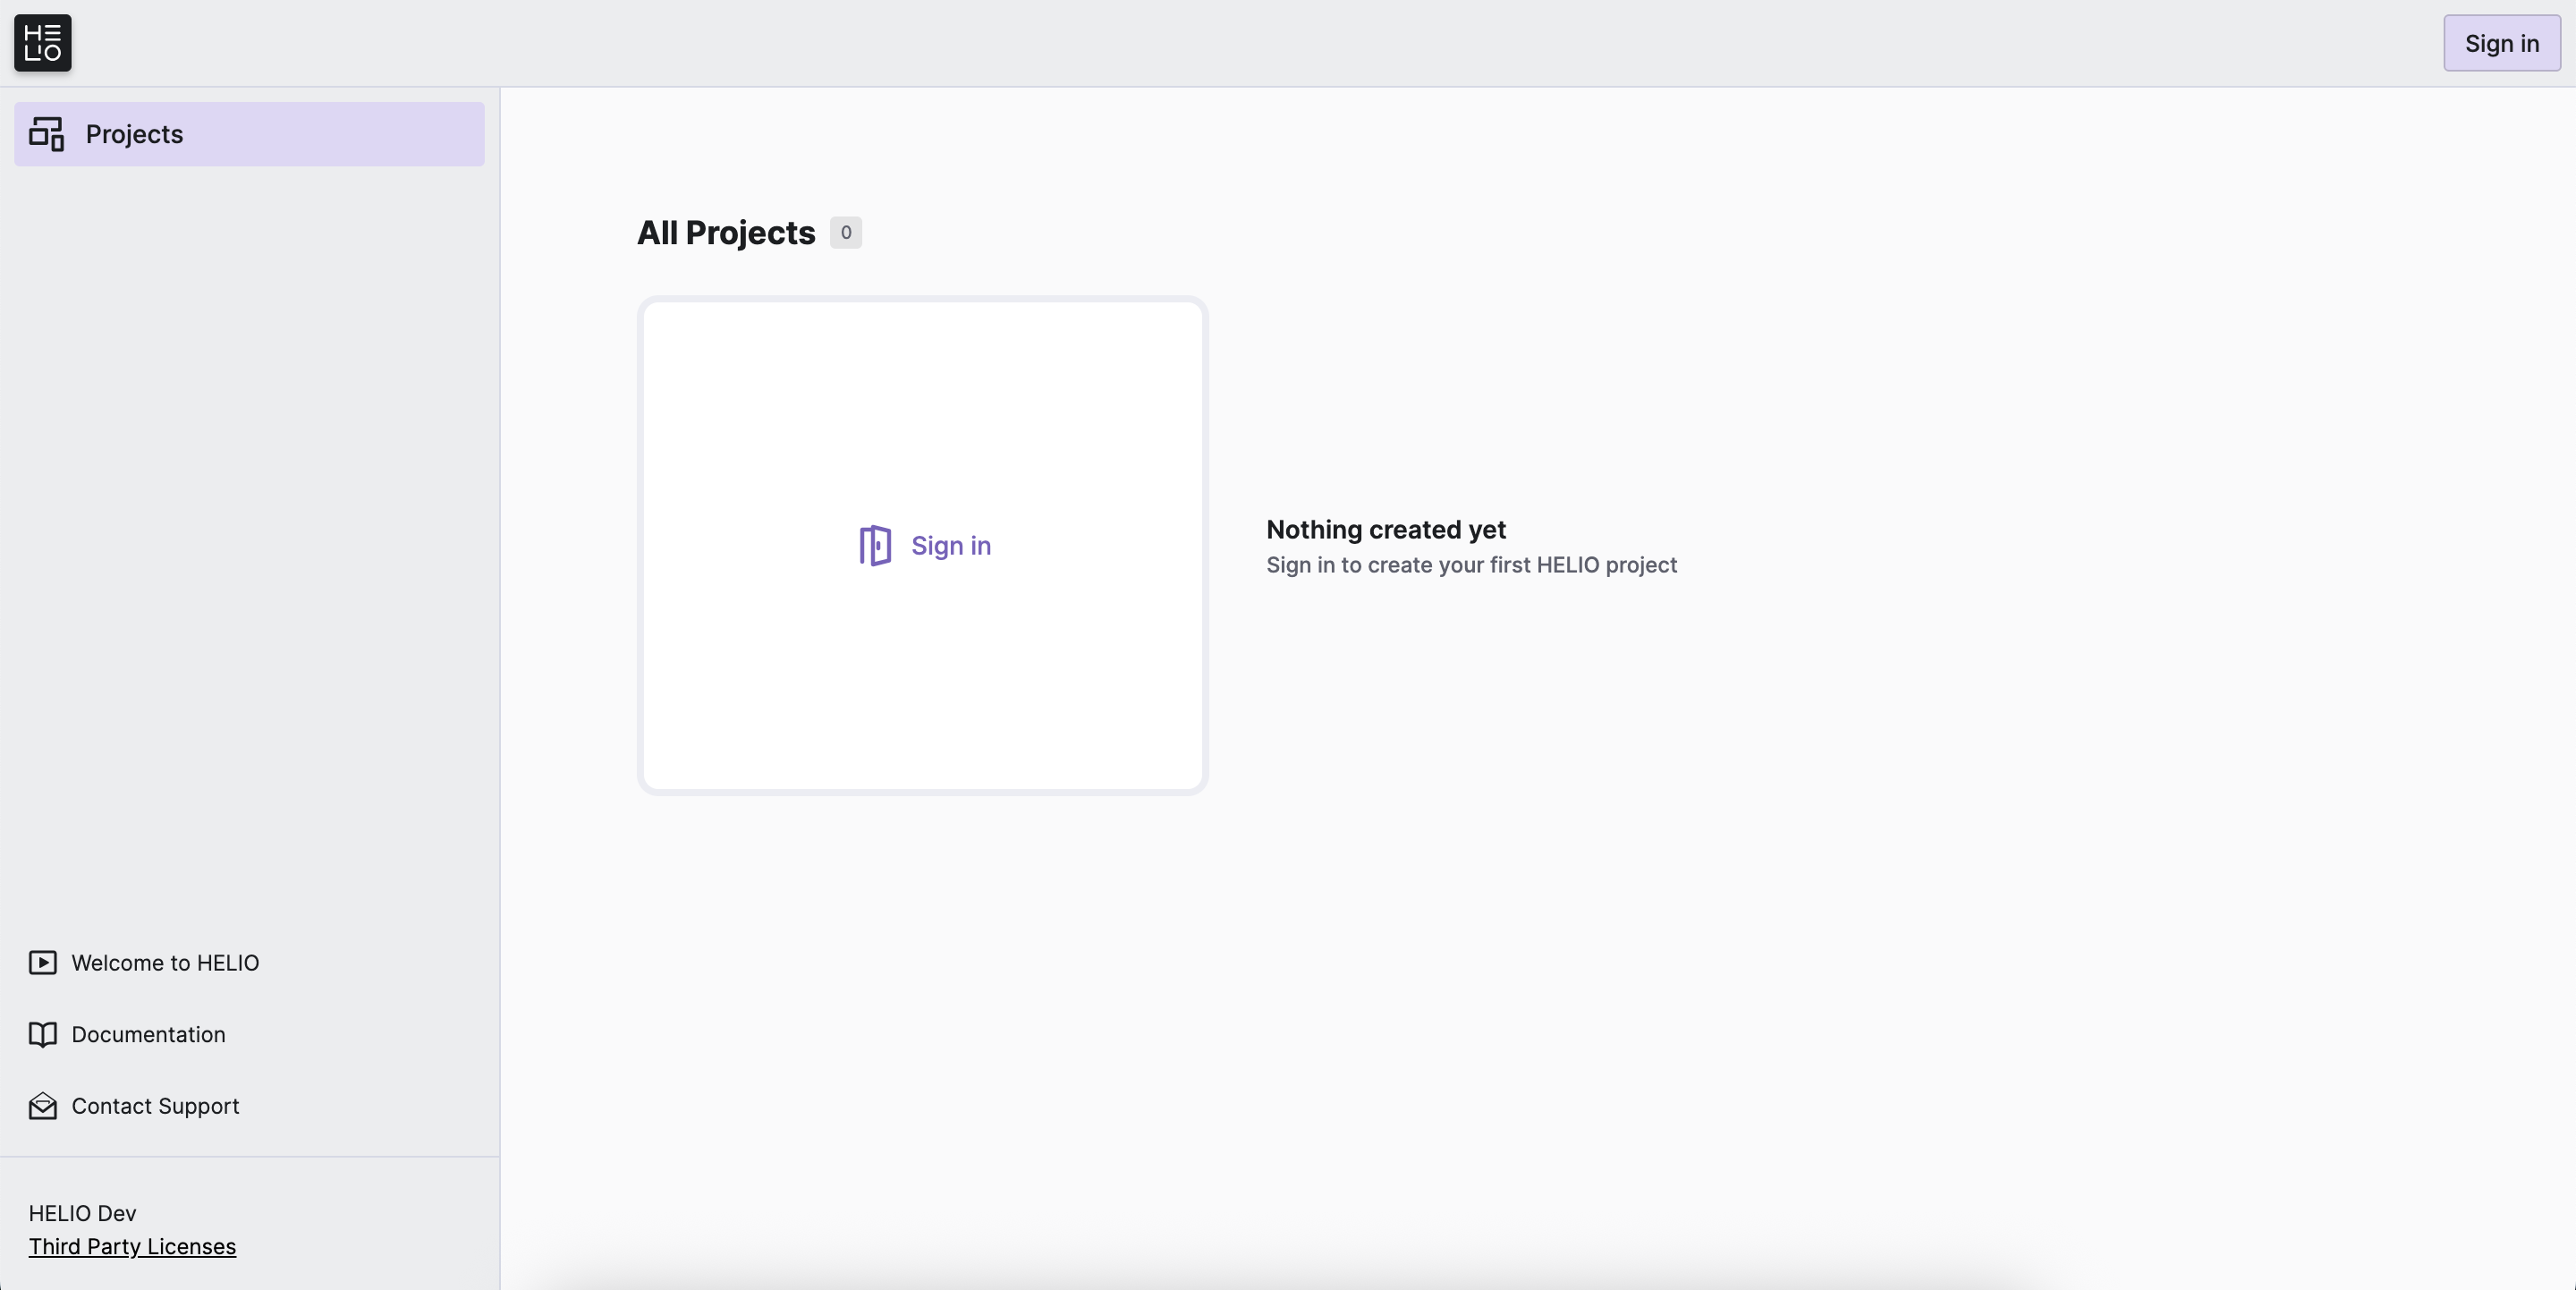
- Open your browser
…and navigate to http://localhost:8512:
For a list of all the supported browsers see the Minimum System Requirements
- Provide Your License Key
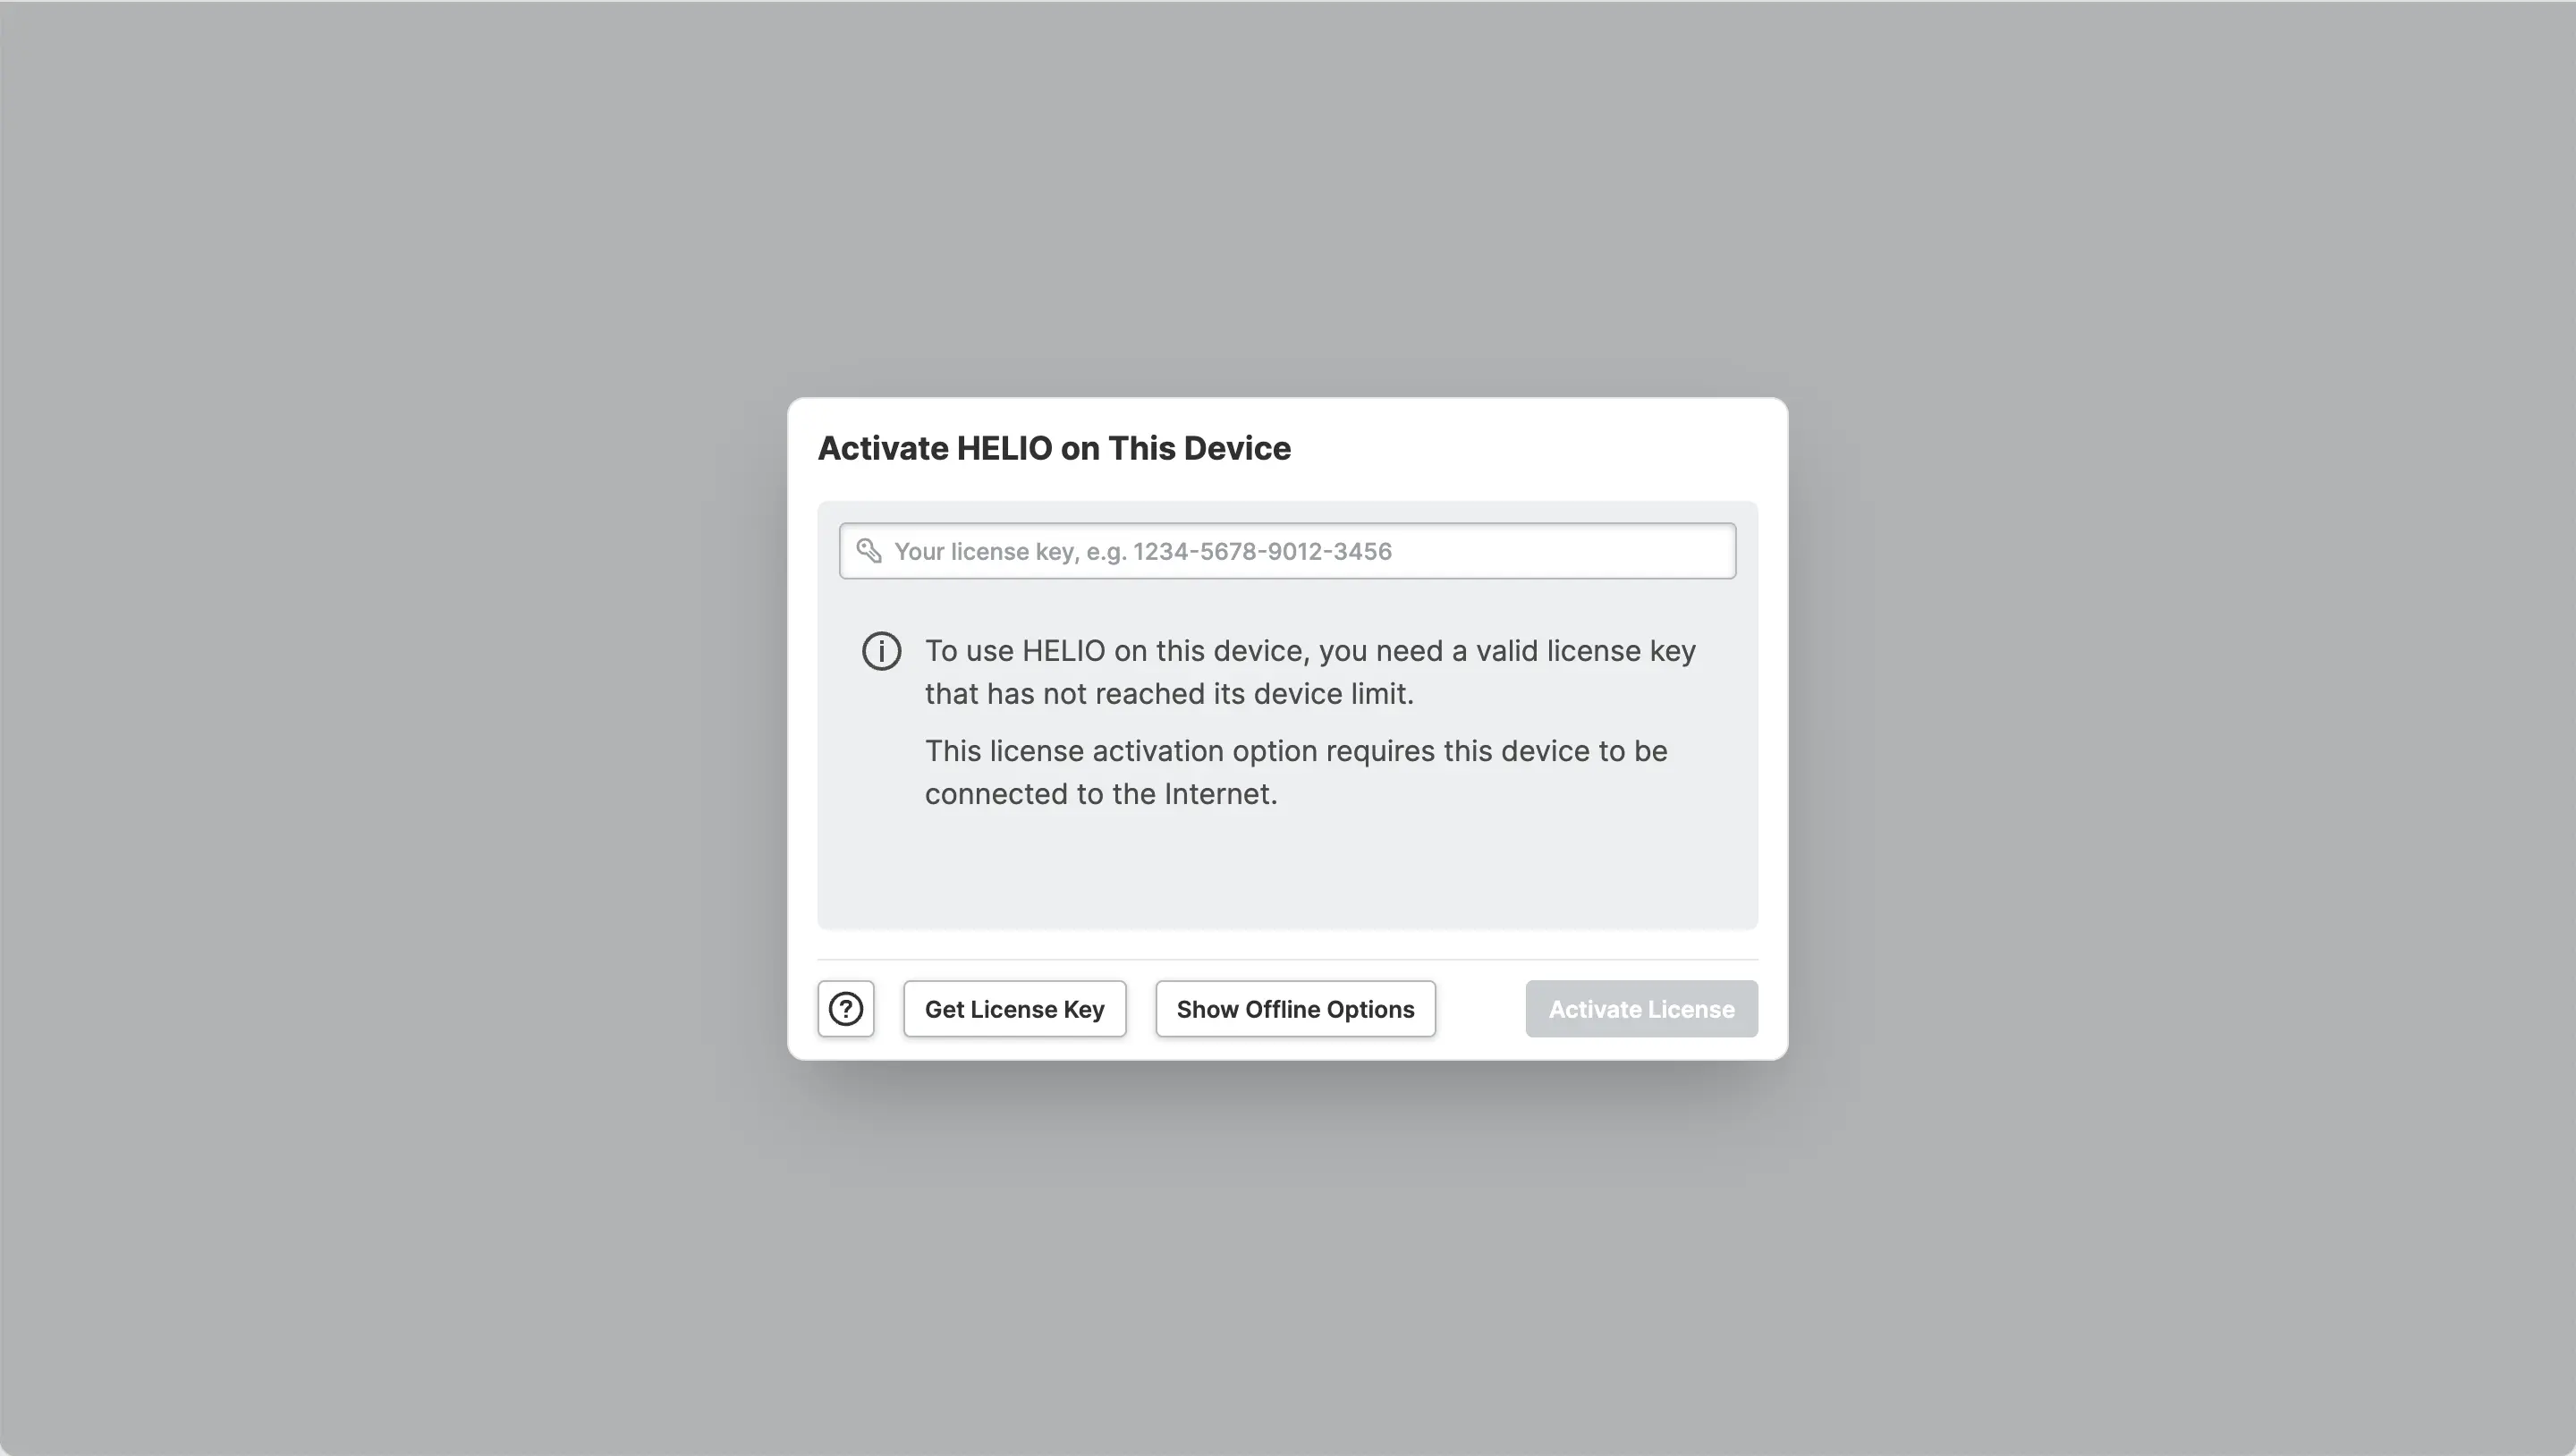
If you start HELIO on a machine for the first time and haven't activated it yet, HELIO will ask you for a license. Paste in your license key and submit. Keep in Mind that a HELIO Trial License can only be activated on 5 Seats.
- Sign In Using the Default IDE User
Click the Sign In button in the upper right corner. Enter the default IDE user credentials that come pre-configured with each HELIO runtime:
| Username | eve |
|---|---|
| Password | eve |
Don't Forget!
- Extract the
HELIO.ziparchive
Since HELIO does not require any installation, you are basically done after
extracting it. You can move the HELIO executable to a safe location on
your hard drive.
Don't worry too much about where to store it before your first run.
- Don't worry too much about where to store the HELIO Runtime Directory before your first run.
- HELIO stores its data in the HELIO Data Directory. So it is totally safe to move the Runtime later on.
- If you want to keep things tidy you can learn about some best practices on the Multiple Runtime Versions page.
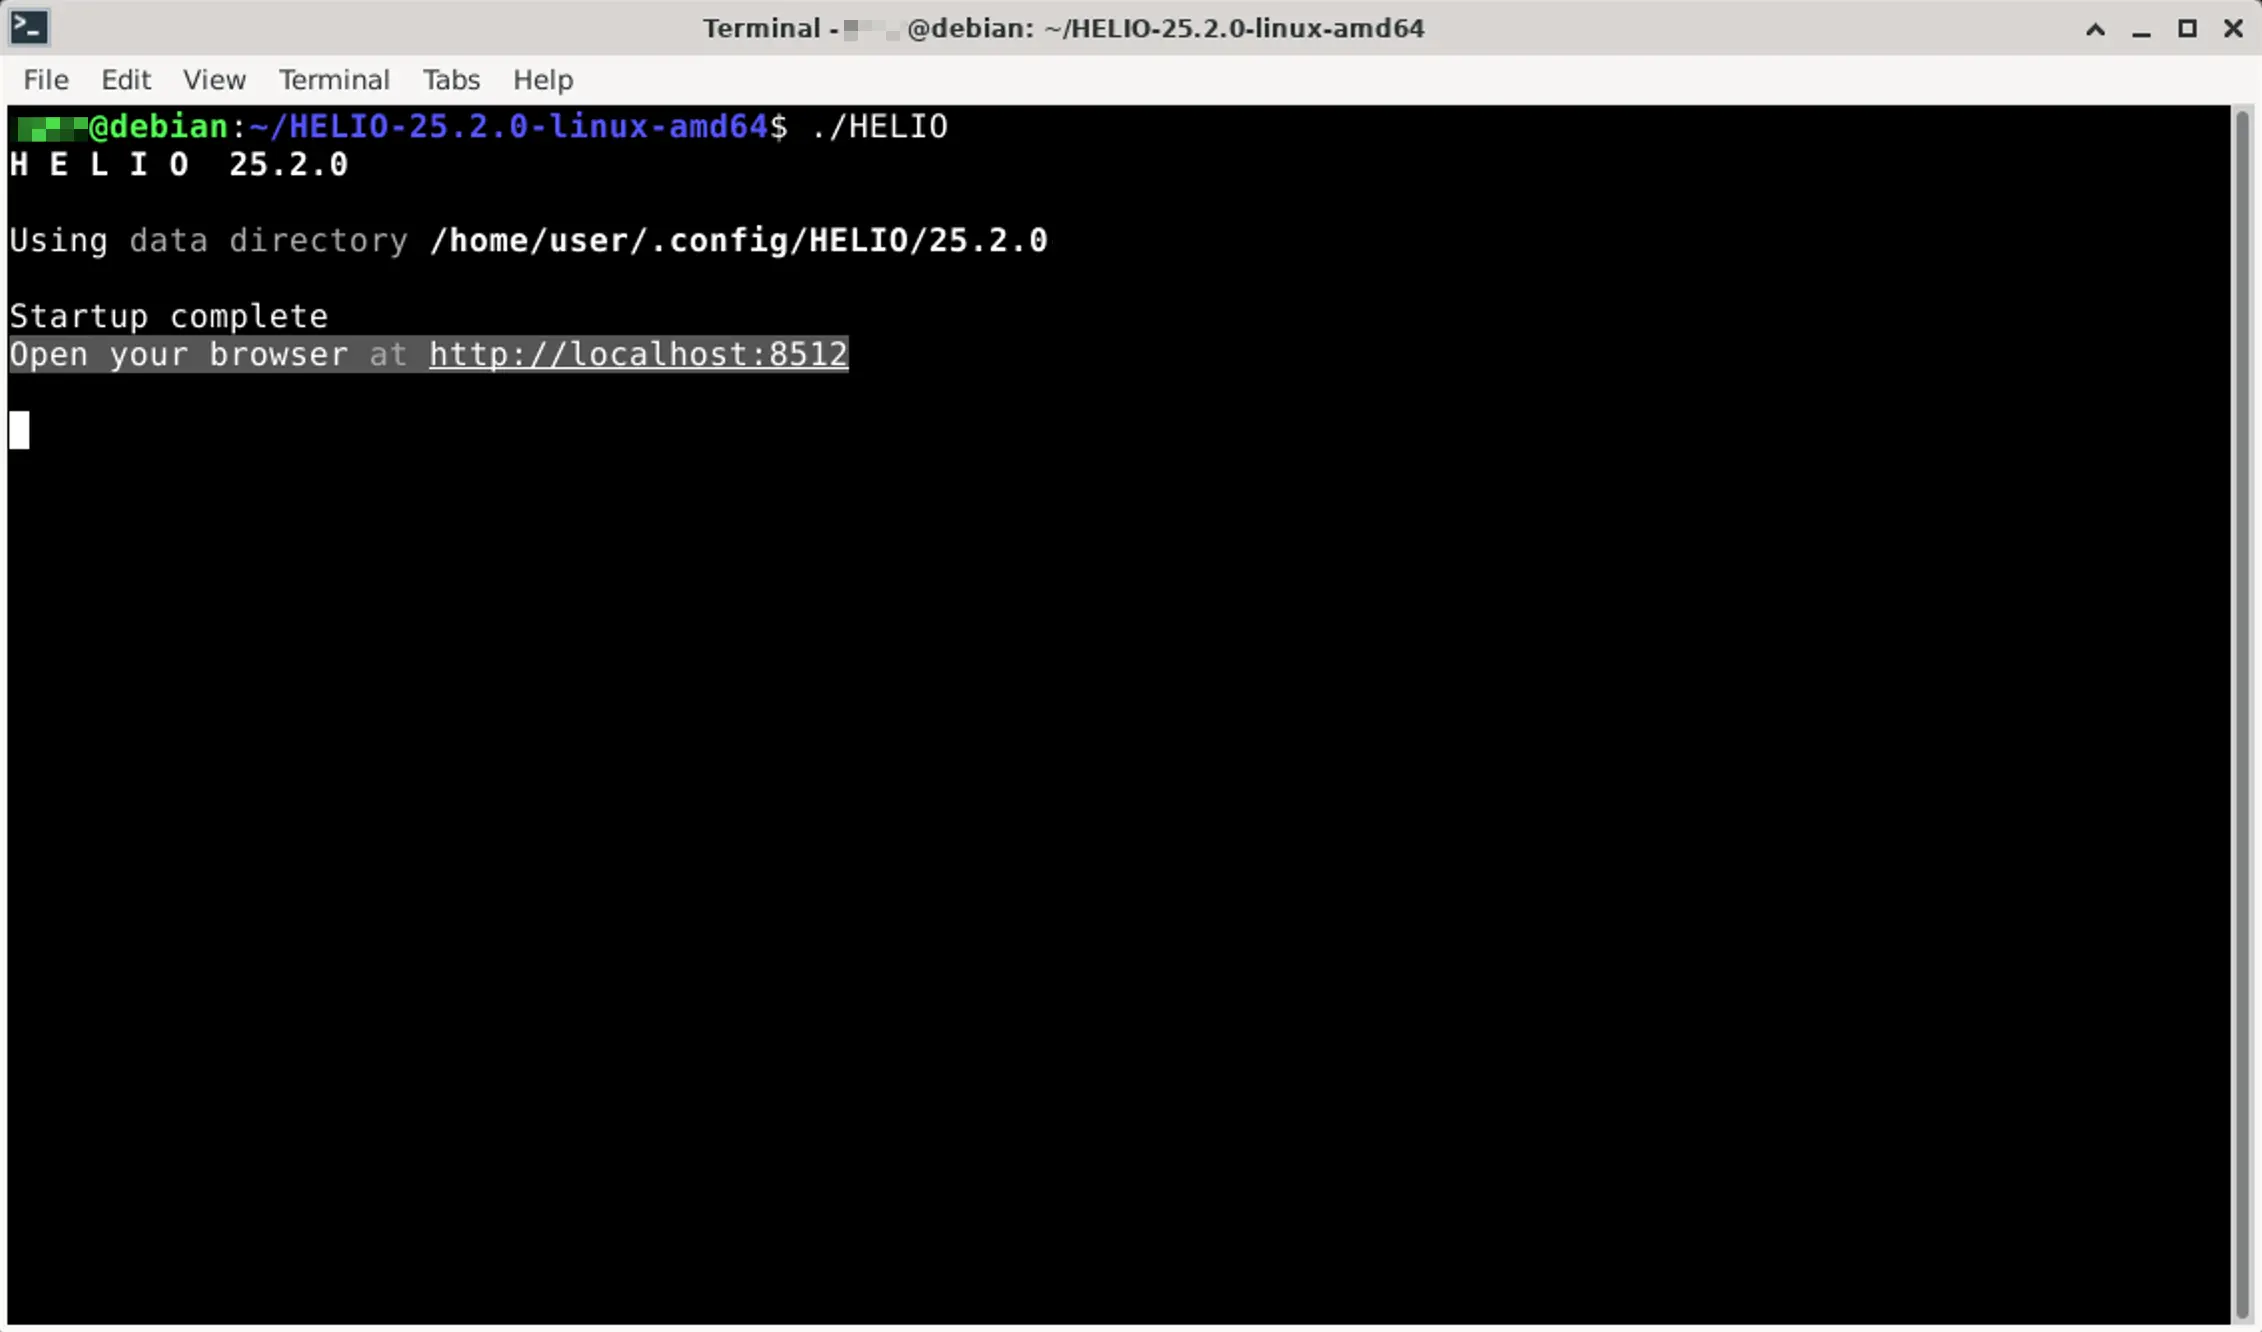
- Start the
HELIOexecutable
…using the Terminal of your choice. The output of a successful start should look like this:
Need More Control?
Learn more about HELIO's Command Line Parameters.
- Open your browser
…and navigate to http://localhost:8512:
For a list of all the supported browsers see the Minimum System Requirements
- Provide Your License Key
If you start HELIO on a machine for the first time and haven't activated it yet, HELIO will ask you for a license. Paste in your license key and submit. Keep in Mind that a HELIO Trial License can only be activated on 5 Seats.
- Sign In Using the Default IDE User
Click the Sign In button in the upper right corner. Enter the default IDE user credentials that come pre-configured with each HELIO runtime:
| Username | eve |
|---|---|
| Password | eve |
Don't Forget!
- Extract the
HELIO.ziparchive
Since HELIO does not require any installation, you are basically done after
extracting it. You can move the HELIO executable to a safe location on
your hard drive.
Where to store the Runtime Directory?
- Don't worry too much about where to store the HELIO Runtime Directory before your first run.
- HELIO stores its data in the HELIO Data Directory. So it is totally safe to move the Runtime later on.
- If you want to keep things tidy you can learn about some best practices on the Multiple Runtime Versions page.
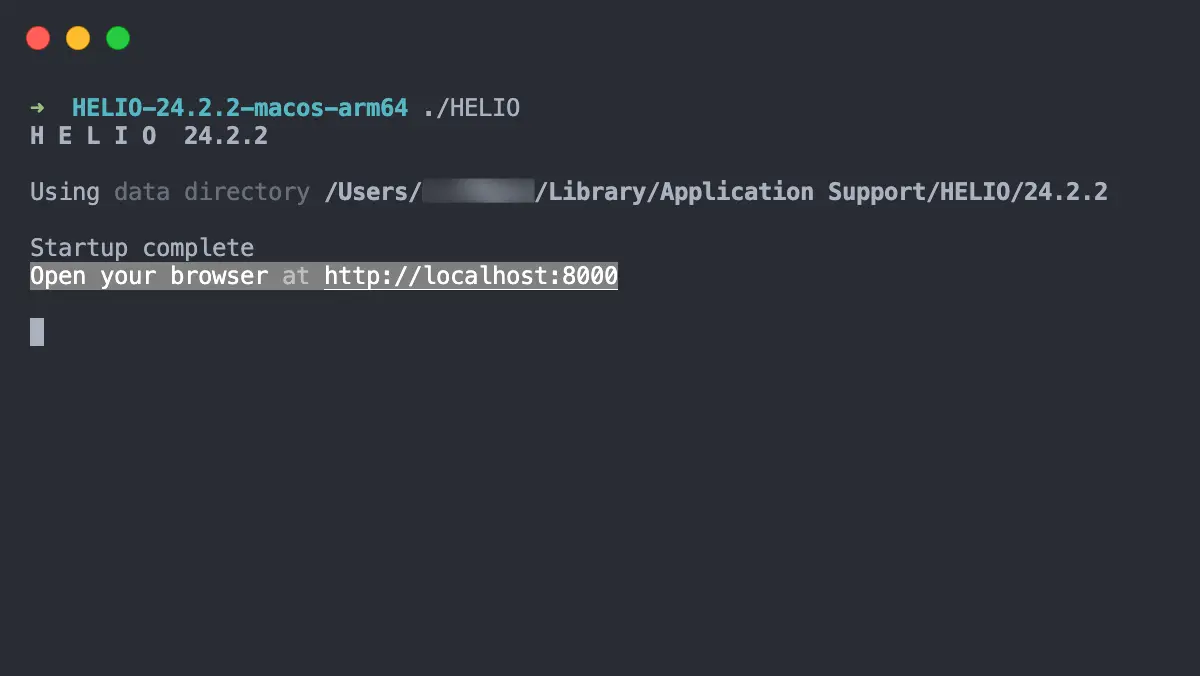
- Start the
HELIOexecutable
…using the Terminal of your choice. The output of a successful start should look like this:
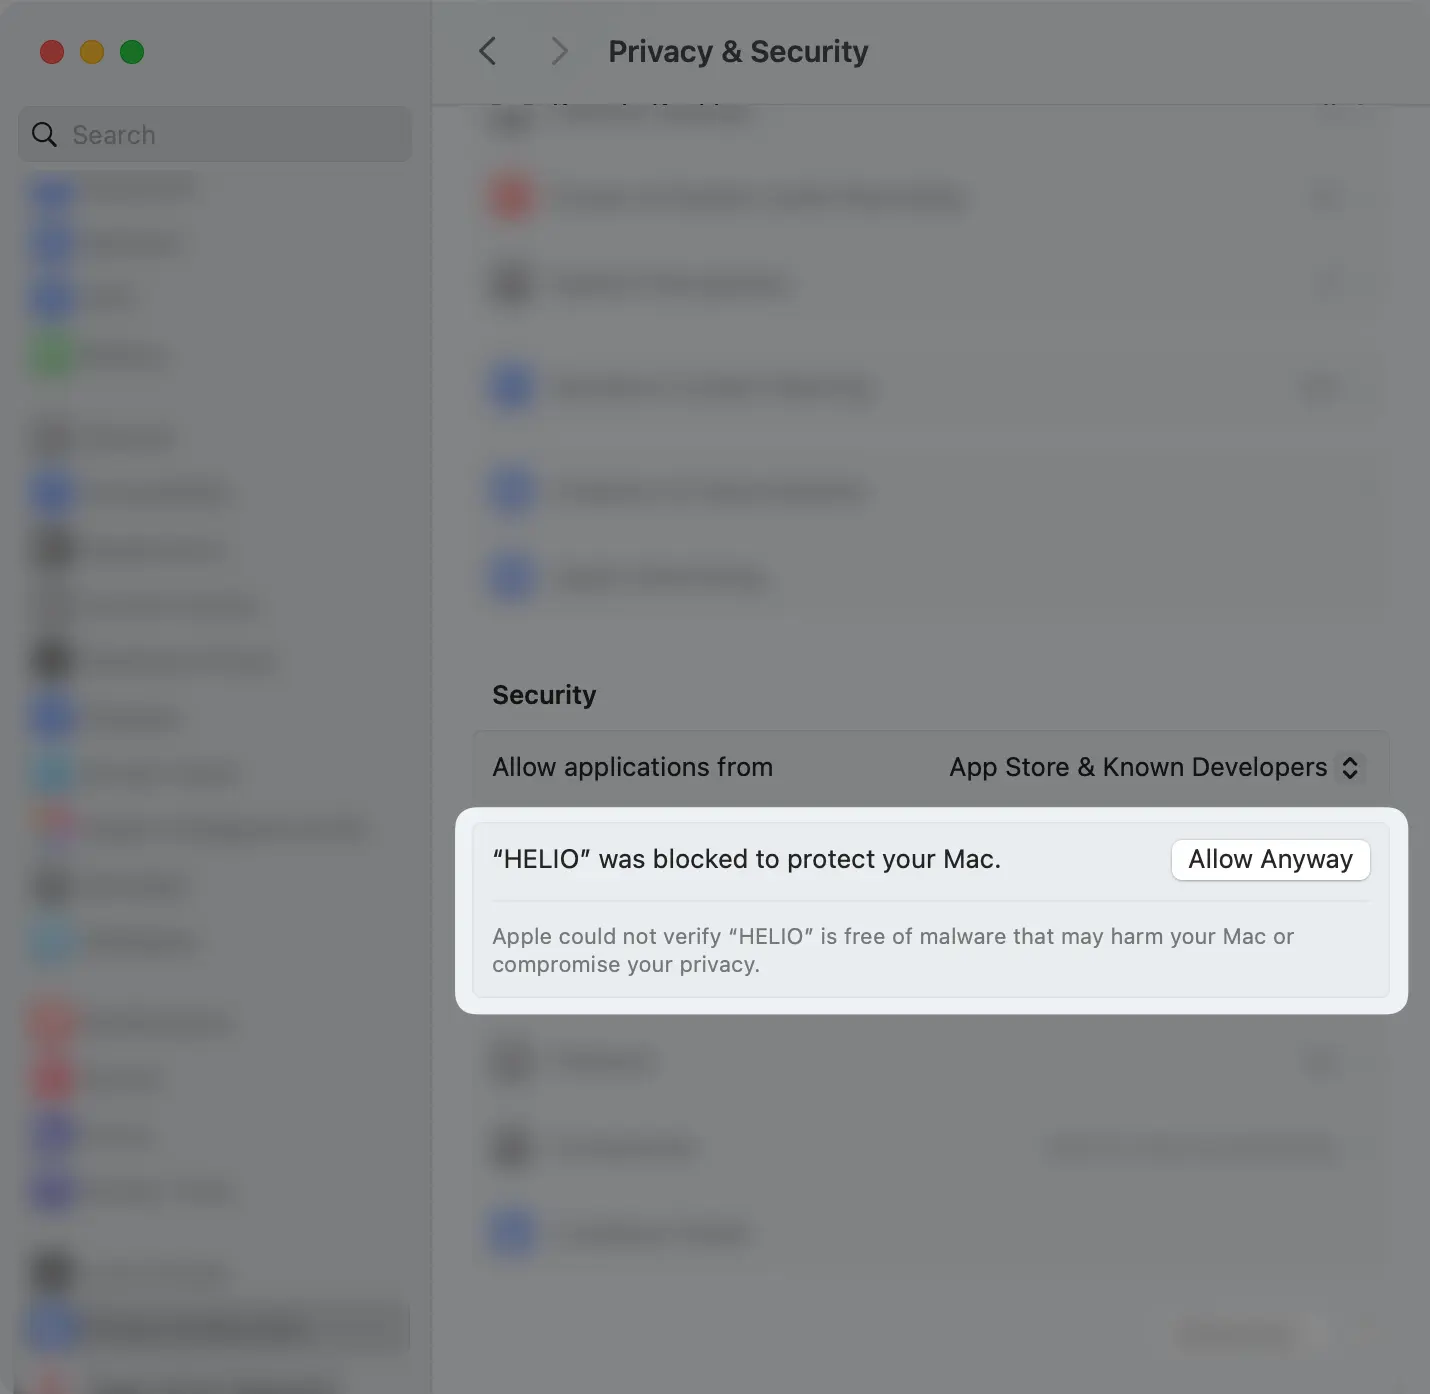
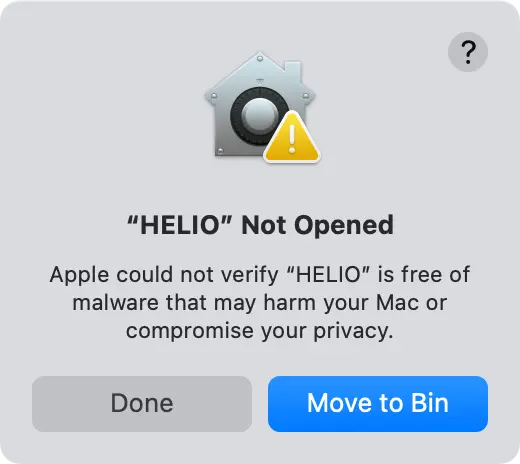
Problems starting HELIO on macOS?
When executing HELIO for the first time, macOS might warn you that HELIO cannot be started since the executable is not yet verified.
The HELIO executable for macOS has not yet been signed. This feature is on our roadmap, but it is a lower priority since the number of HELIO users on macOS is still limited.
Until this issue has been fully resolved:
- Make sure to choose
Done
- Open the
System Settings - Go to the
Privacy & Security - Scroll down to the page until you reach the section that tells you
that
"HELIO" was blocked. - Click on
Open Anywayto remove the warning
Need More Control?
Learn more about HELIO's Command Line Parameters.
- Open your browser
…and navigate to http://localhost:8512:
For a list of all the supported browsers see the Minimum System Requirements
- Provide Your License Key
If you start HELIO on a machine for the first time and haven't activated it yet, HELIO will ask you for a license. Paste in your license key and submit. Keep in Mind that a HELIO Trial License can only be activated on 5 Seats.
- Sign In Using the Default IDE User
Click the Sign In button in the upper right corner. Enter the default IDE user credentials that come pre-configured with each HELIO runtime:
| Username | eve |
|---|---|
| Password | eve |
Don't Forget!
- HELIO will be started automatically
When installing the HELIO app on your ctrlX OS device, the operating system will make sure to automatically start HELIO for you.
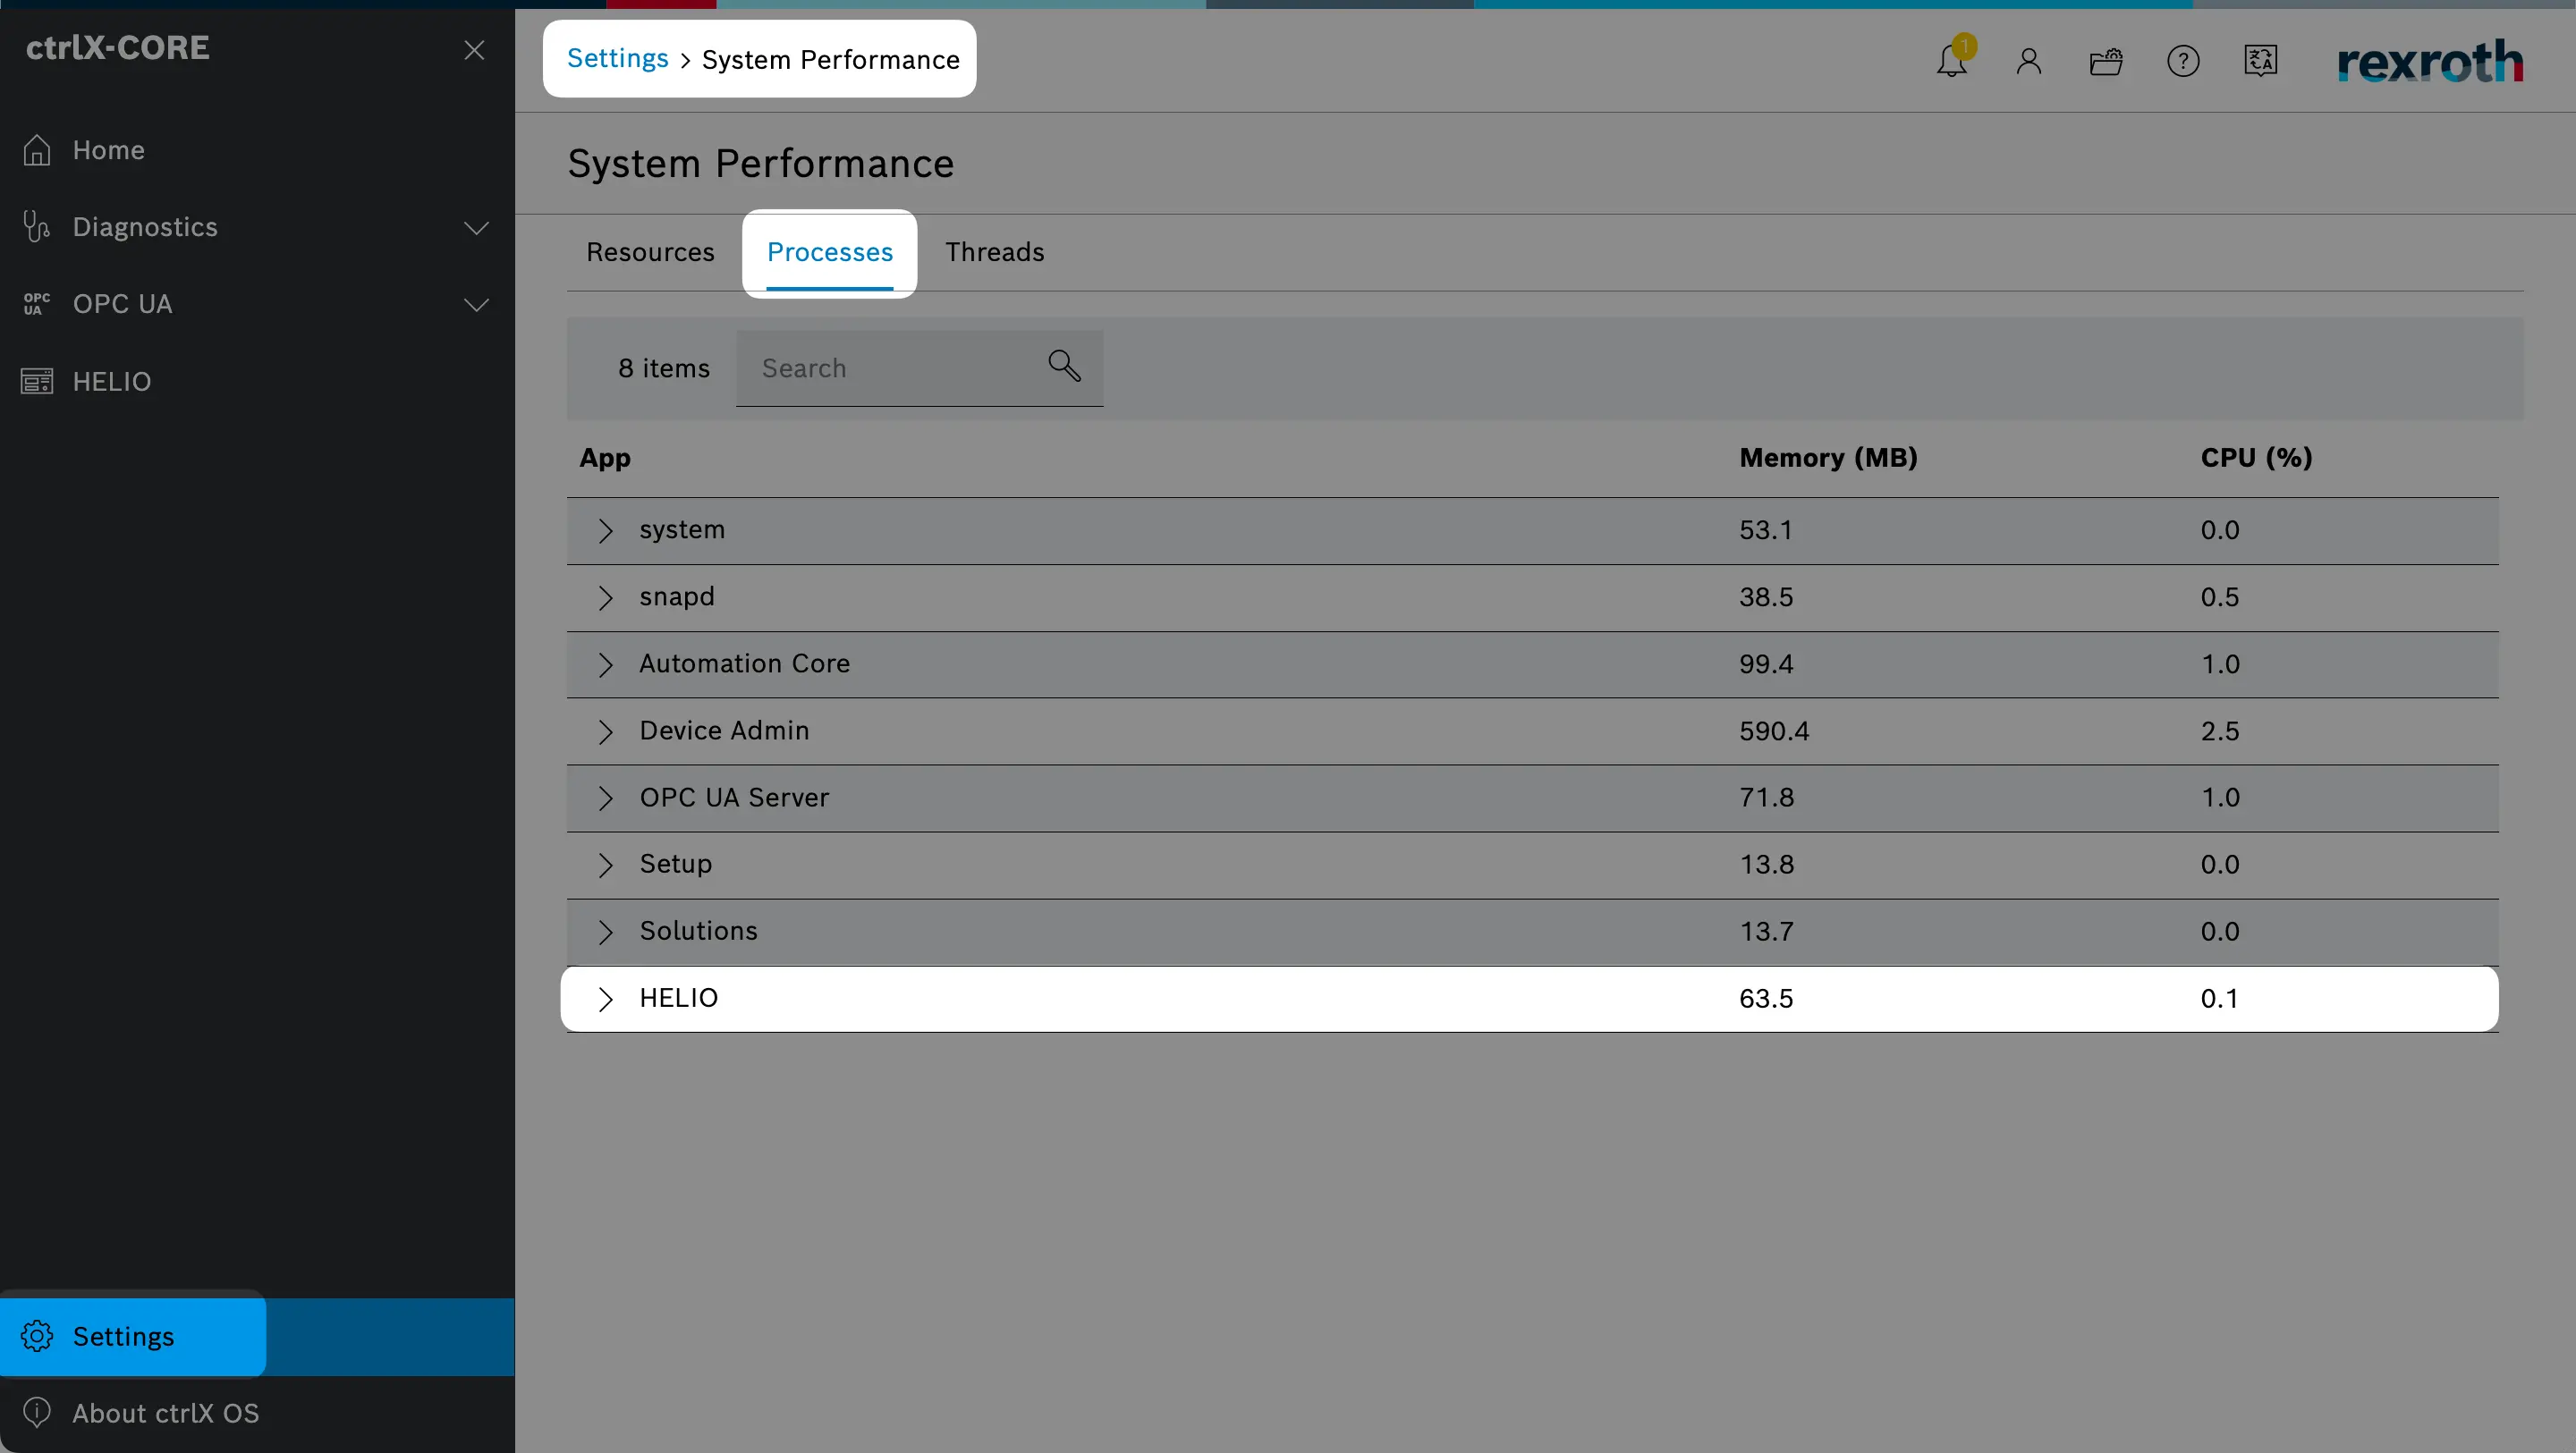
You can validate that HELIO is up an running by navigating to Settings > System Performance > Processes and making sure that there is an active
HELIO process in process list.
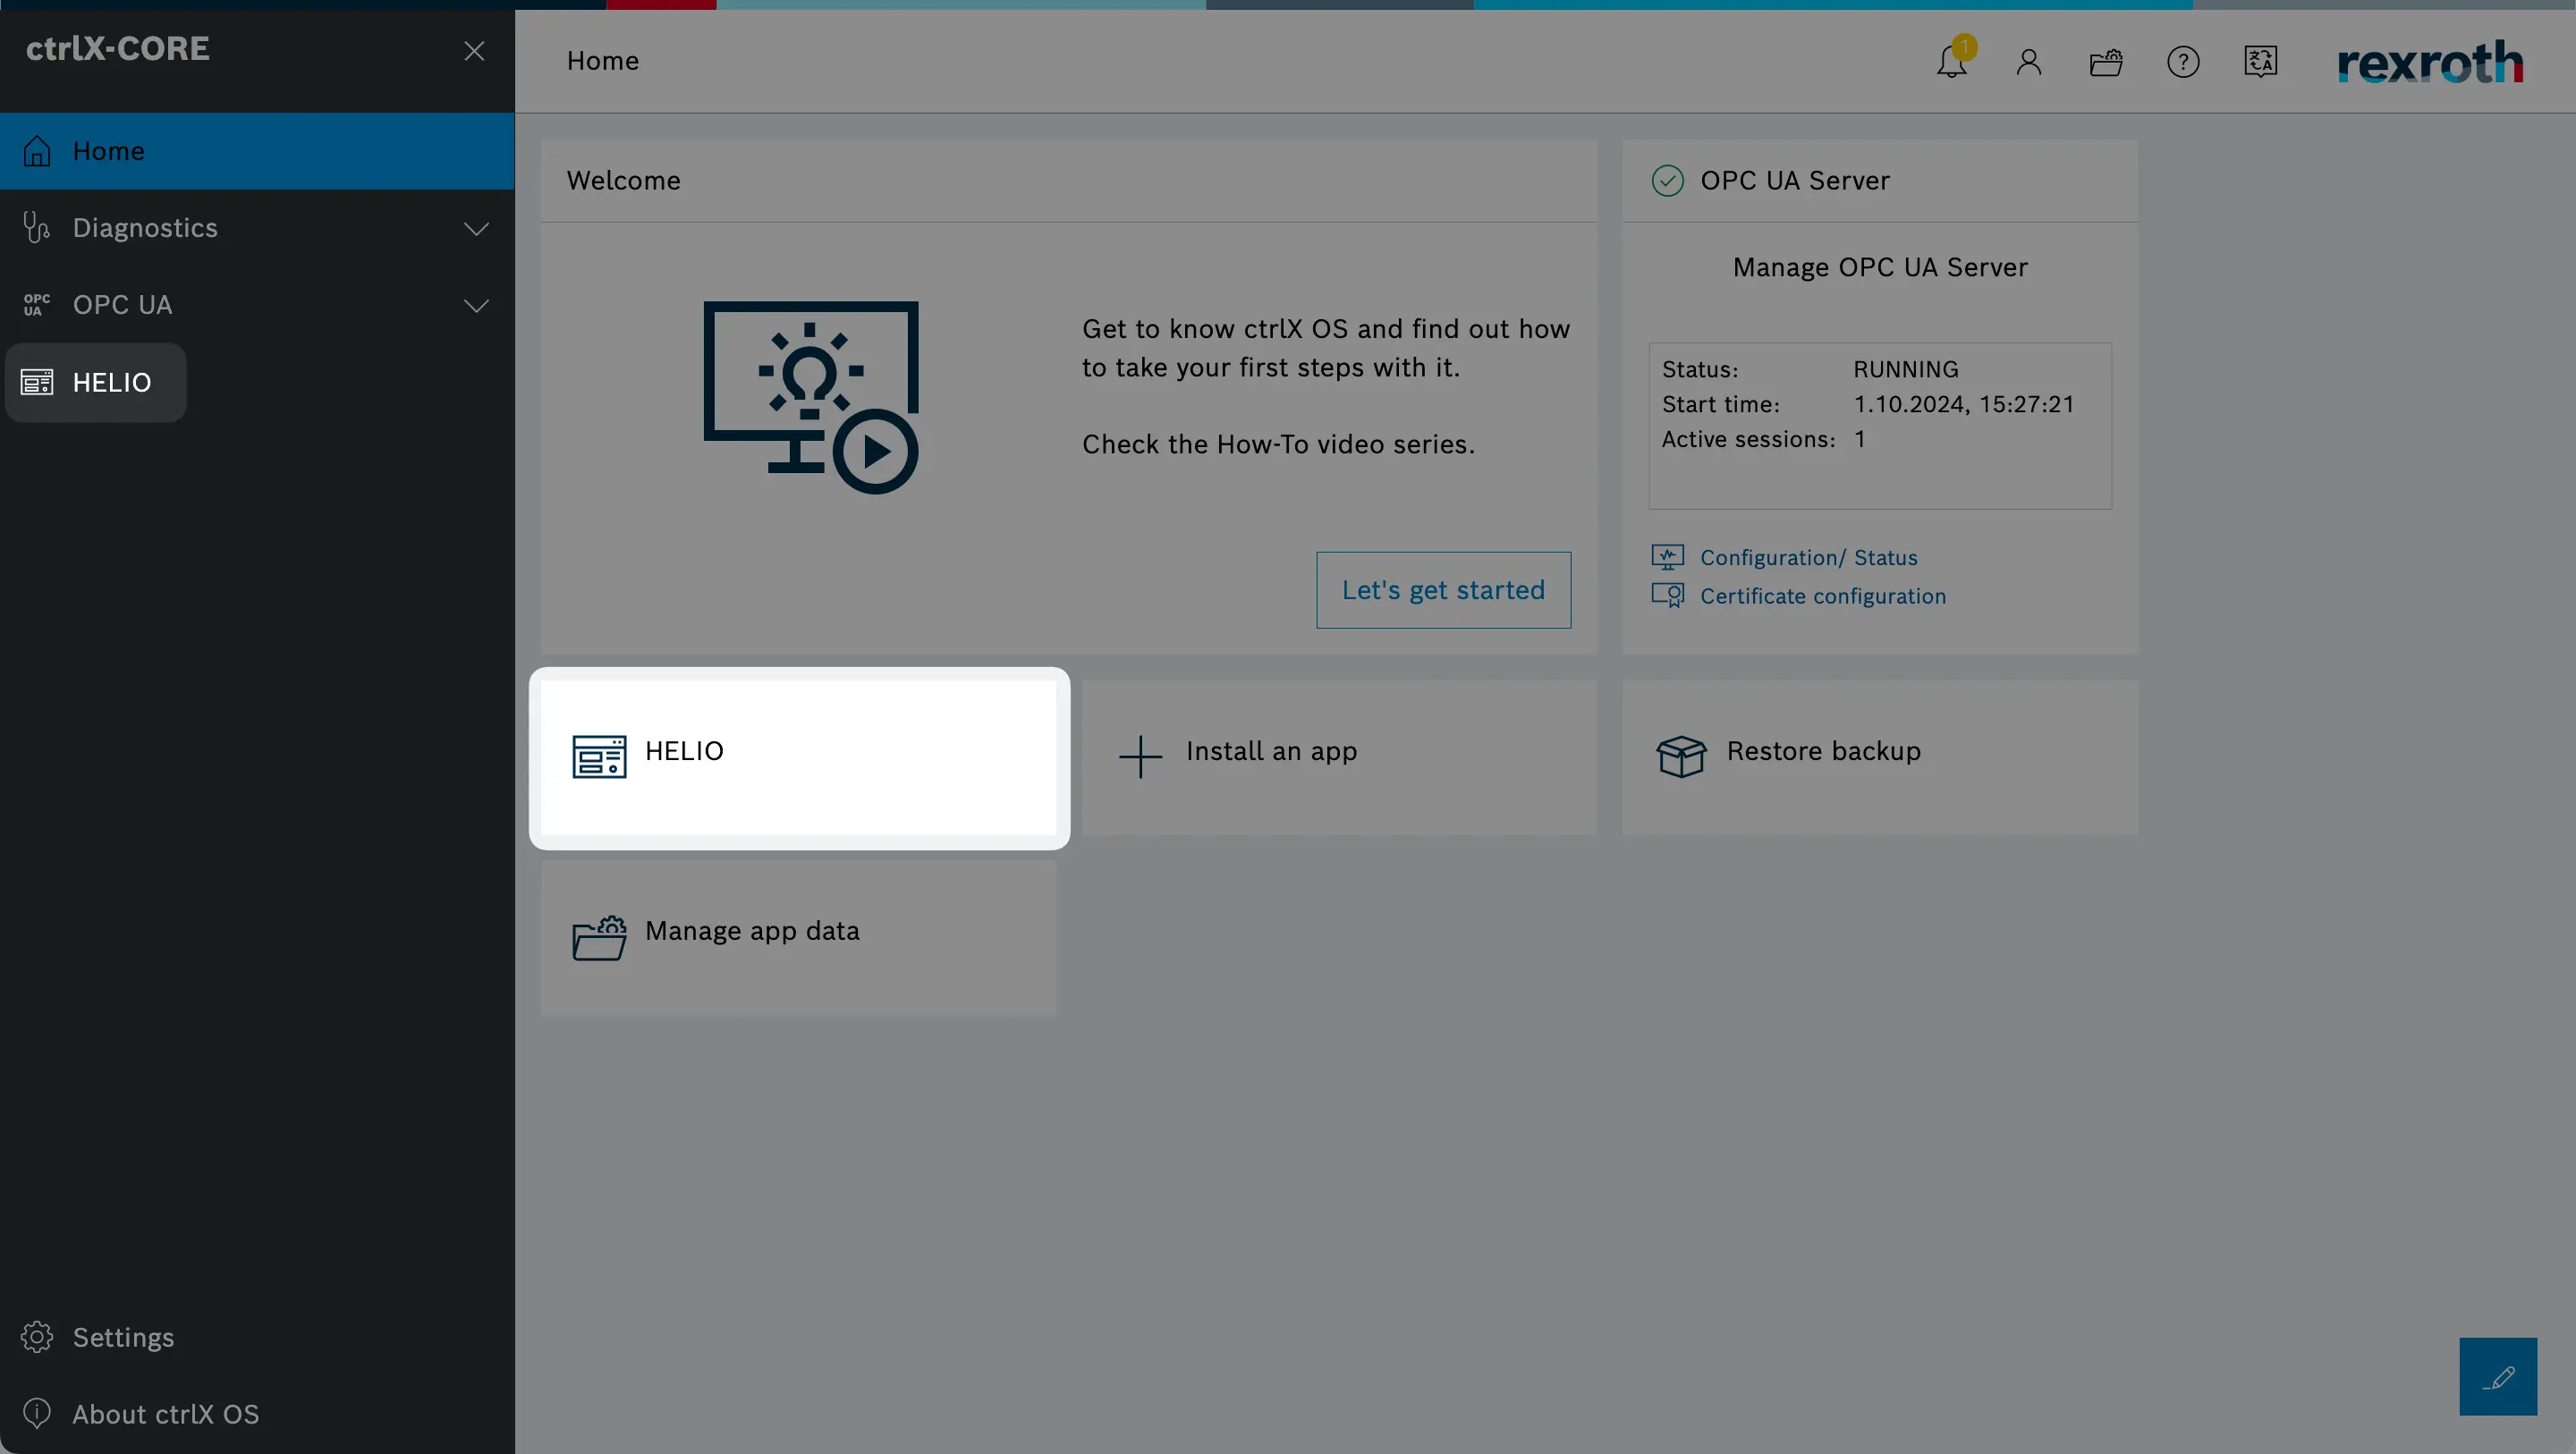
- Open HELIO IDE
Once the HELIO app is installed, a link to the HELIO IDE will be added to the main navigation.
- Sign In Using the Default IDE User
Click the Sign In button in the upper right corner. Enter the default IDE user credentials that come pre-configured with each HELIO runtime:
| Username | eve |
|---|---|
| Password | eve |
Don't Forget!
- HELIO will be started automatically
Once the HELIO app is installed, NOA will automatically start HELIO for you.
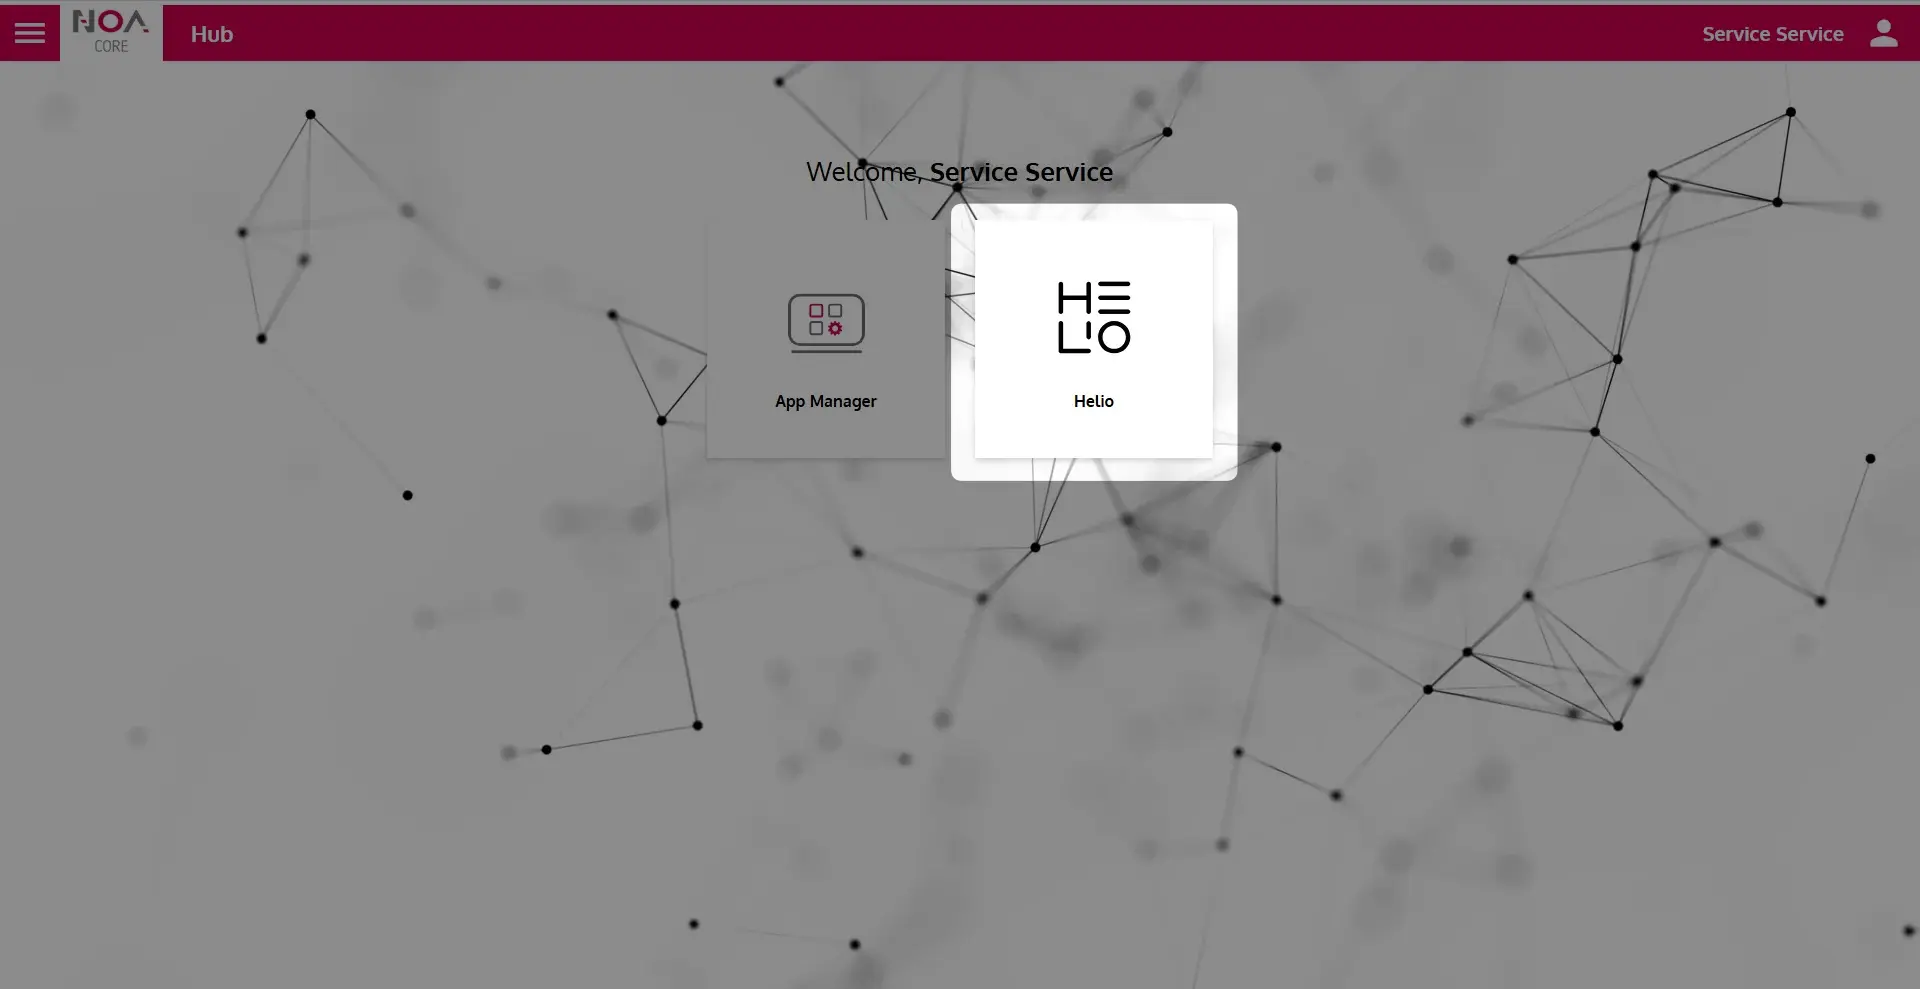
- Open the HELIO IDE
To open the HELIO IDE, click on the tile
on the welcome page of your NOA Hub.
- Provide Your License Key
If you start HELIO on a machine for the first time and haven't activated it yet, HELIO will ask you for a license. Paste in your license key and submit. Keep in Mind that a HELIO Trial License can only be activated on 5 Seats.
- Sign In Using the Default IDE User
Click the Sign In button in the upper right corner. Enter the default IDE user credentials that come pre-configured with each HELIO runtime:
| Username | eve |
|---|---|
| Password | eve |
