Trigger Messages Using Numeric Variables and Ranges
The easiest way to trigger a message in HELIO is to monitor a numeric variable and trigger a new message as soon as that variable moves out of a specific range.
1. Create a PLC Connection
Our first task is to create a PLC Connection connection and bring in some data variables that we can use to trigger our messages.
PLC Mode is Required!
Keep in mind that it is not possible to trigger messages using Placeholder Mode.
- Download & Start the
HELIO Playground PLC
Setting up a PLC that we can connect to sounds pretty complex, right?
The HELIO Playground PLC Has Got Your Back
It's a software-based demo PLC that you can download for free and run on your development computer right away. A handy tool when you want to learn how to connect HELIO to an industrial machine that communicates using OPC-UA.
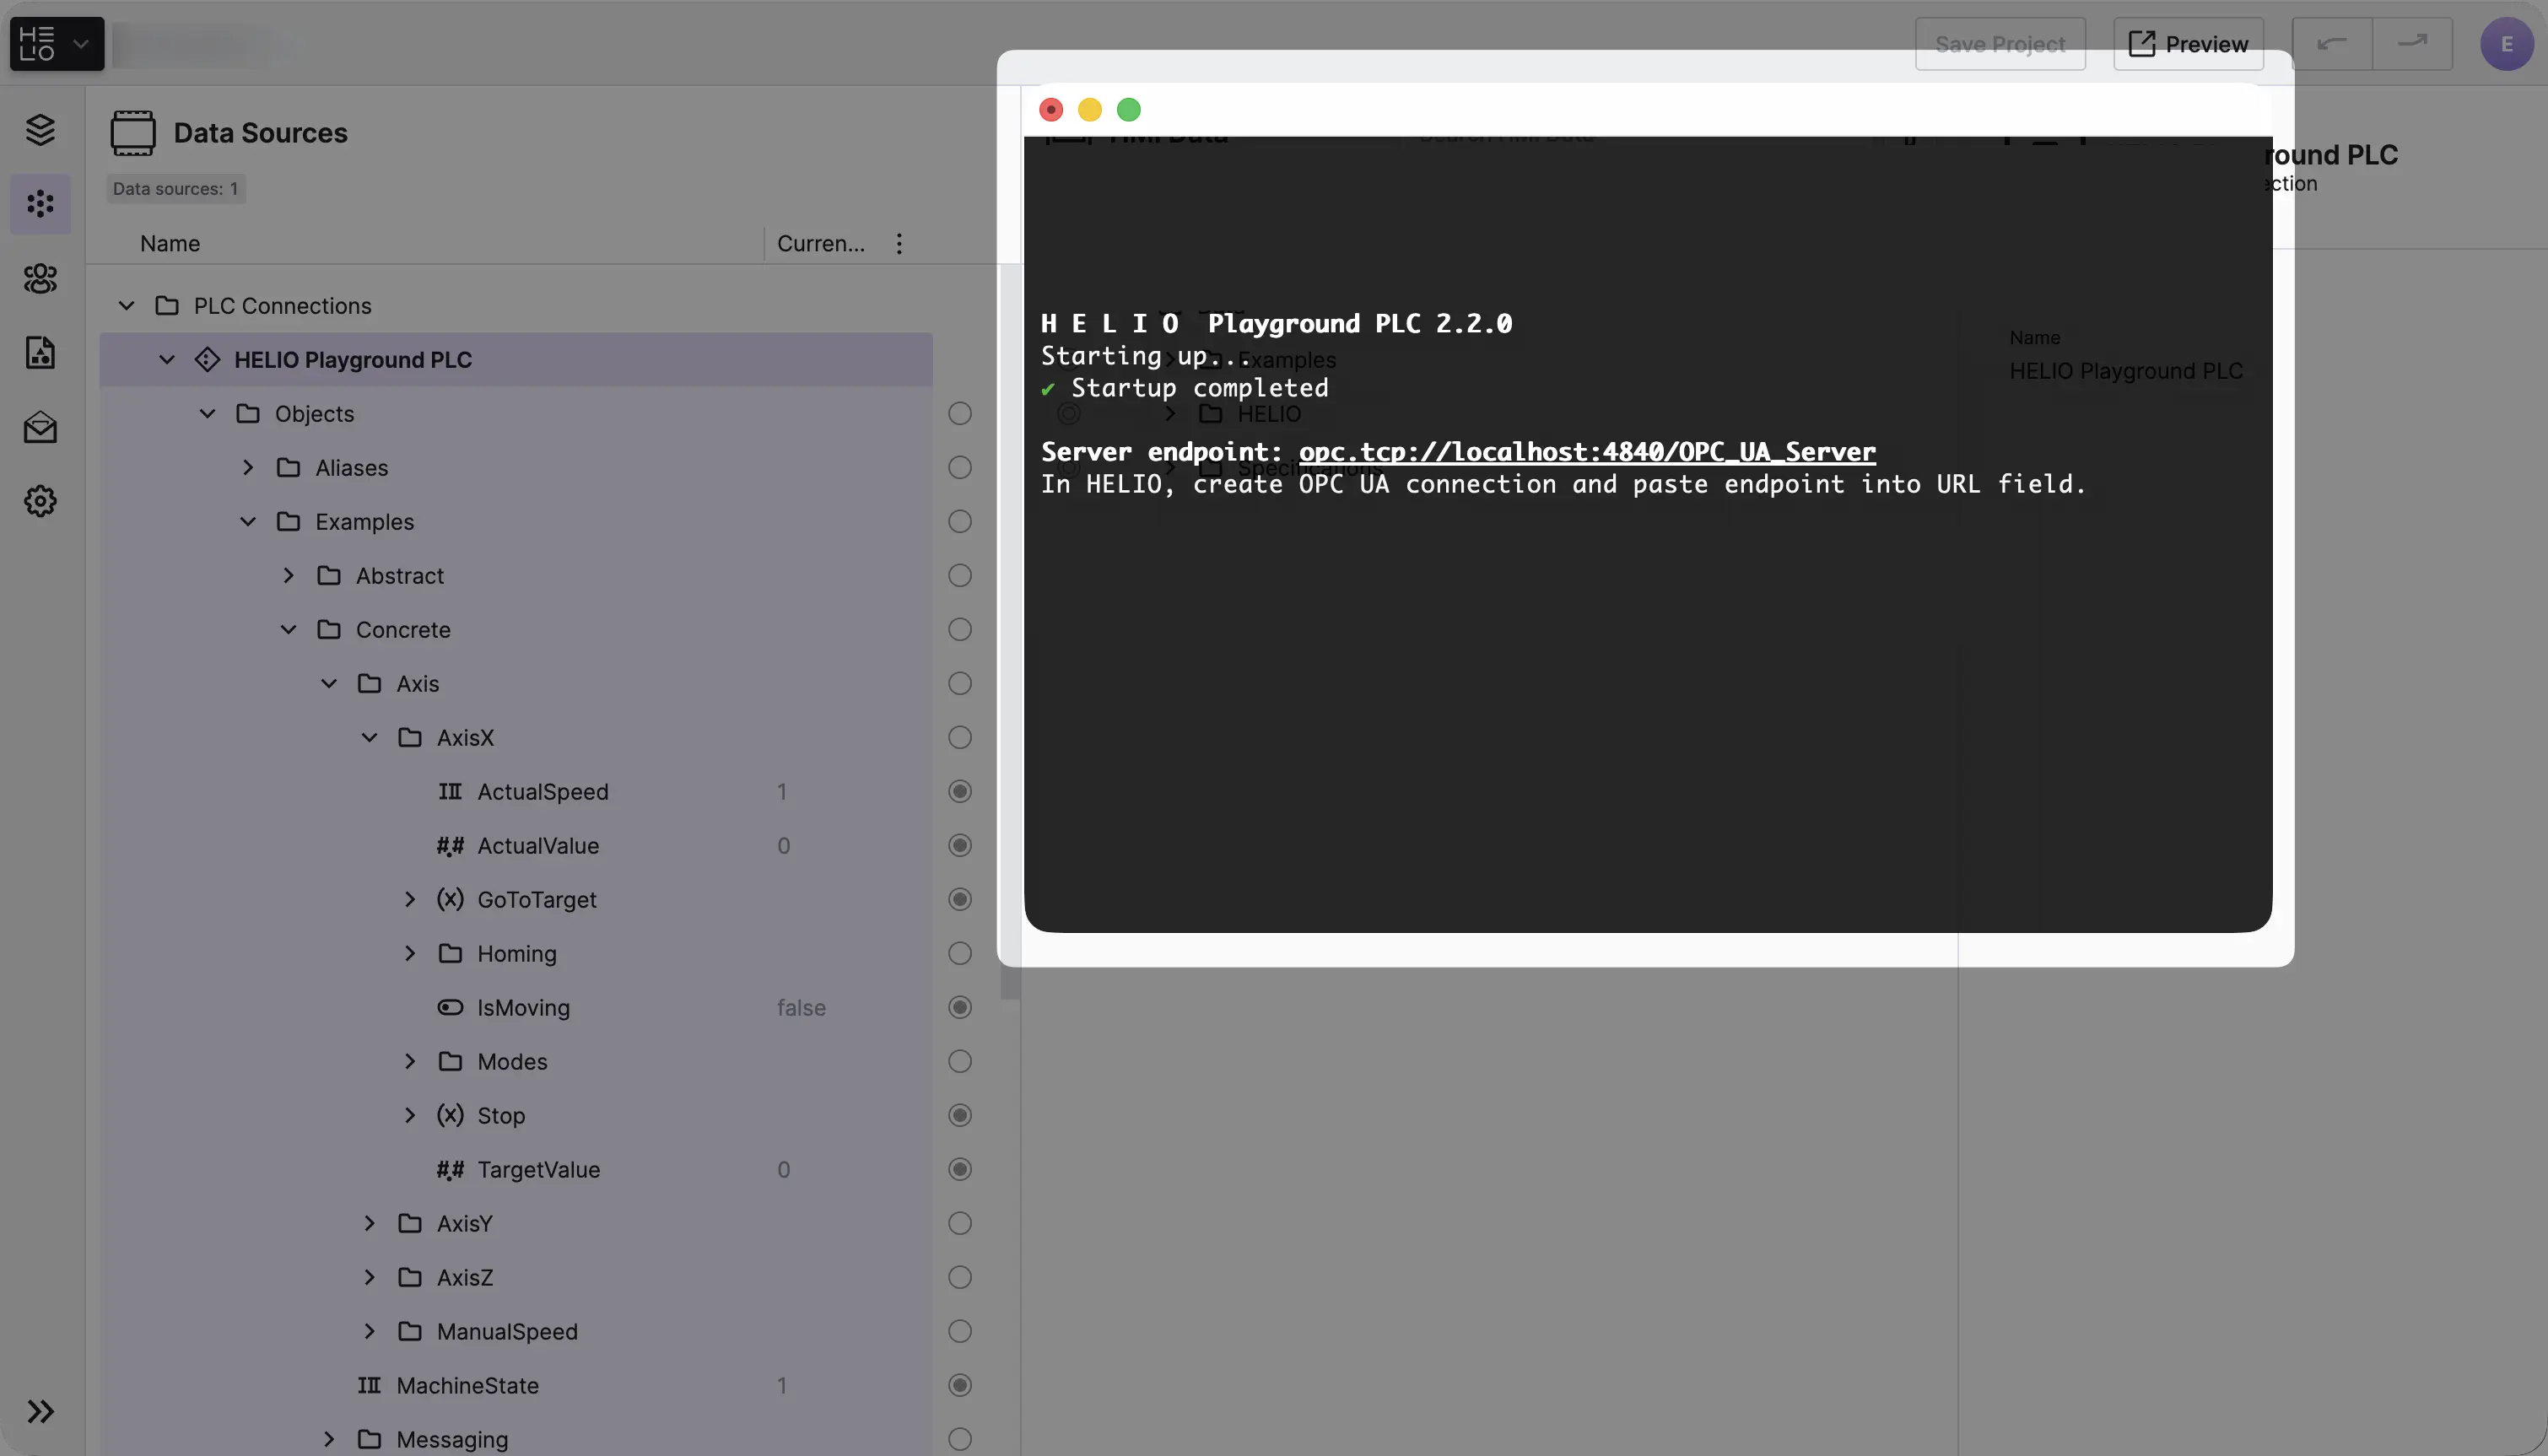
→ Download the latest version and start it.
- Add the Connection
Good job on getting the PLC set up and running. Let's keep going:
- If you haven't set up a new project just yet, now is a great time to Create a New Project.
- Open your new project in the Project Editor and switch to the Data View.
- In the
Data Source Explorer,
add a new OPC UA Connection,
rename it to
HELIO Playground PLC, and use the default settings.
The Right Name Is Important!
It is important to name the connection correctly and not to use the
default name, since the template — and thus all the variables it uses — was
created with HELIO Playground PLC as the connection name.
- Explore the Structure
Once you've got the connection all set up, feel free to take a look and explore the data tree of the HELIO Playground PLC.

2. Define The Variables
Next, we need a variable that we can monitor and trigger a Warn message
when it rises above a certain threshold.
Fortunately, the HELIO Playground PLC already has a set of Temperature variables
that we can use to do just that. Let's add them to our project.
- Locate the
TemperatureVariables
Locate the variable in the Data Source Explorer.
You should spot it under:
Examples/Concrete/Temperature.
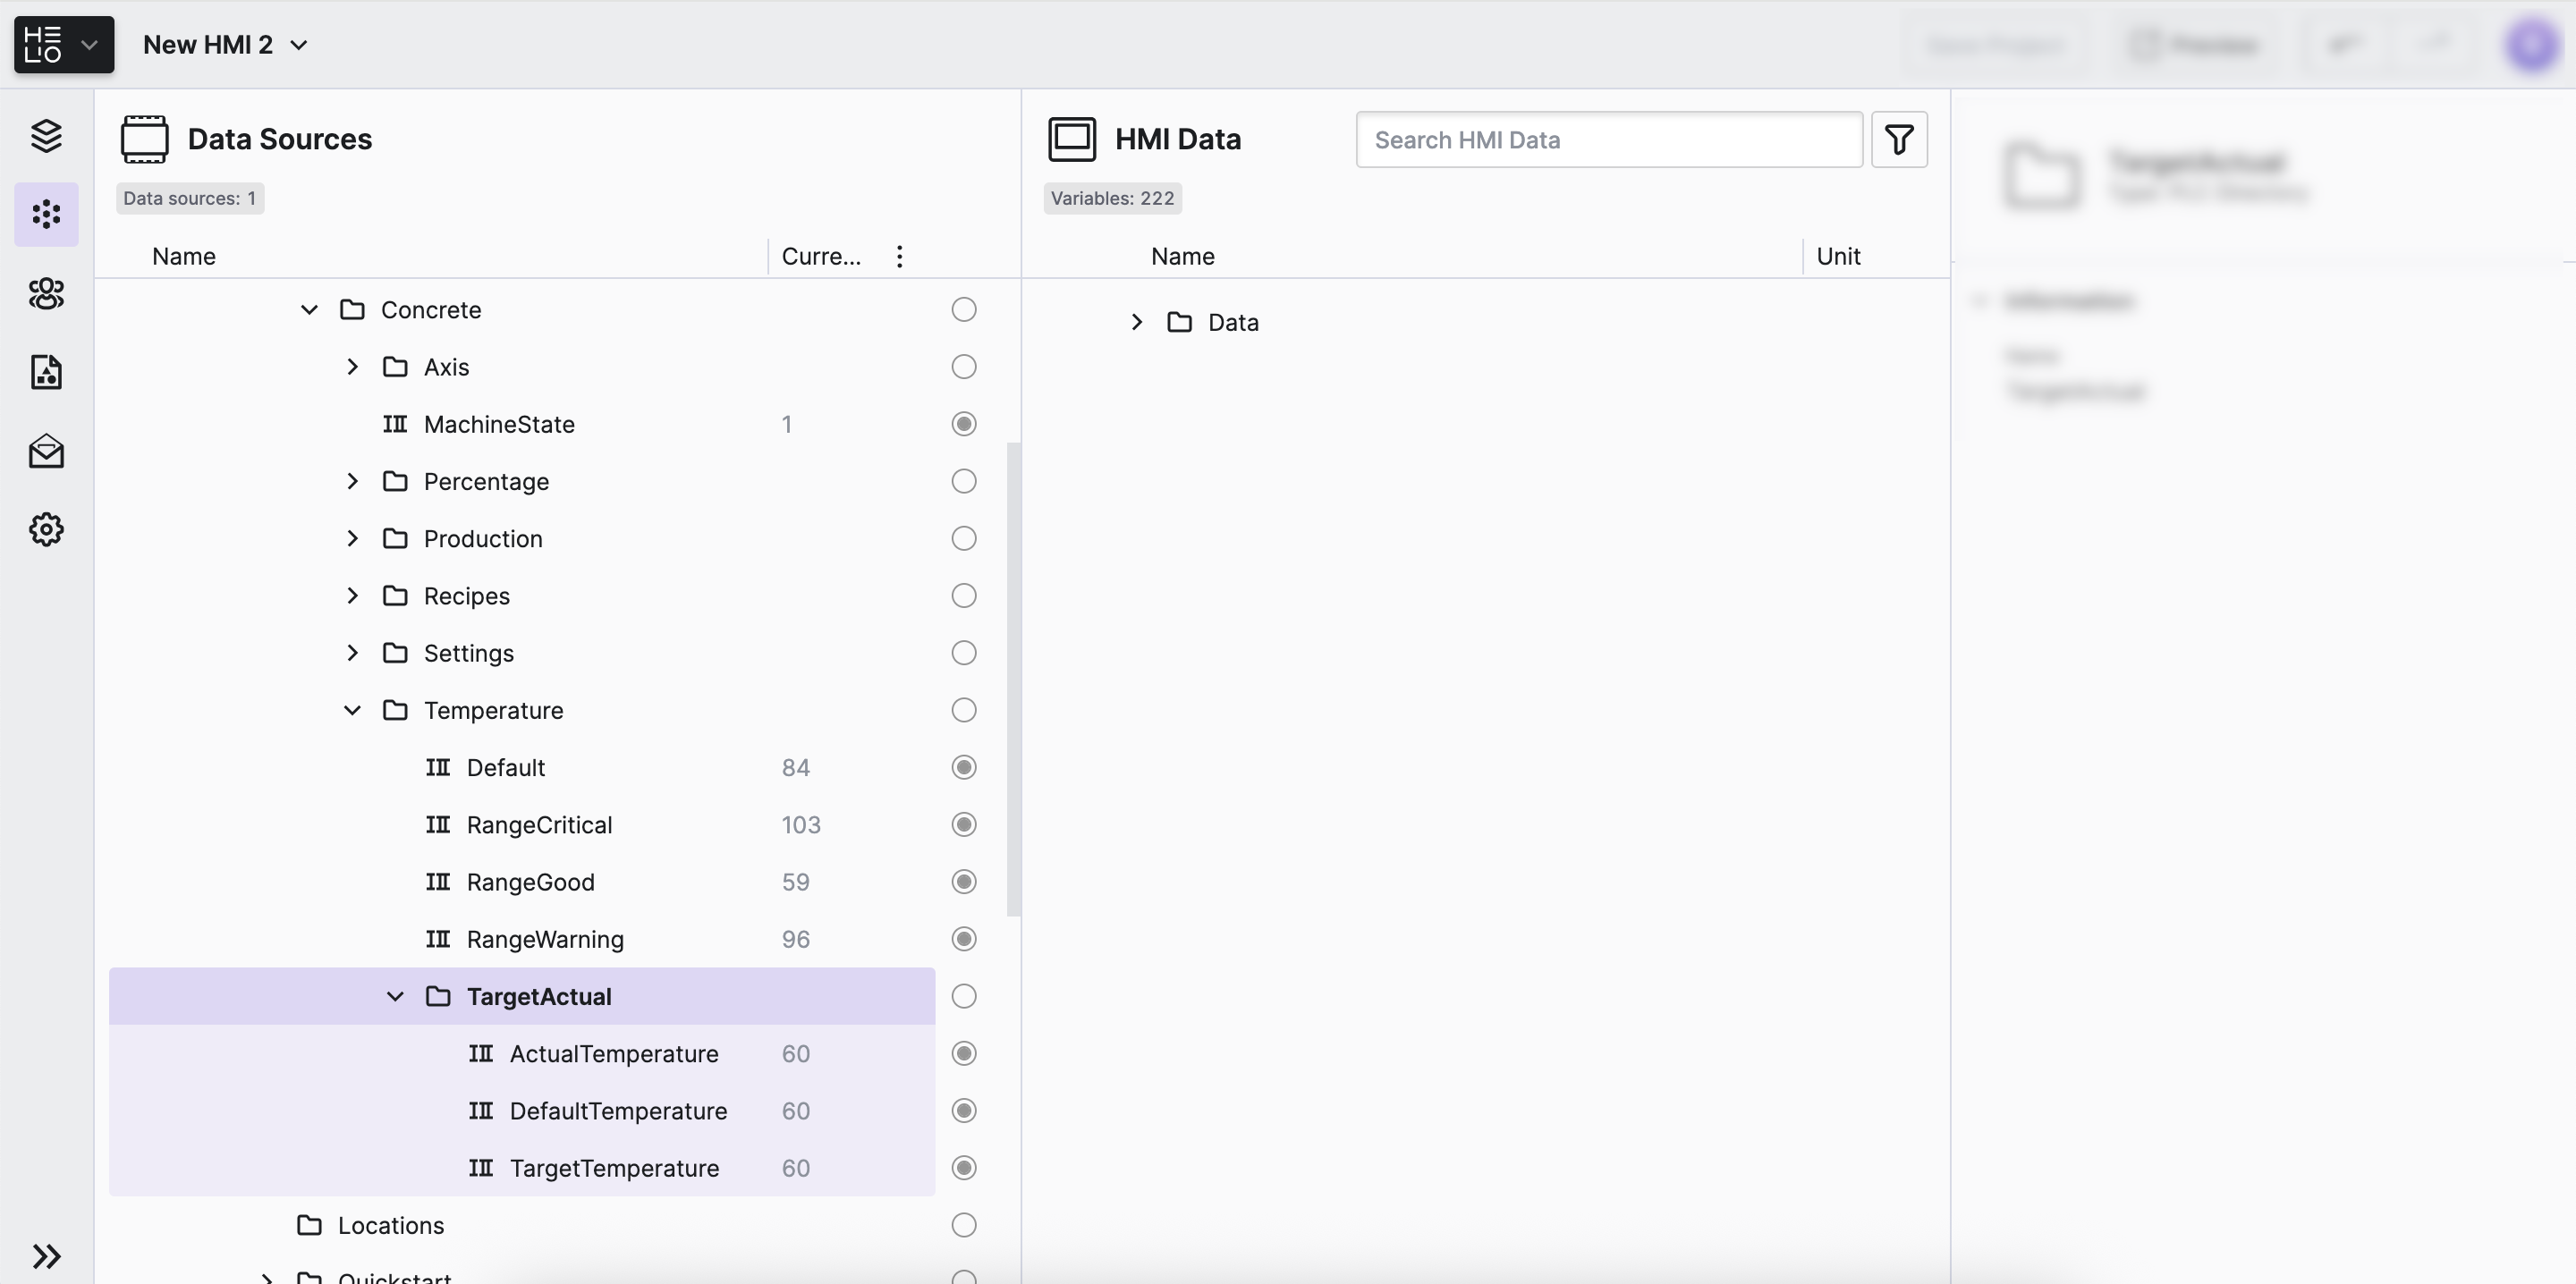
- Import the Variables
Let's bring the variables into our HMI Data so we can use them in our HMI.
Since the ActualTemperature is controlled by the TargetTemperature value,
let's just import the whole Temperature directory like this:

- Make
TargetTemperatureWritable
To be able to change the temperature we need to make sure that
we can actually write the TargetTemperature variable. So, go ahead and
loosen the
restrictions of the variables, so that we can read and write them.
Your HMI Data Explorer should look something like this:

3. Setup the Trigger
In the previous step, we've defined a Warn message with the code WARN-1.
Let's see if we can trigger it using our ActualTemperature variable.
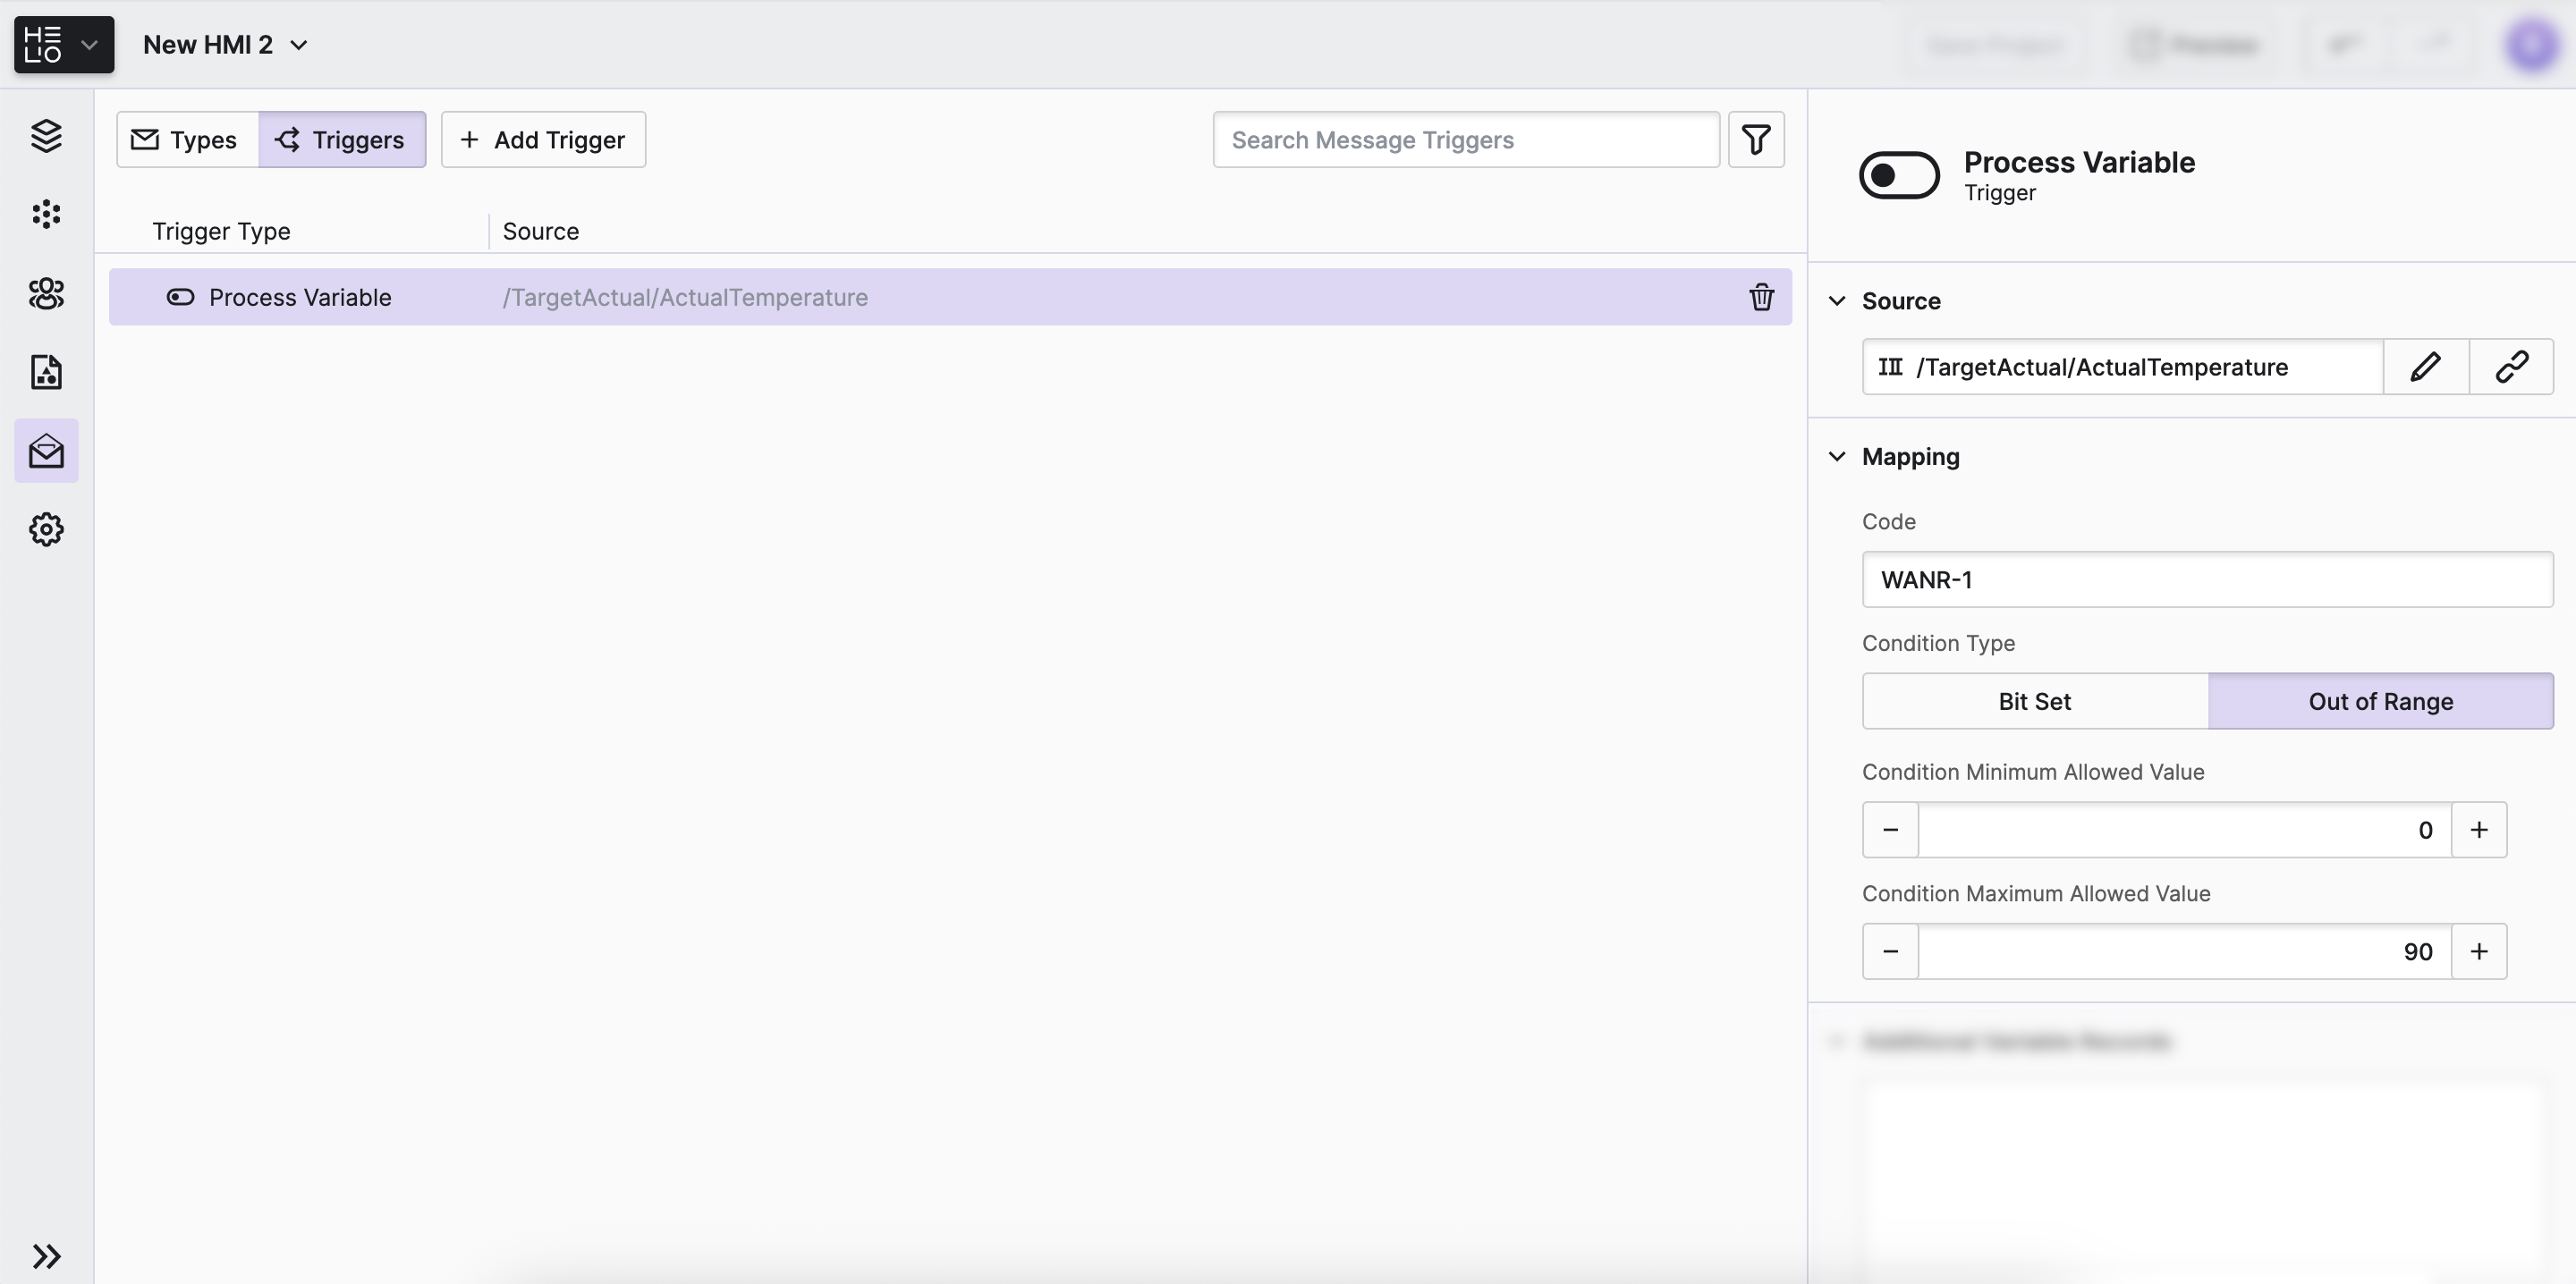
- Add Your First Trigger
Switch to the Message Triggers View, click
the Add Type action and choose Process Variable as a trigger type.
- Configure the Trigger
4. Create a Page to Trigger Messages
Things are really starting to get interesting since we're about to start sending messages to our HMI. All we need to do is create a simple page to test everything out. With HELIO, it couldn't be easier. So, let's do this!
- Add a
Parameter Page
First things first, we need to create a page. To keep it simple, we're just going to create a super simple Parameter Page.
So switch to the Content View and:
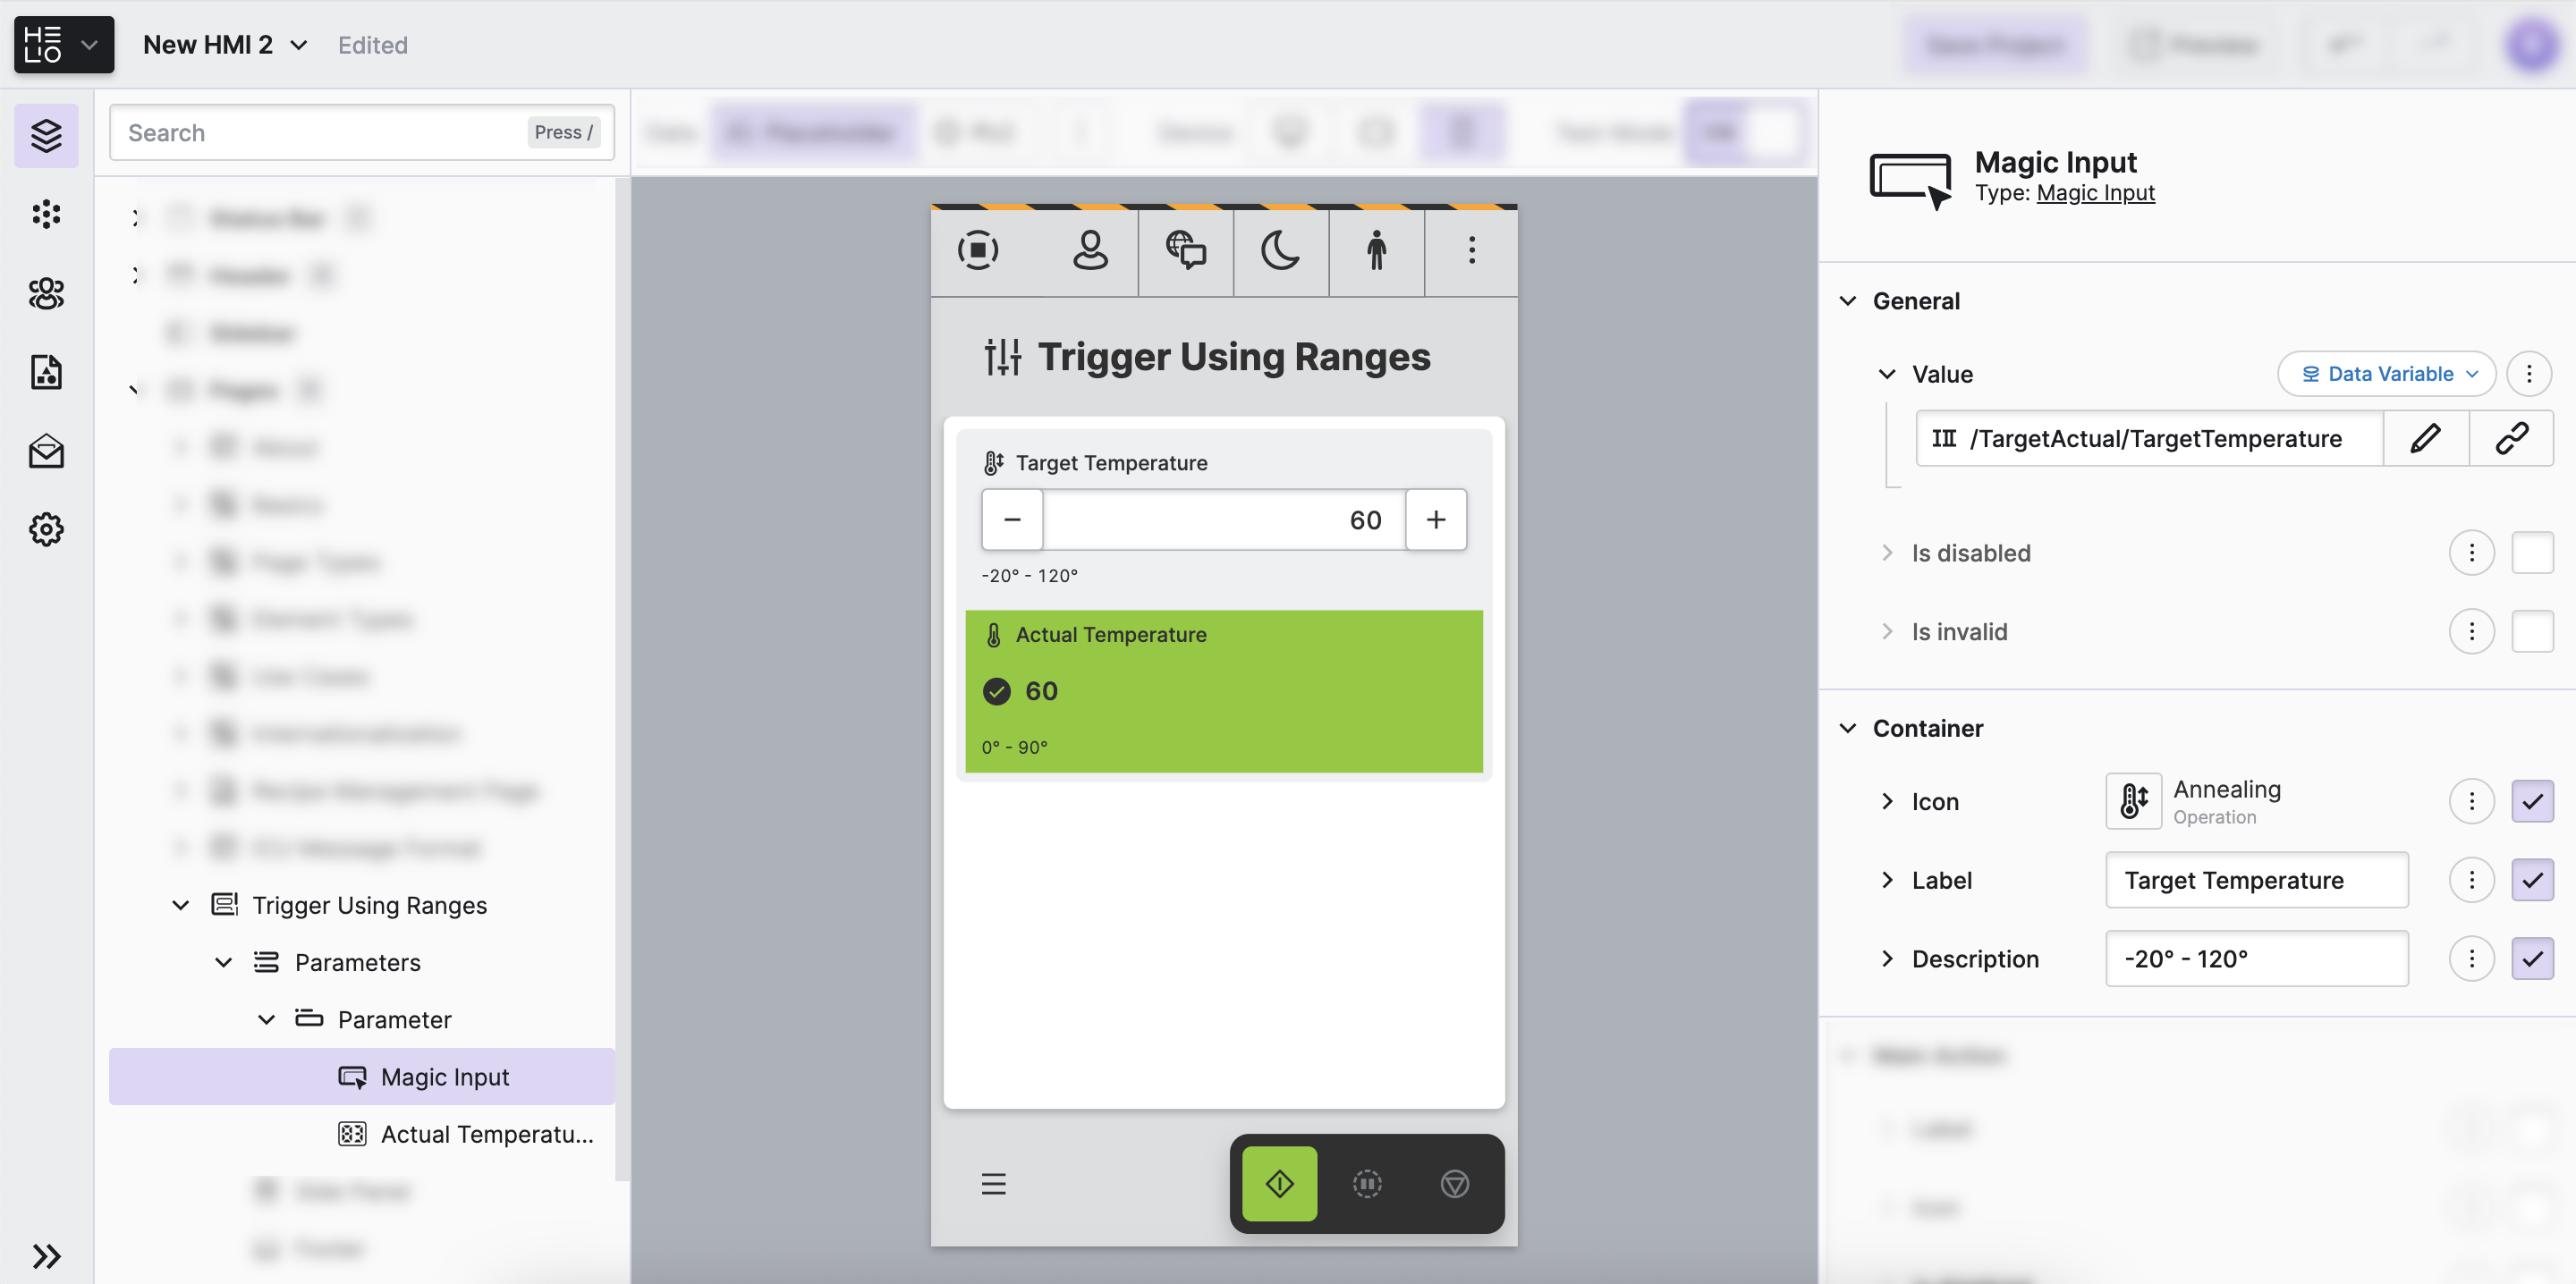
- Add a Parameter Page and give it title.
- Add a Little Magic to Adjust and Check the Temperature
Next, we need two elements so that we can actually adjust the
TargetTemperature and observe the ActualTemperature:
- Add a
Magic Input element and connect it to the
TargetTemperaturevariable. - Add a
Magic Output element and connect it to the
ActualTemperaturevariable.
5. Let's Trigger Some Messages
Let's Get Those Messages Fired Up!
- Switch to
PLC Modeto make sure you will be writing to the actual PLC. - Switch to
Test Modeso you can toggle the inputs. - Activate set the temperature to something above 90° and watch the
Warnmessage appear.
Your HMI should behave something like this:
You've triggered your first message using an actual PLC.
Ready to learn how to display all active and archived messages? Check out the next step of the guide…