4. Set up a Collection Page
Now that you've learned how to set up any parameter page you need, let's add some more pages to our HMI. In this step we will be adding a CollectionPage to display a list of tools.
4.1 Create a »Tools« Page
- Add a new page
If you've been following along, you probably know how to add another page already.
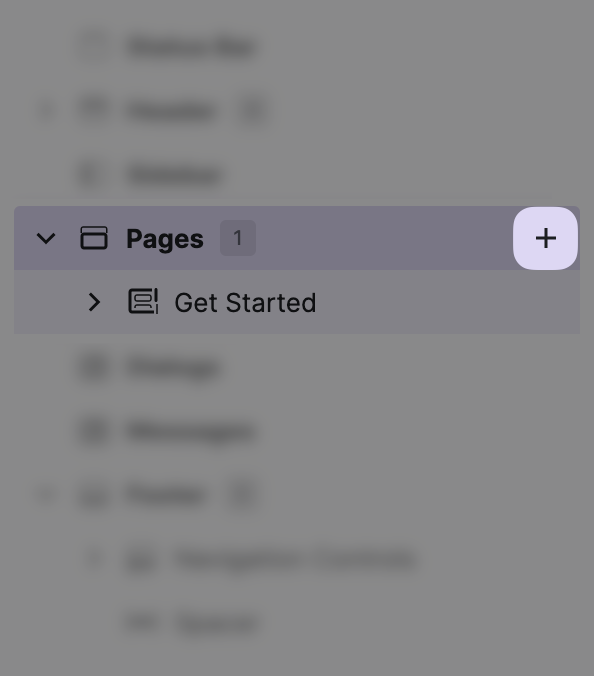
Navigate to the pages section in your
HMI Content Tree, and click the
+ button to bring up the Add Element dialog.
- Choose a page type
Choose Collection Page from this list to add a new page to your HMI.
- Rename the page
Within this Collection Page we want to display a list of our tools, so
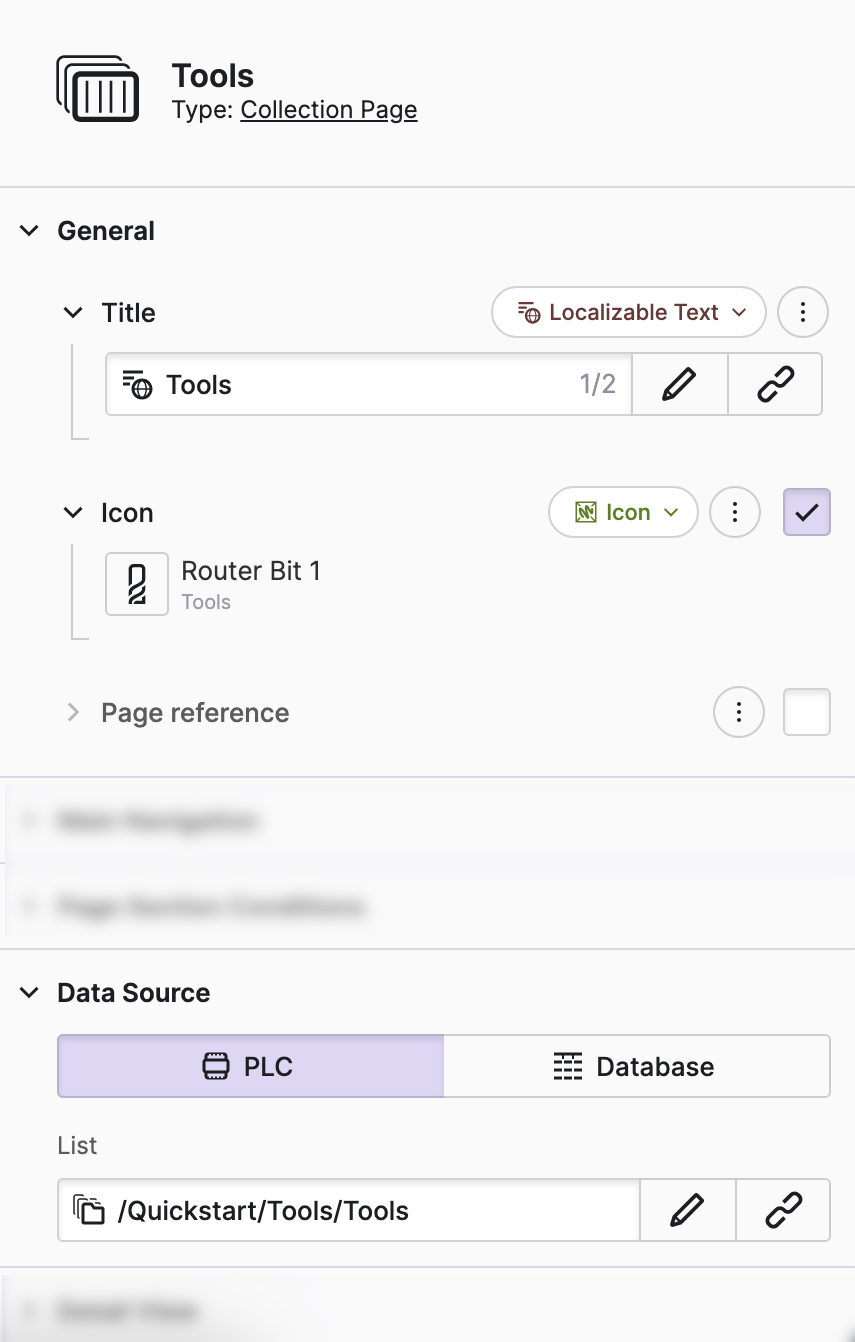
let's change its title to "Tools".
- Adjust the page icon
The pages has an icon by default which already works. But let's be a little more specific and use an icon of a tool instead, for example the the "Router Bit 1" icon. This way, our operators will later be able to identify the tools page at the first glance!
4.2 Connect Your List
At the moment our new page still looks pretty empty, so we should probably fill
it in. If you take a look at the Data Source group in the
Properties Panel, you'll see that HELIO is actually
highlighting what this page is missing by coloring the List property in
orange.
- Connect a list
Click the Choose Data Record button of the List property and select the
Quickstart > Tools list from the dialog, then confirm.
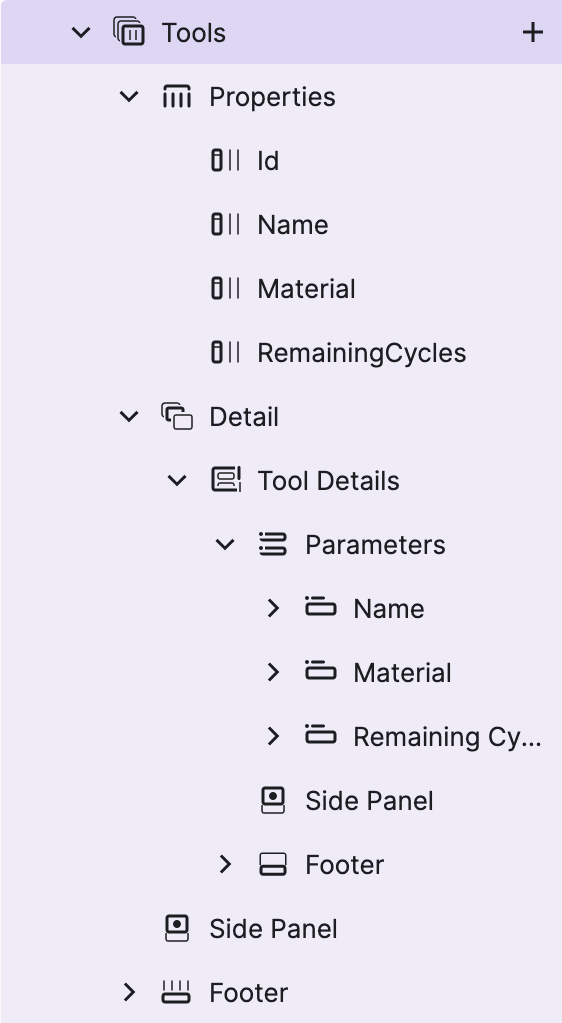
HELIO displays a table of tools with data based on the Item Blueprint
of the "Tools" list. The blueprint contains four properties: an
id, a name, a material and the remaining cycles.
HELIO uses this meta data to create four columns in our "Tools" table and sets the titles according to the names of the blueprint's properties. You can edit this table any way you like, we'll get to that in a second.
4.3 Adjust the Properties
Expand the new page in the
HMI Content Tree. You'll discover that a Collection Page
has three slots: Properties, Detail and a Footer.
For now, we'll focus on the Properties slot that lets us customize the columns
that will be displayed in the tools table of the page.
- Move the
Nameproperty to the left
Our operators are going to identify the tools by their names, so let's
display the Name property as the first column and make it stand out
visually.
Within the content tree, drag the Name property to the top of the
Properties slot. HELIO will change the table layout straight away so
the "Name" column should now be the first one.

- Make the property stand out visually
Since we want this property to stand out visually let's change the width
of this column. Navigate to the Column Width section in the
Properties Panel and
set the width to relative and its weight to 3. Now the "Tool Name"
column should be wider than the others!
To make this column stand out even more, let's check the
Emphasize value checkbox within the Appearance section in the
Properties Panel.
Note: You can also remove Properties or add new ones!
Visit Collection Page to learn more.
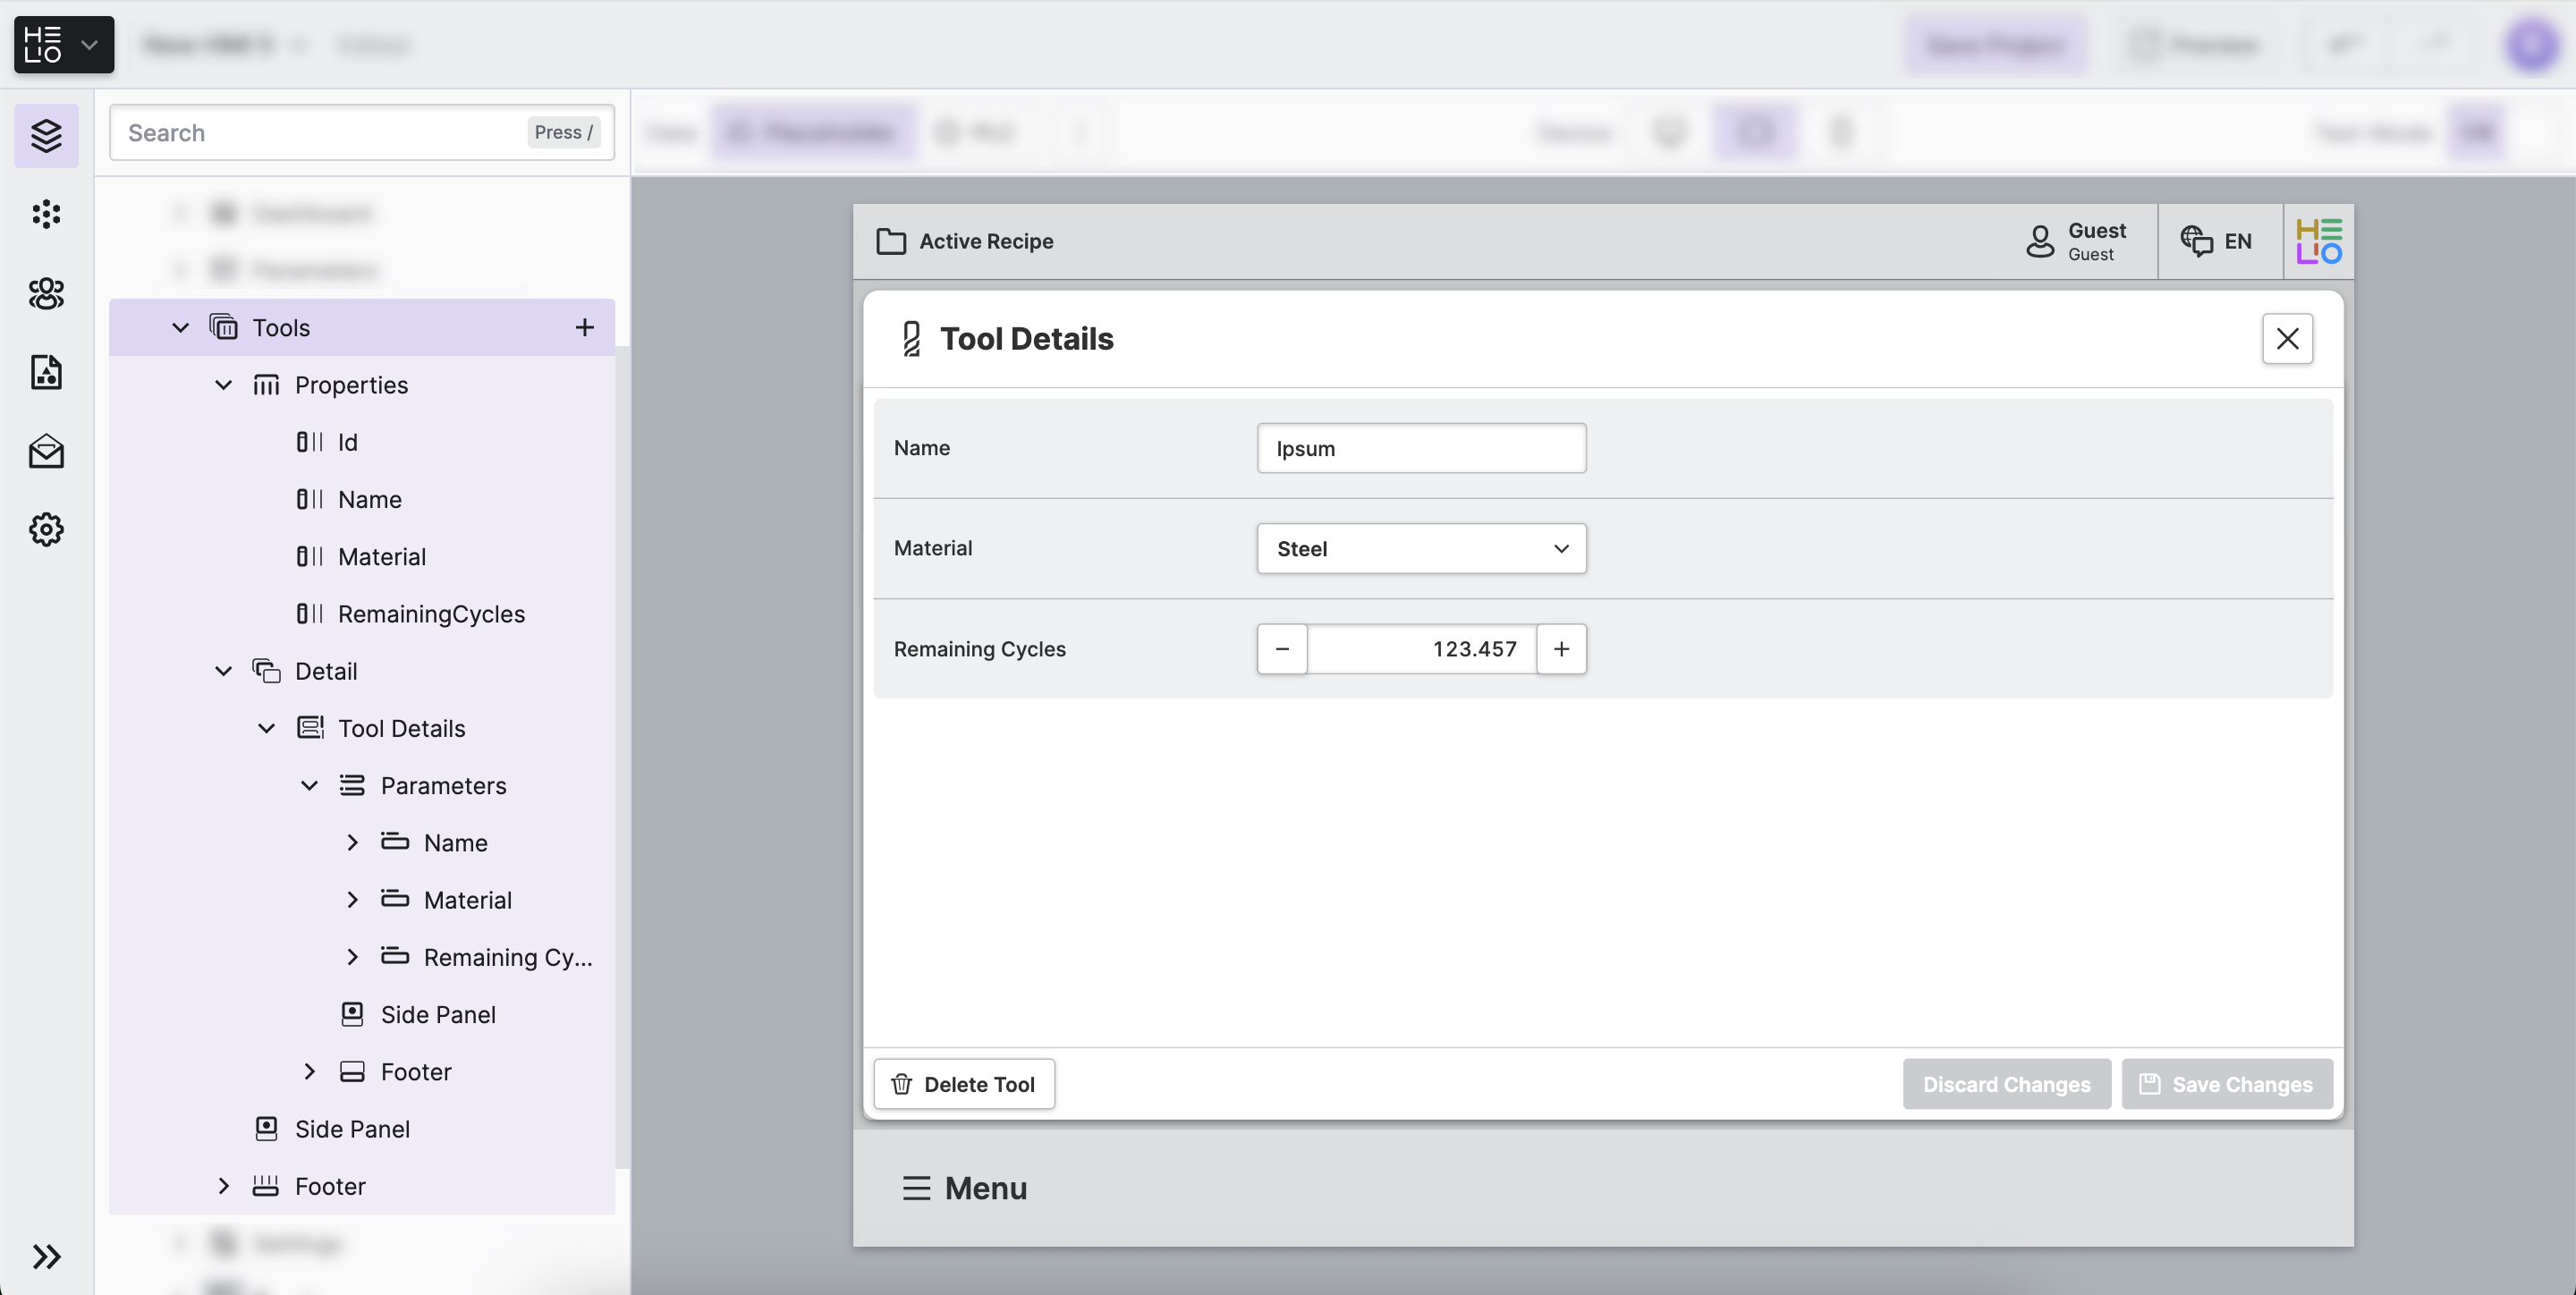
4.4 Add a Detail View
You can add a Detail view to your Collection Page to show or edit the details of the
tool you've selected. HELIO provides all the properties of the selected entry to
the elements on that detail view using
the Data Variable (Dynamic Property). In our use case we'll choose a
simple
Parameter Page and a few inputs to to let operators
edit the Remaining cycles of each tool.
- Add a
Detailview
Navigate to the Detail section of our collection page and click the
+ button next to it. Since our operators will need to edit and save some
values, let's pick the element Parameter Page with Manual Saving. This
is a preset of a parameter page, which already has a Reset and a Save
button integrated in the footer, so its exactly what we need! Let's rename
the page to "Tool Page".
- Challenge
Fill theDetailview
Challenge Steps
- Our detail page is empty right now, so let's see if you still remember how to set up a parameter page to change that.
- Our operators will need to know which tool they are editing. So, add a
Parameter With Icon, choose a fitting name and icon for it and add two outputs to this parameter. One should display thenameand one theid. Both should have fitting labels. - We will need another parameter to be able to edit the tools's "Remaining cycles". So, add another parameter, give it a name and add a way to edit the "Remaining cycles" data variable.
Your content tree should look now like this:
Tip: Need some help with this challenge? Go back to 3. Set Up a Parameter Page.
Check Your Result
Time to validate your result against these screenshots. Make sure that you have included all the necessary elements in your HMI. 👉

Looks good? Then you're ready to move on to the next step!