2. Create Your First Page
Now that you have created your first HELIO project, you should have your project opened in the Project Editor. In this part of our guide, we will start adding content to our HMI. Specifically, we will cover two of the most important content types: Pages and Elements.
2.1 Add a Dashboard Page
Let's dive in and create a first page! In HELIO, every page is special and serves a unique purpose. To kick things off, we'll make a Dashboard Page, which is a helpful page type often used as a home page to your HMI.
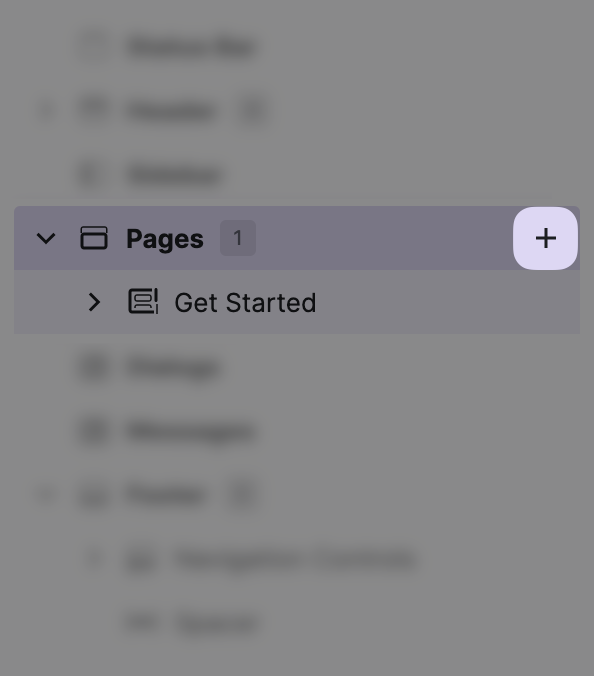
- Add a new page
Navigate to the pages section in your
HMI Content Tree, and click the
+ button to bring up the Add Element dialog.
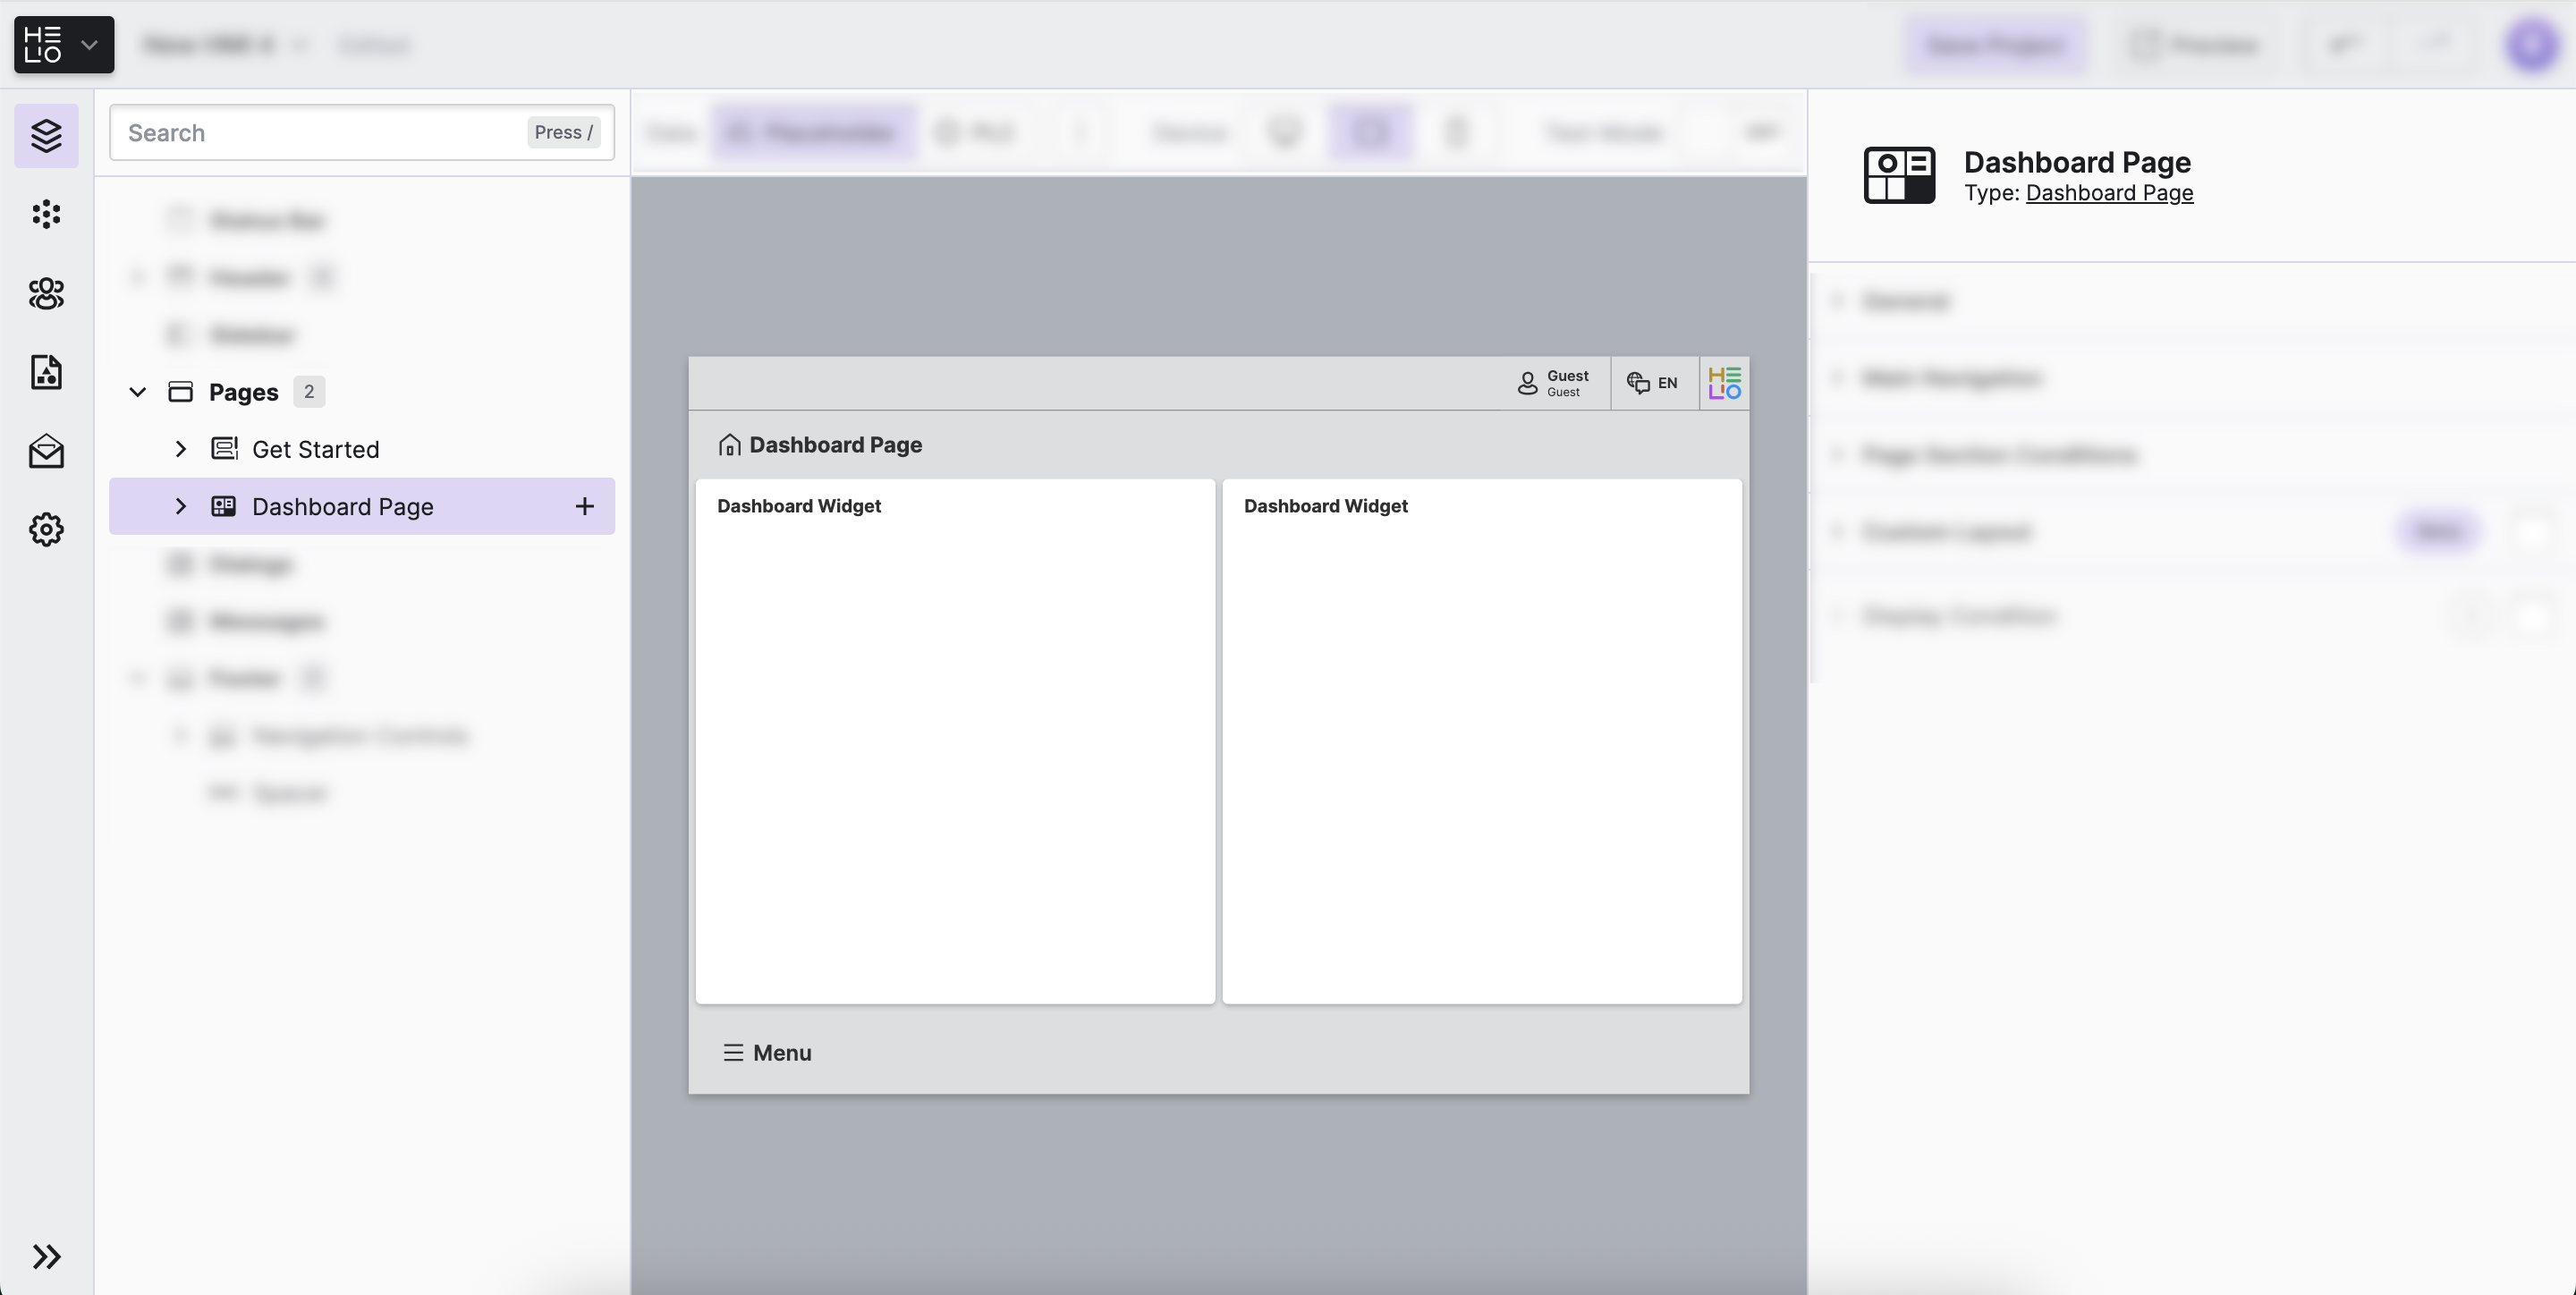
- Choose page type
Choose Dashboard Page from this list to add a new page to your HMI.
Did you know? New pages will be added automatically to the navigation of your HMI.
2.2 Configure Your First Widget: OEE
Your new dashboard appears to be empty, so let's add some content to bring it to life.
- Add a Widget
The Dashboard Page comes predefined with two empty Widgets already
included. This will be enough for the purposes of this tutorial.
Select the first widget and rename it to OEE in the HMI Content Tree, as we would like it to display the quality of our production.
Like to Add More Widgets?
In the HMI Content Tree:
- Select the
Dashboard Page - Locate its
Widgetsnode - Click the
+button on the left side of it
This time you'll see a different list of elements to add. Choose one of
the predefined widgets that HELIO has to offer, e.g.
Widget with Gauge and 2 Outputs.
2.3 Adding Your First Element to Your Widget: A Gauge
We would like to display the OEE in the form of a gauge and some additional numbers related to our production quality. Let's start with the gauge, since it will be the eye-catcher of our dashboard.
- Add a gauge
Add an element to your OEE Widget by using the + button again. This
time you'll choose Gauge from the extensive list of elements.
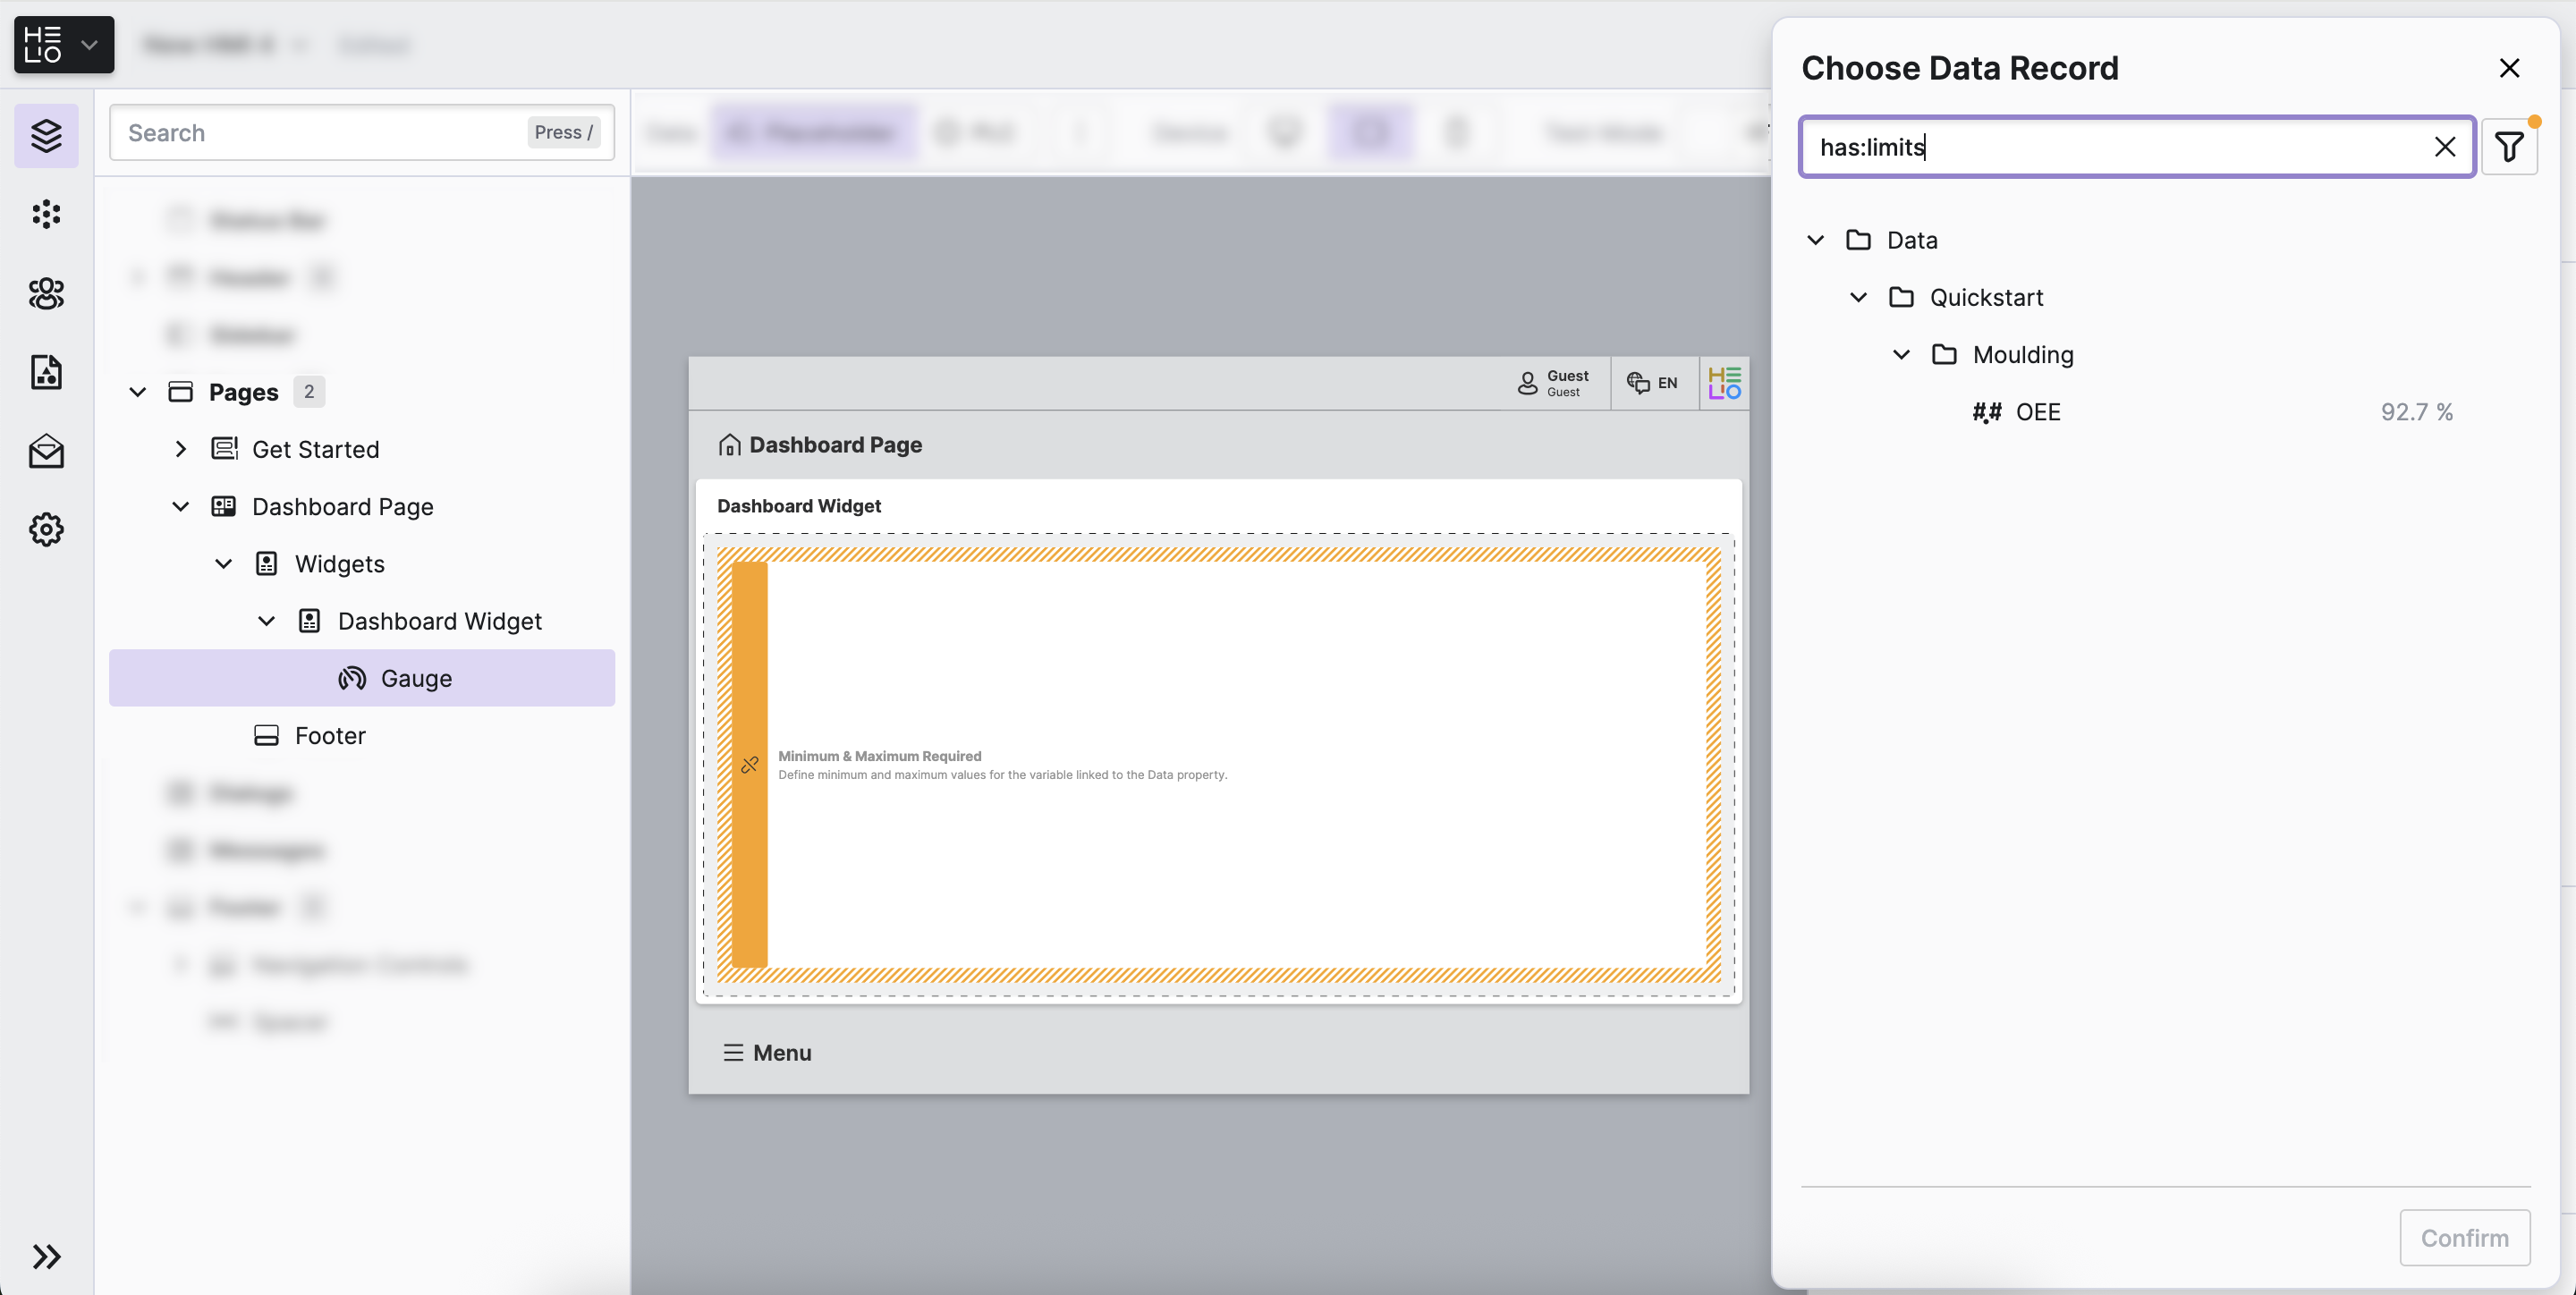
- Connect a data variable
Once you have selected the element, HELIO needs to know where to retrieve the data for it. To accomplish this, HELIO displays the "Choose Data Record" dialog for you.
Note: You can always change the data source of the element later. To do this, you need to…
- locate the
General>Dataproperty in the properties panel - click the Link-Button, choose a variable, and confirm
In your HMI Data Tree, you''ll find a variable called Quickstart >
Moulding > OEE . Your PLC experts have defined this variable in a
previous workshop, and it already has a placeholder value of 92.7%. Select it and
Confirm your selection.
Note: You will learn more about how to set up your own data variables later!
2.4 Adding Key Figures Using the Magic Output Element
Additionally, this widget should display the number of produced items that were deemed good and the number that were deemed bad.
- Add an output
To display a value that should not be modified by Operators, use the
Magic Output.
To do so, click the + button again and select the Magic Output
element.
- Connect a data variable
Again the Data Selector will open automatically. Choose the Quickstart >
Moulding > Production > Bad Data Variable and confirm.
Note: Did you notice? The Magic Output will display the unit "pcs" automatically. That's one of the superpowers of the Magic Inputs and Outputs. You'll learn a lot more about them later…
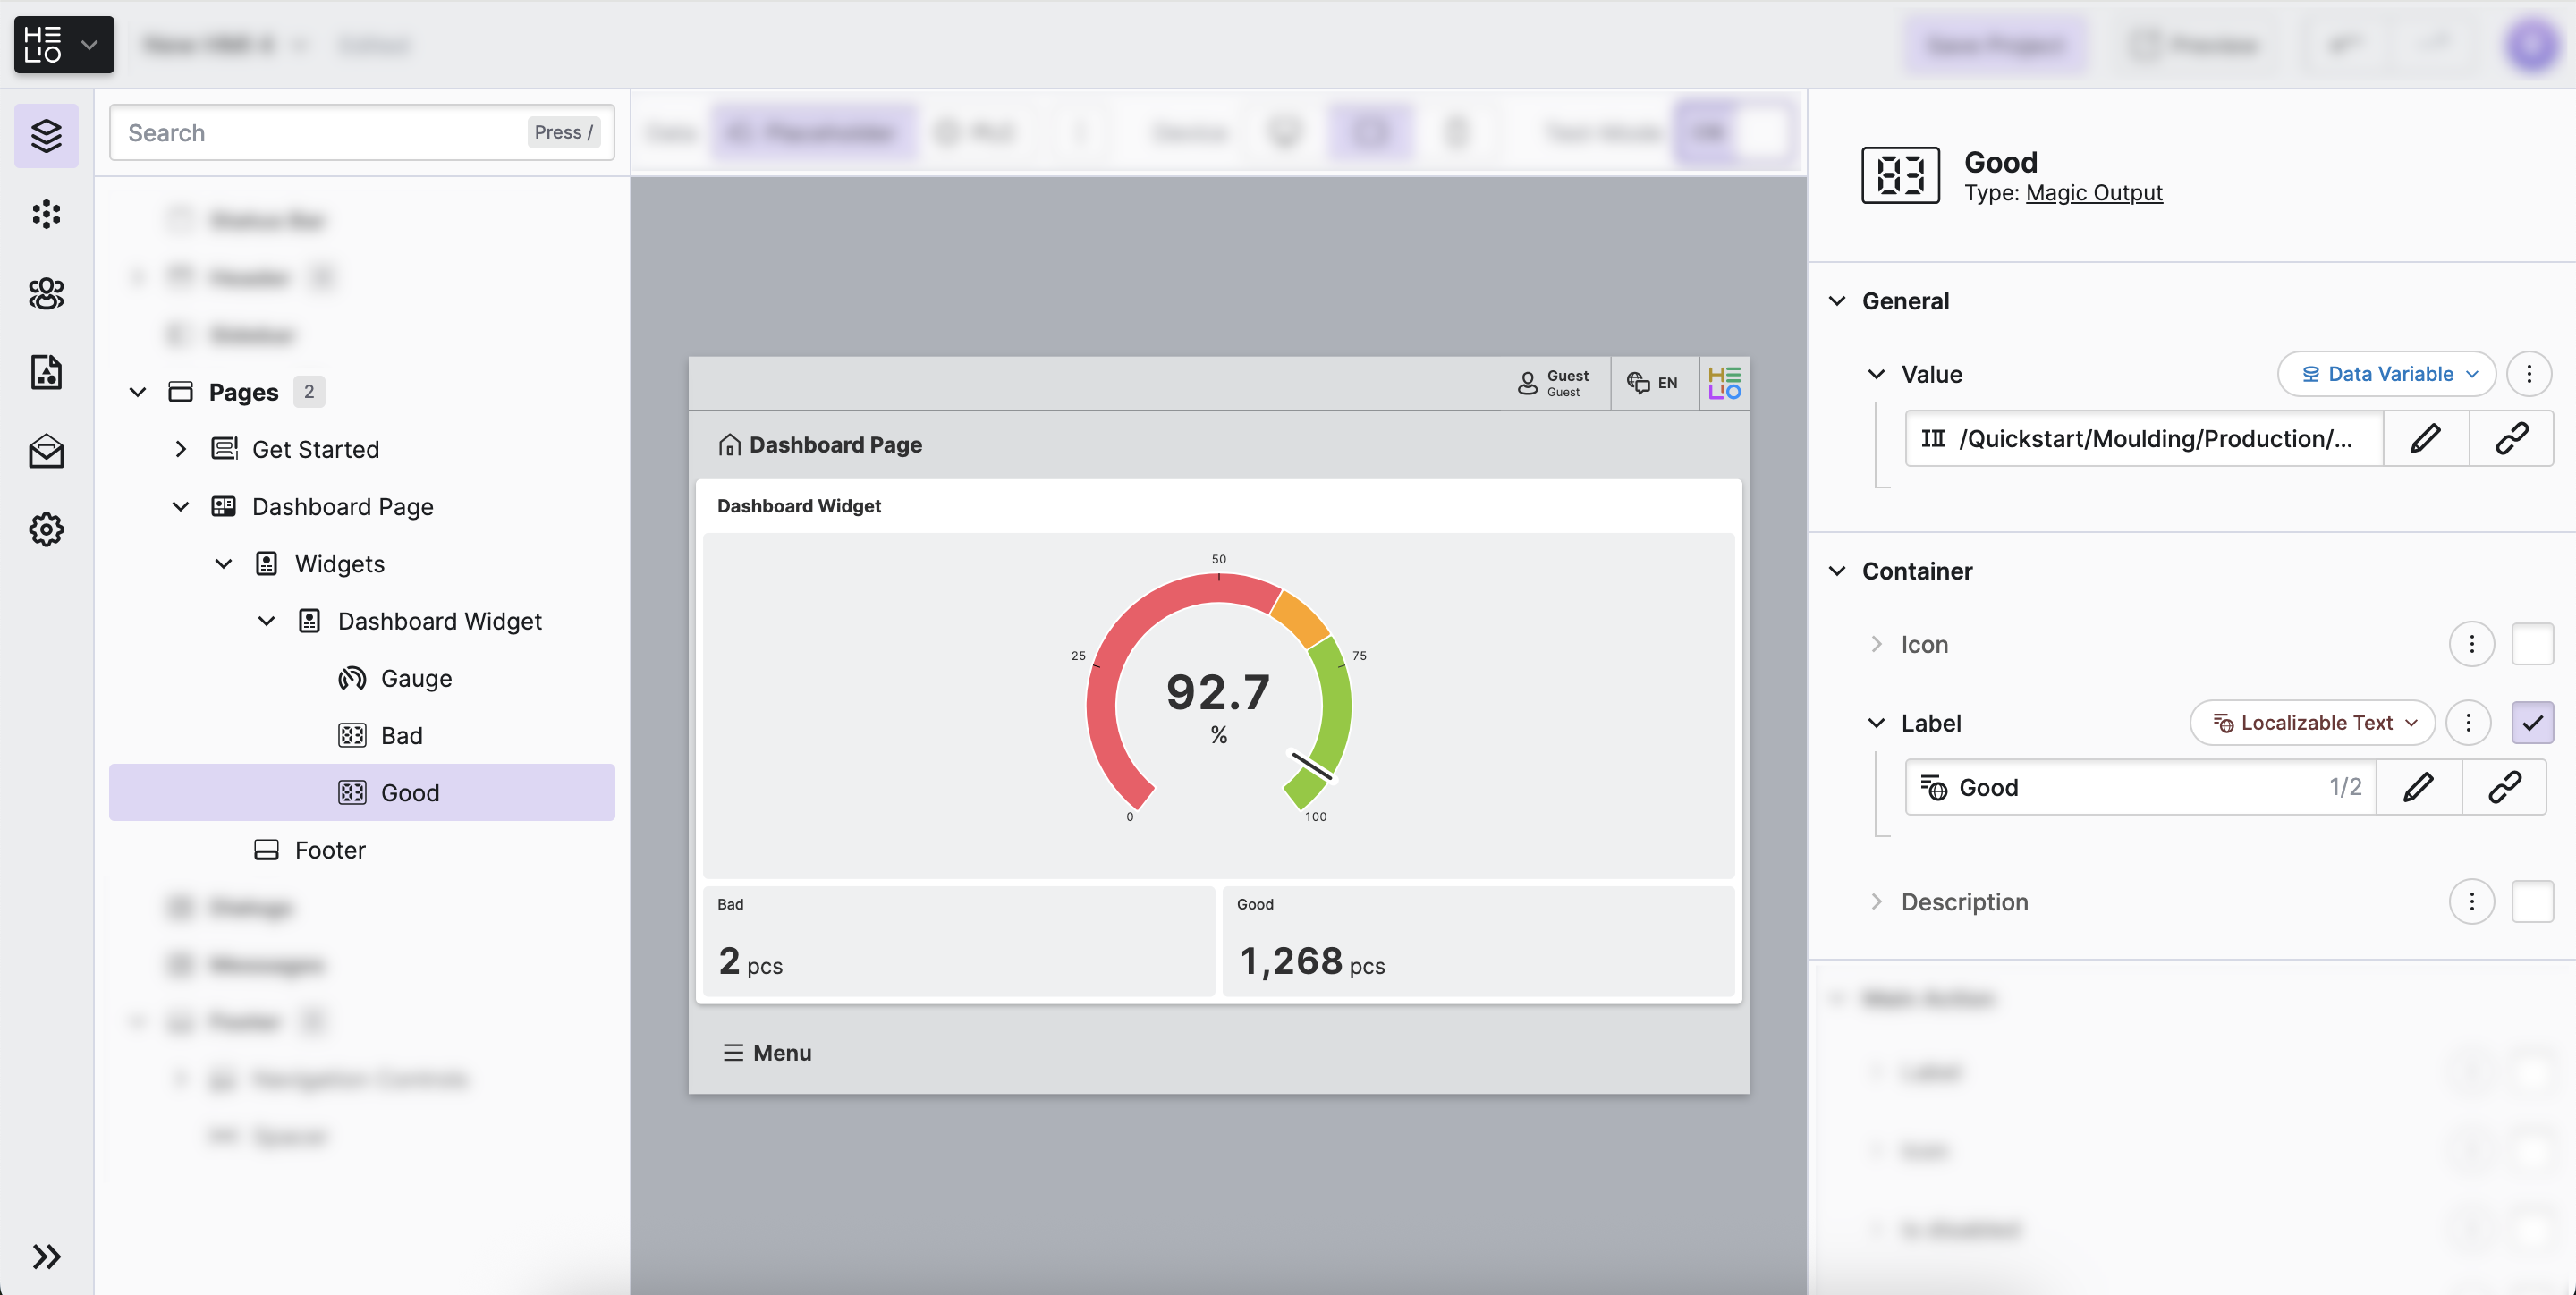
- Set the label
Finally set its Label Property to something like "Bad".
- Add a second output
2.5 Challenge: Add a Second »Steam« Widget
Now the "OEE" Widget is done, so let's add a second widget our Dashboard!
Note: There are a lot more Widgets you can add to your Dashboard and you can configure them however you need! Find out more about the Dashboard Page as well as Elements.
- Challenge
Goal: Try to add a widget that enables operators to change two important steam parameters of our machine.
Add two Elements that enable operators to manipulate the following variables:
Quickstart>Steam>PressureQuickstart>Steam>Temperature
Tip: In this case we want our operators to be able to manipulate the values of those variables. So the Magic Output might not be the best choice. 😉
Solution
Did you choose a Magic Input or Numeric Stepper element for this use case?
Perfect! That's exactly what we would recommend.
- Bonus
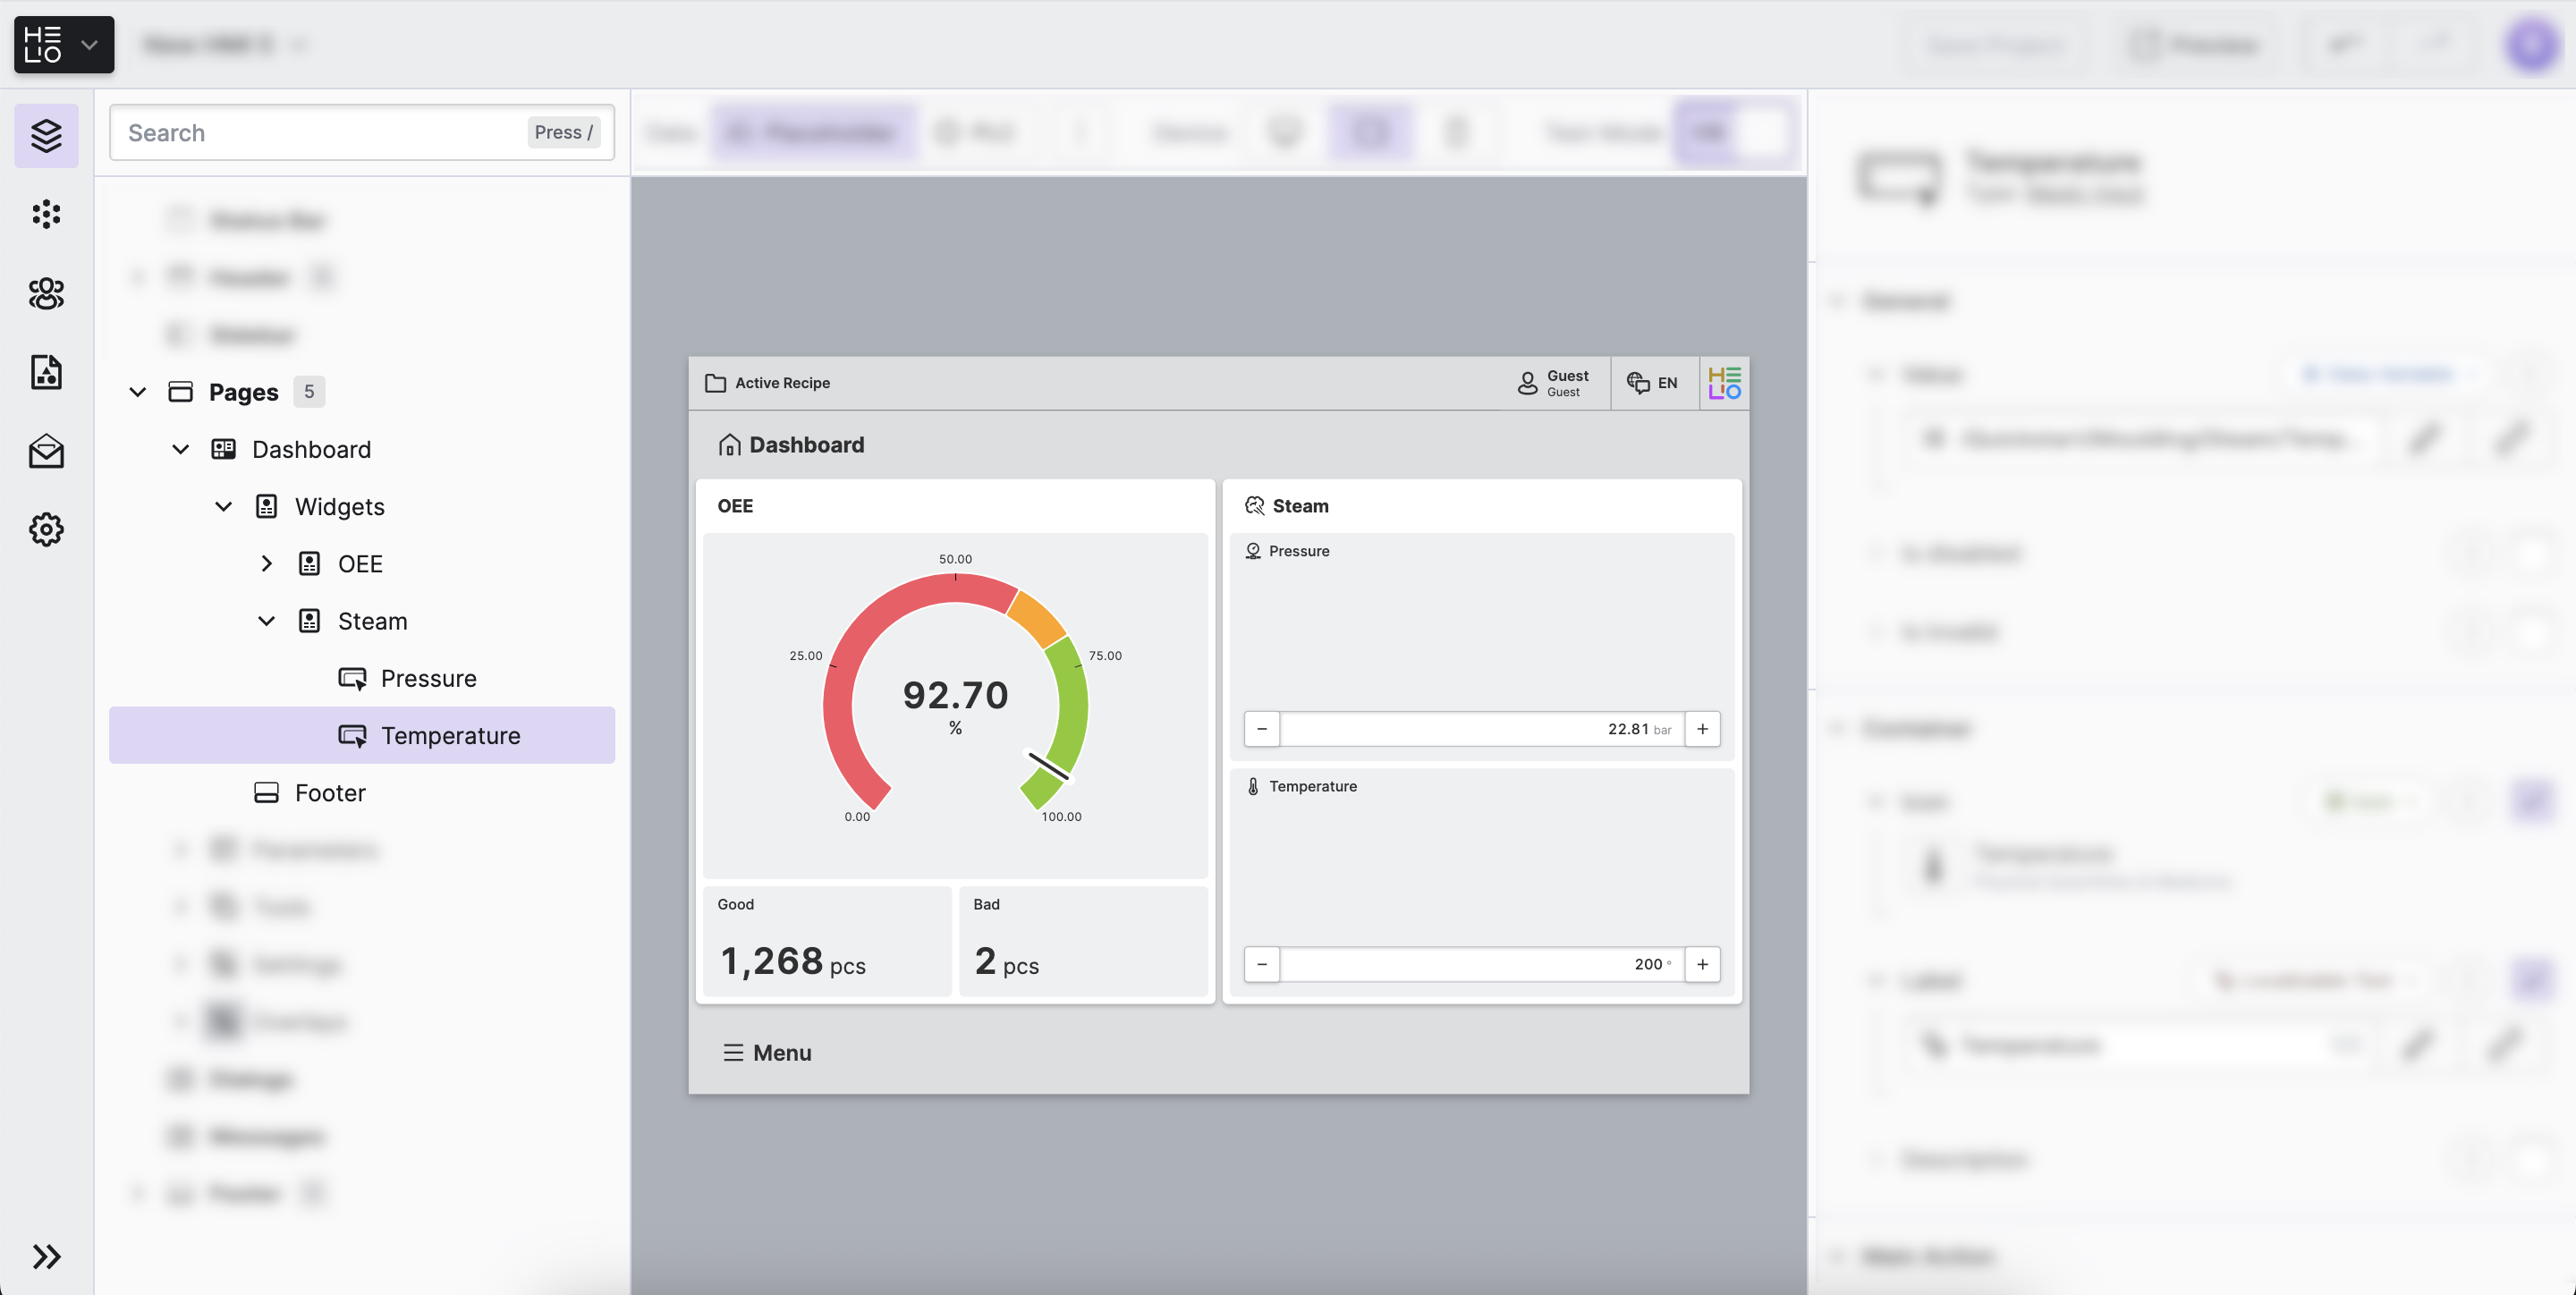
Check Your Result
Time to validate your own result against this screenshot. Make sure that you have included all the necessary elements in your HMI. 👉
You're ready to move on to the next step!