Record Custom Events
We've already learned how to record built-in events, which is useful since HELIO automatically handles all relevant events. However, you may have specific audit requirements and need to record certain information, such as the options selected by operators. This is where custom audit trail events come in. Let's figure out how to start recording them.
- Create a Parameter Page
Simply add a Parameter Page that we can use for our little experiment.
- Add a Button to Trigger the Action
Add a Button to this page that will record
our custom event and choose the Record Audit Trail Event Action
to be executed when the On click event of the button has been triggered.
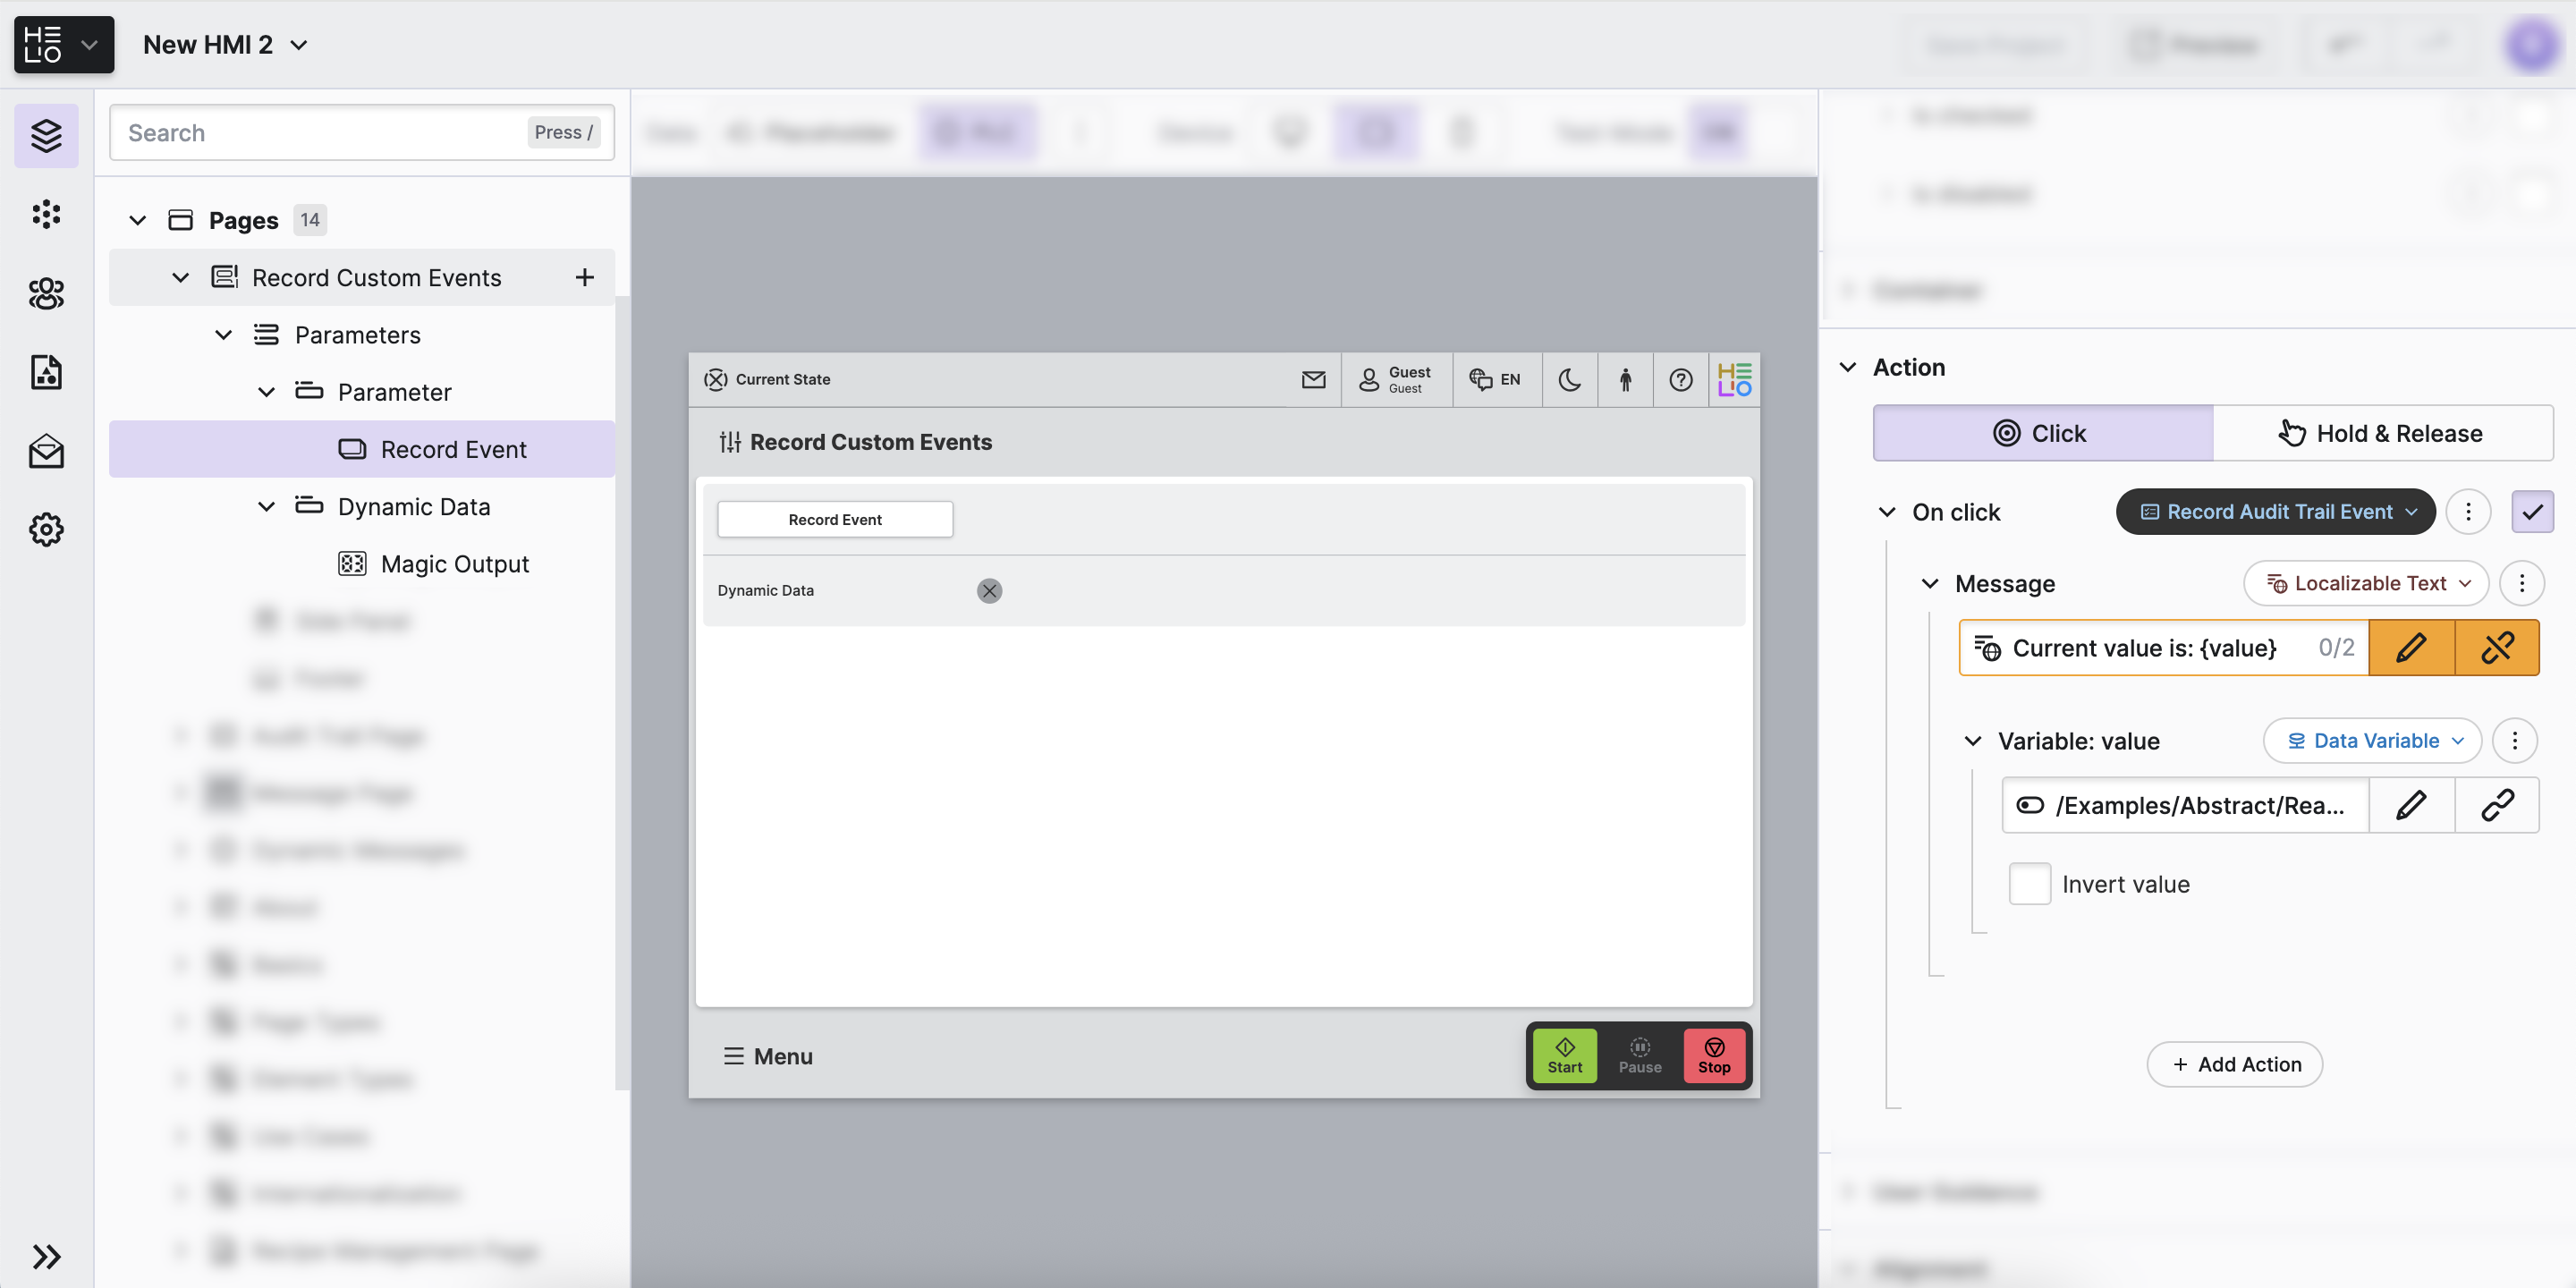
- Make The Message Dynamic
Choose
Localizable Text for the Message and insert
the following text:Current value is: {value}.
This text will now contain dynamic data that will be inserted via a
placeholder called value.
For the newly created Variable: value
property select the following variable:
- Choose Data Variable (Dynamic Property) as its type
- Select the following variable
/Examples/Abstract/ReadOnly/Dynamic/Boolean/Alternating
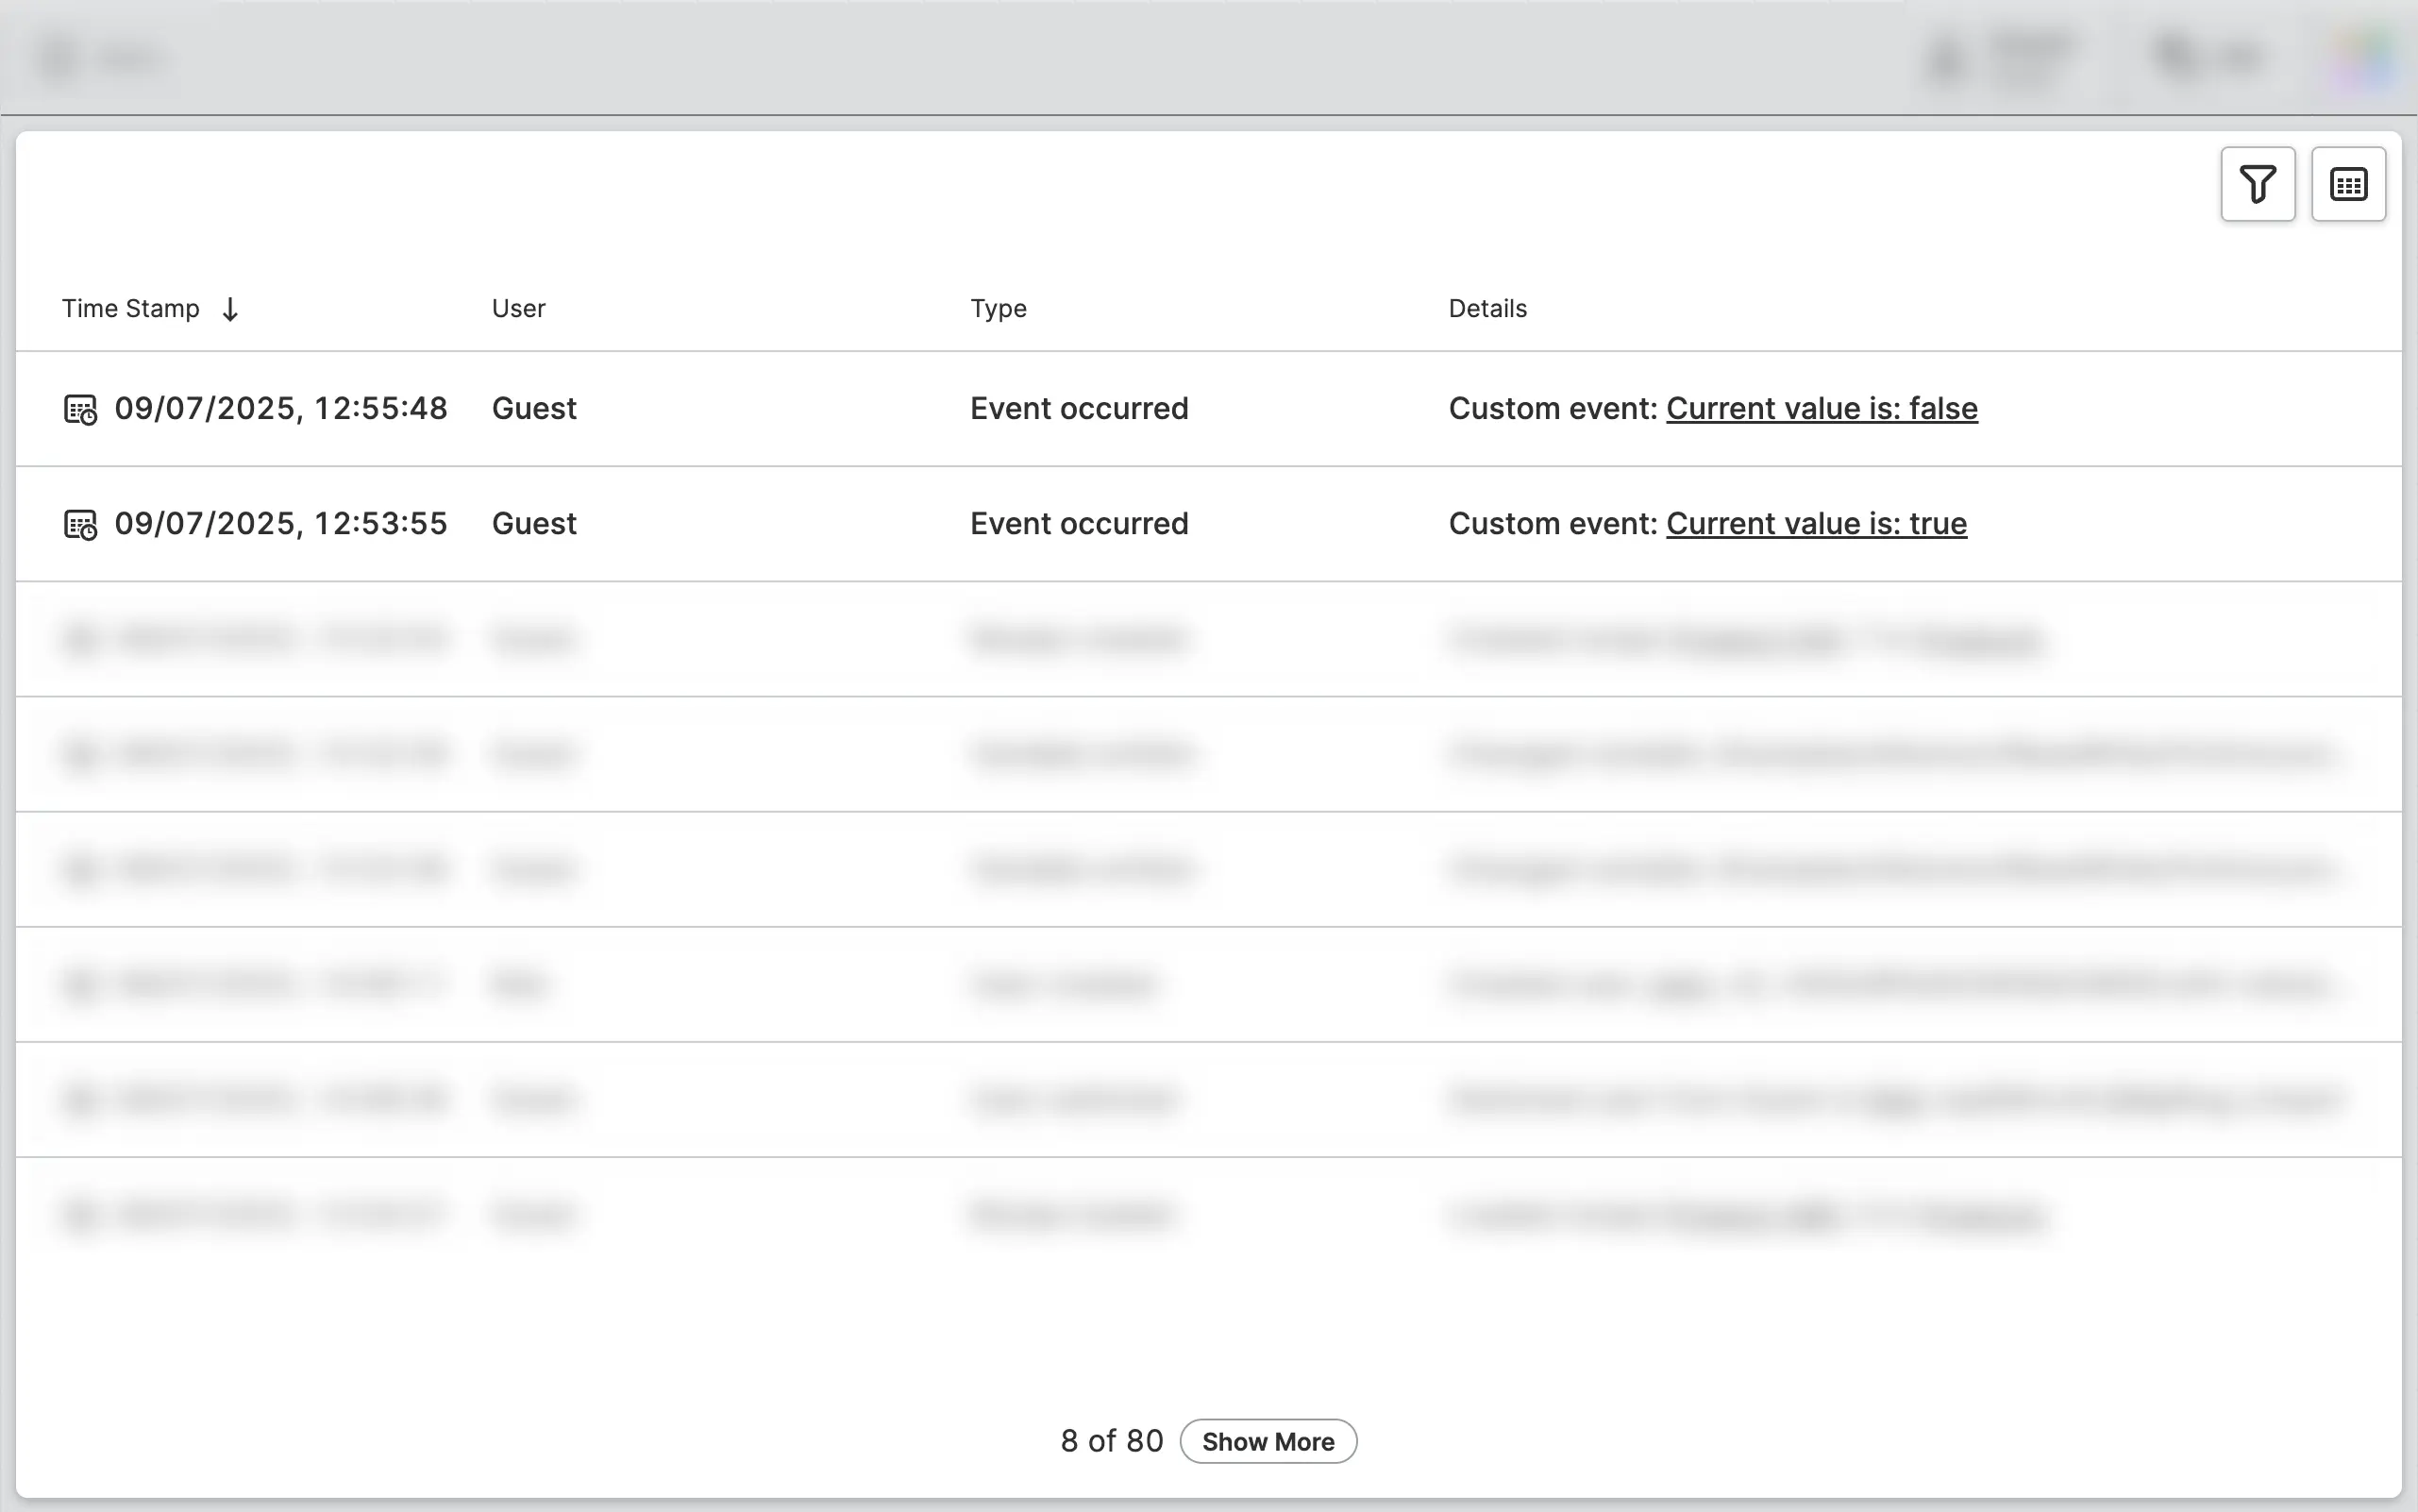
Actual Result
The message that will actually be recorded to the database will be one of the following:
Current value is: trueCurrent value is: false
- Record Events
Okay, so now it's time to put our HMI into production and record some custom events by simply clicking the button we've just created.
Don't forget:
Events Will Not Be Recorded While Editing
No events will be logged or recorded in the audit trail while you are editing and previewing your HMI. You need to Run a Project in Production Mode in order to actually generate entries in the audit trail database.
Why Is That?
- Prevents Misleading Records: During configuration and testing, you may perform many actions that don't represent actual operational usage. Recording these could create confusing audit records.
- Avoids Database Clutter: Configuration activities can generate large volumes of test events that would unnecessarily fill your audit trail database with non-operational data.
- View the Audit Trail
Once we've recorded some events we can now navigate to the Audit Trail Page we've created before. It will now be filled with our additional custom events:
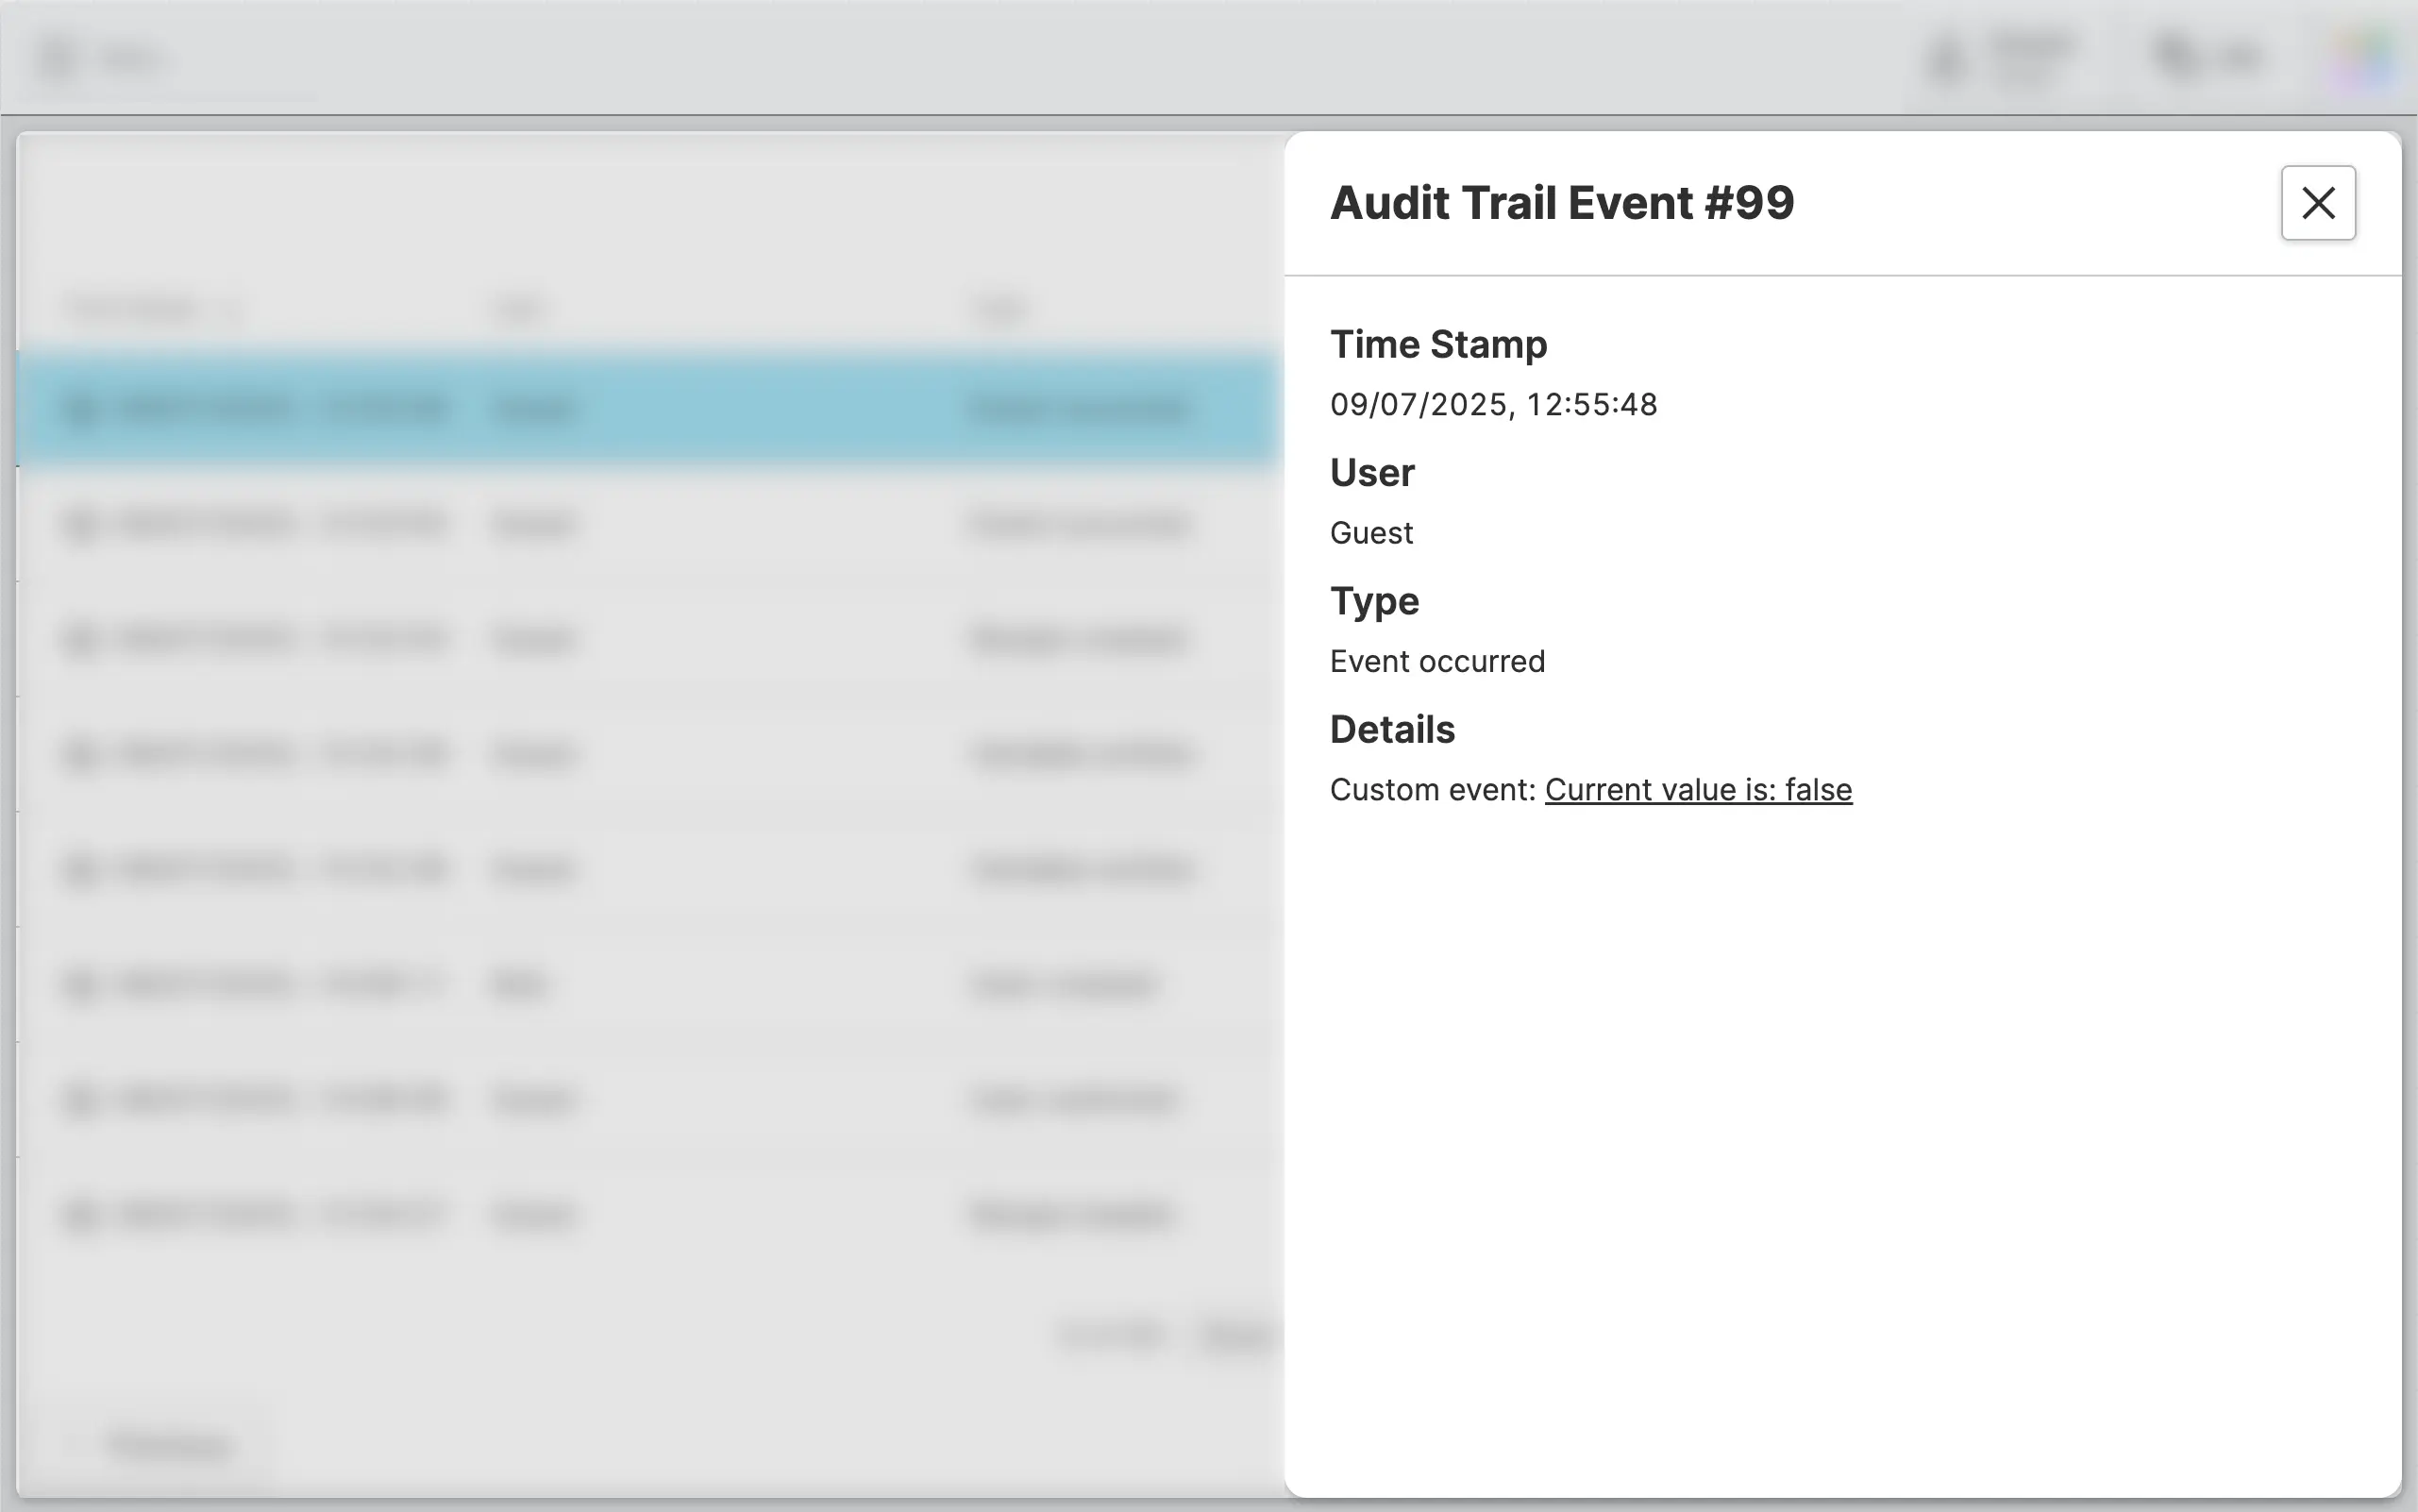
Again, just click on one of these events to see more details in an overlay.
You've recorded plenty of events by now. Let's learn how to export all of them into CSV files that can then be used for auditing purposes.