Setting up a PLC Controlled MessageList
Every machine needs to provide messages to ensure proper functioning and prevent damage or safety hazards. HELIO uses three types of messages to provide guardrails on how to best communicate with operators.
- An
Erroroccurs while the machine is running and requires human interaction to be resolved. Therefore, these errors typically need to be acknowledged by the operator to ensure that someone has actually provided a fix. - A
Warningis a message used to prevent errors from occurring in the first place. It provides operators with hints that certain thresholds have been exceeded and that it's time to act now in order to keep the machine running. - All other messages fall into the category of
Information. These messages can provide hints, tips on how to continue, or simply inform the user that a particular order has been completed. There are no limits to your imagination.
Usually, the PLC provides these messages as it needs to be the sole source of truth for its state, especially when it comes to errors. In order for HELIO to display those messages, the PLC must provide a way to:
- Query for messages
- Acknowledging messages
Step 1: Implement the API in your PLC
Follow the specifications provided in the HELIO Messaging API v1 to create a PLC capable of providing messages to HELIO.
Additionally, you can start a new project using the preinstalled Playground HMI Template. Connect it to The HELIO Playground
PLC
to view a live example demonstrating how HMI and PLC interact to generate a
Message List.
Step 2: Import MessageList and AcknowledgeMessage in your HMI
- If you haven't already done so, add a new connection to your PLC.
- Locate and drag both the
MessageListandAcknowledgeMessageinto your HMI Data Explorer. - Convert the
MessageListinto List.
Step 3: Setting Up the Basics
Once you've defined your API and Data, it's time to connect them to your HMI. To do this, switch to the Content View in the Project Editor.
- Click on the Messages Item in the HMI Content Tree.
- Locate the basic settings in the Properties Panel.
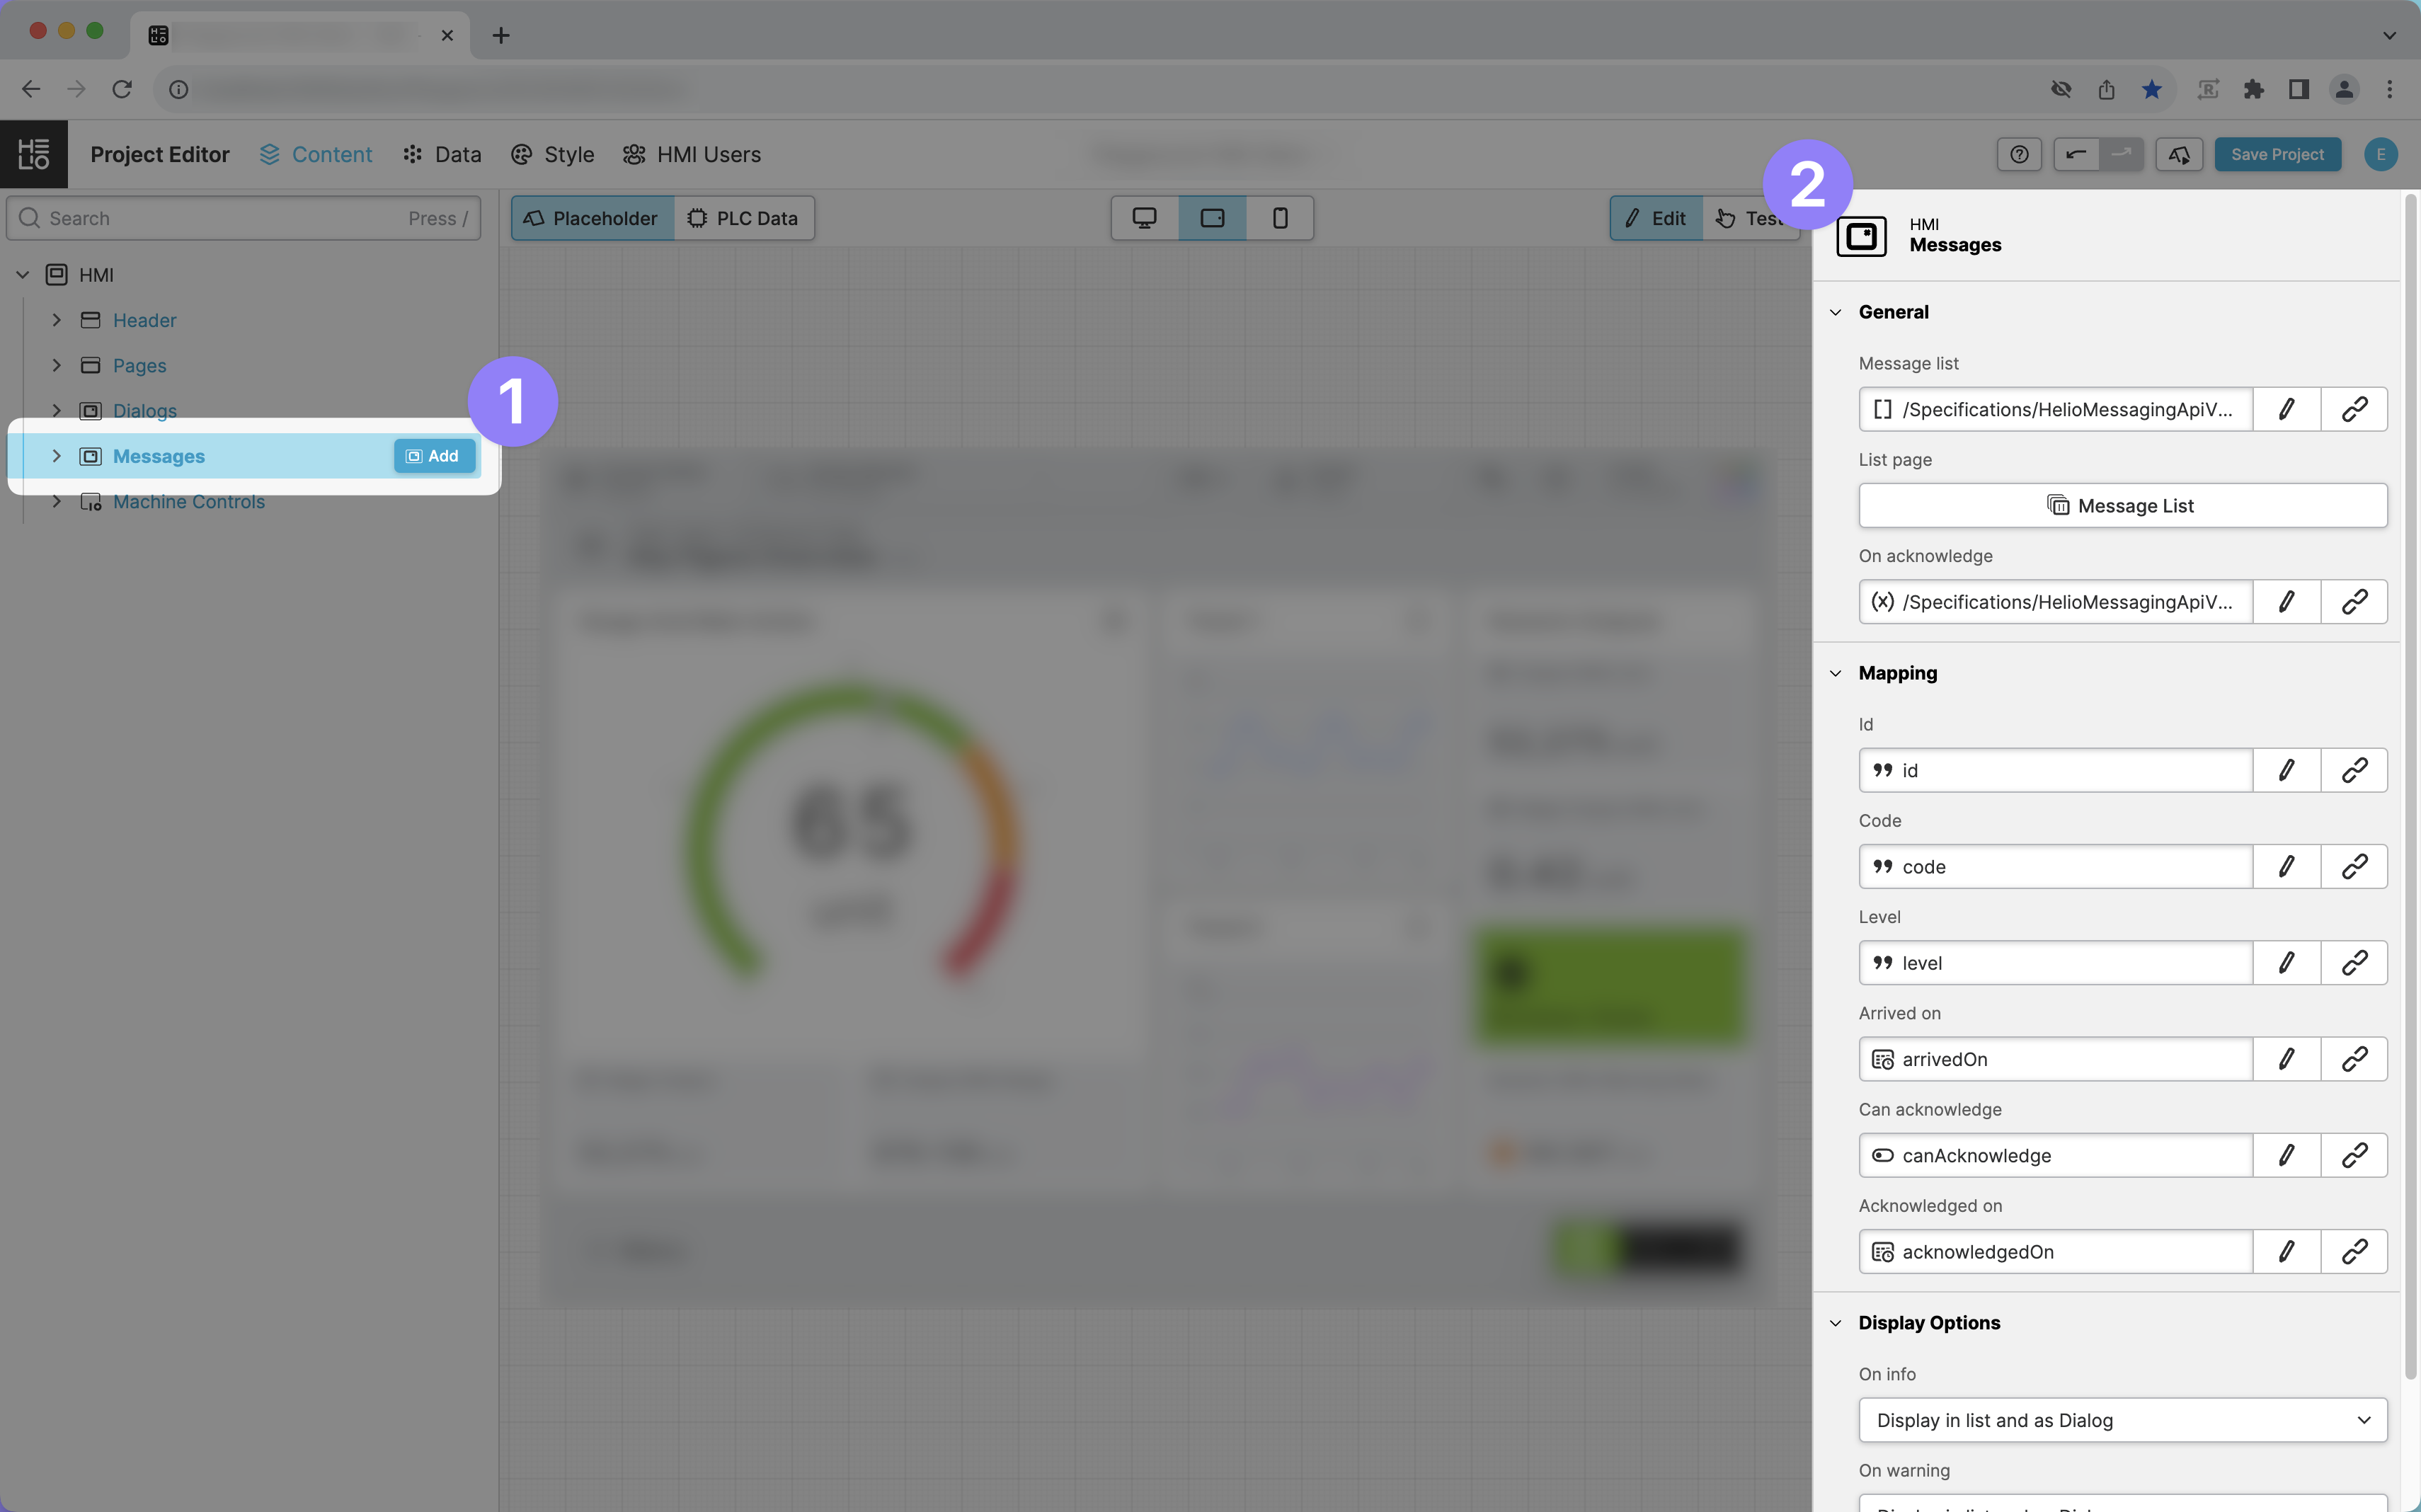
Required Settings
Message list
Link this property to the MessageList that you've created in your PLC and
imported into your project.
On acknowledge
Link this property to the AcknowledgeMessage method that you've created in
your PLC and imported into your project.
Optional Settings
List page
You can set up an additional page in your HMI to display a comprehensive
list of
messages. Most HMIs incorporate this feature into their navigation, allowing
operators to view both current and previous messages. To set it up, add a
new
Collection Page to your HMI
and connect it to your MessageList. You're also free to enhance
this page by adding features such as type and date filters.
Mapping
If your messaging API has a unique structure or additional properties that you'd like to maintain for transparency, use these properties to map the attributes of a message to the ones you've defined in your list.
Display Options
Use these properties to define how each message level (Information, Warning, Critical) should be handled inside your HMI:
- Display in List and Dialog: This will display a modal dialog and block the operator.
- Display only in list: This will not block the operators. Instead, it will simply add the message to the list where it can be viewed and acknowledged.
Step 4: Adding a Default Message
HELIO offers two methods to present a notification in your HMI when a new item
appears in the MessageList:
Default Message
Use the Default Message to establish a fallback message that can manage all the
messages appearing in your list.
Custom Message
Add additional Custom Messages to handle specific or critical situations. This
gives you more control over the content and footer actions displayed to the
operators.
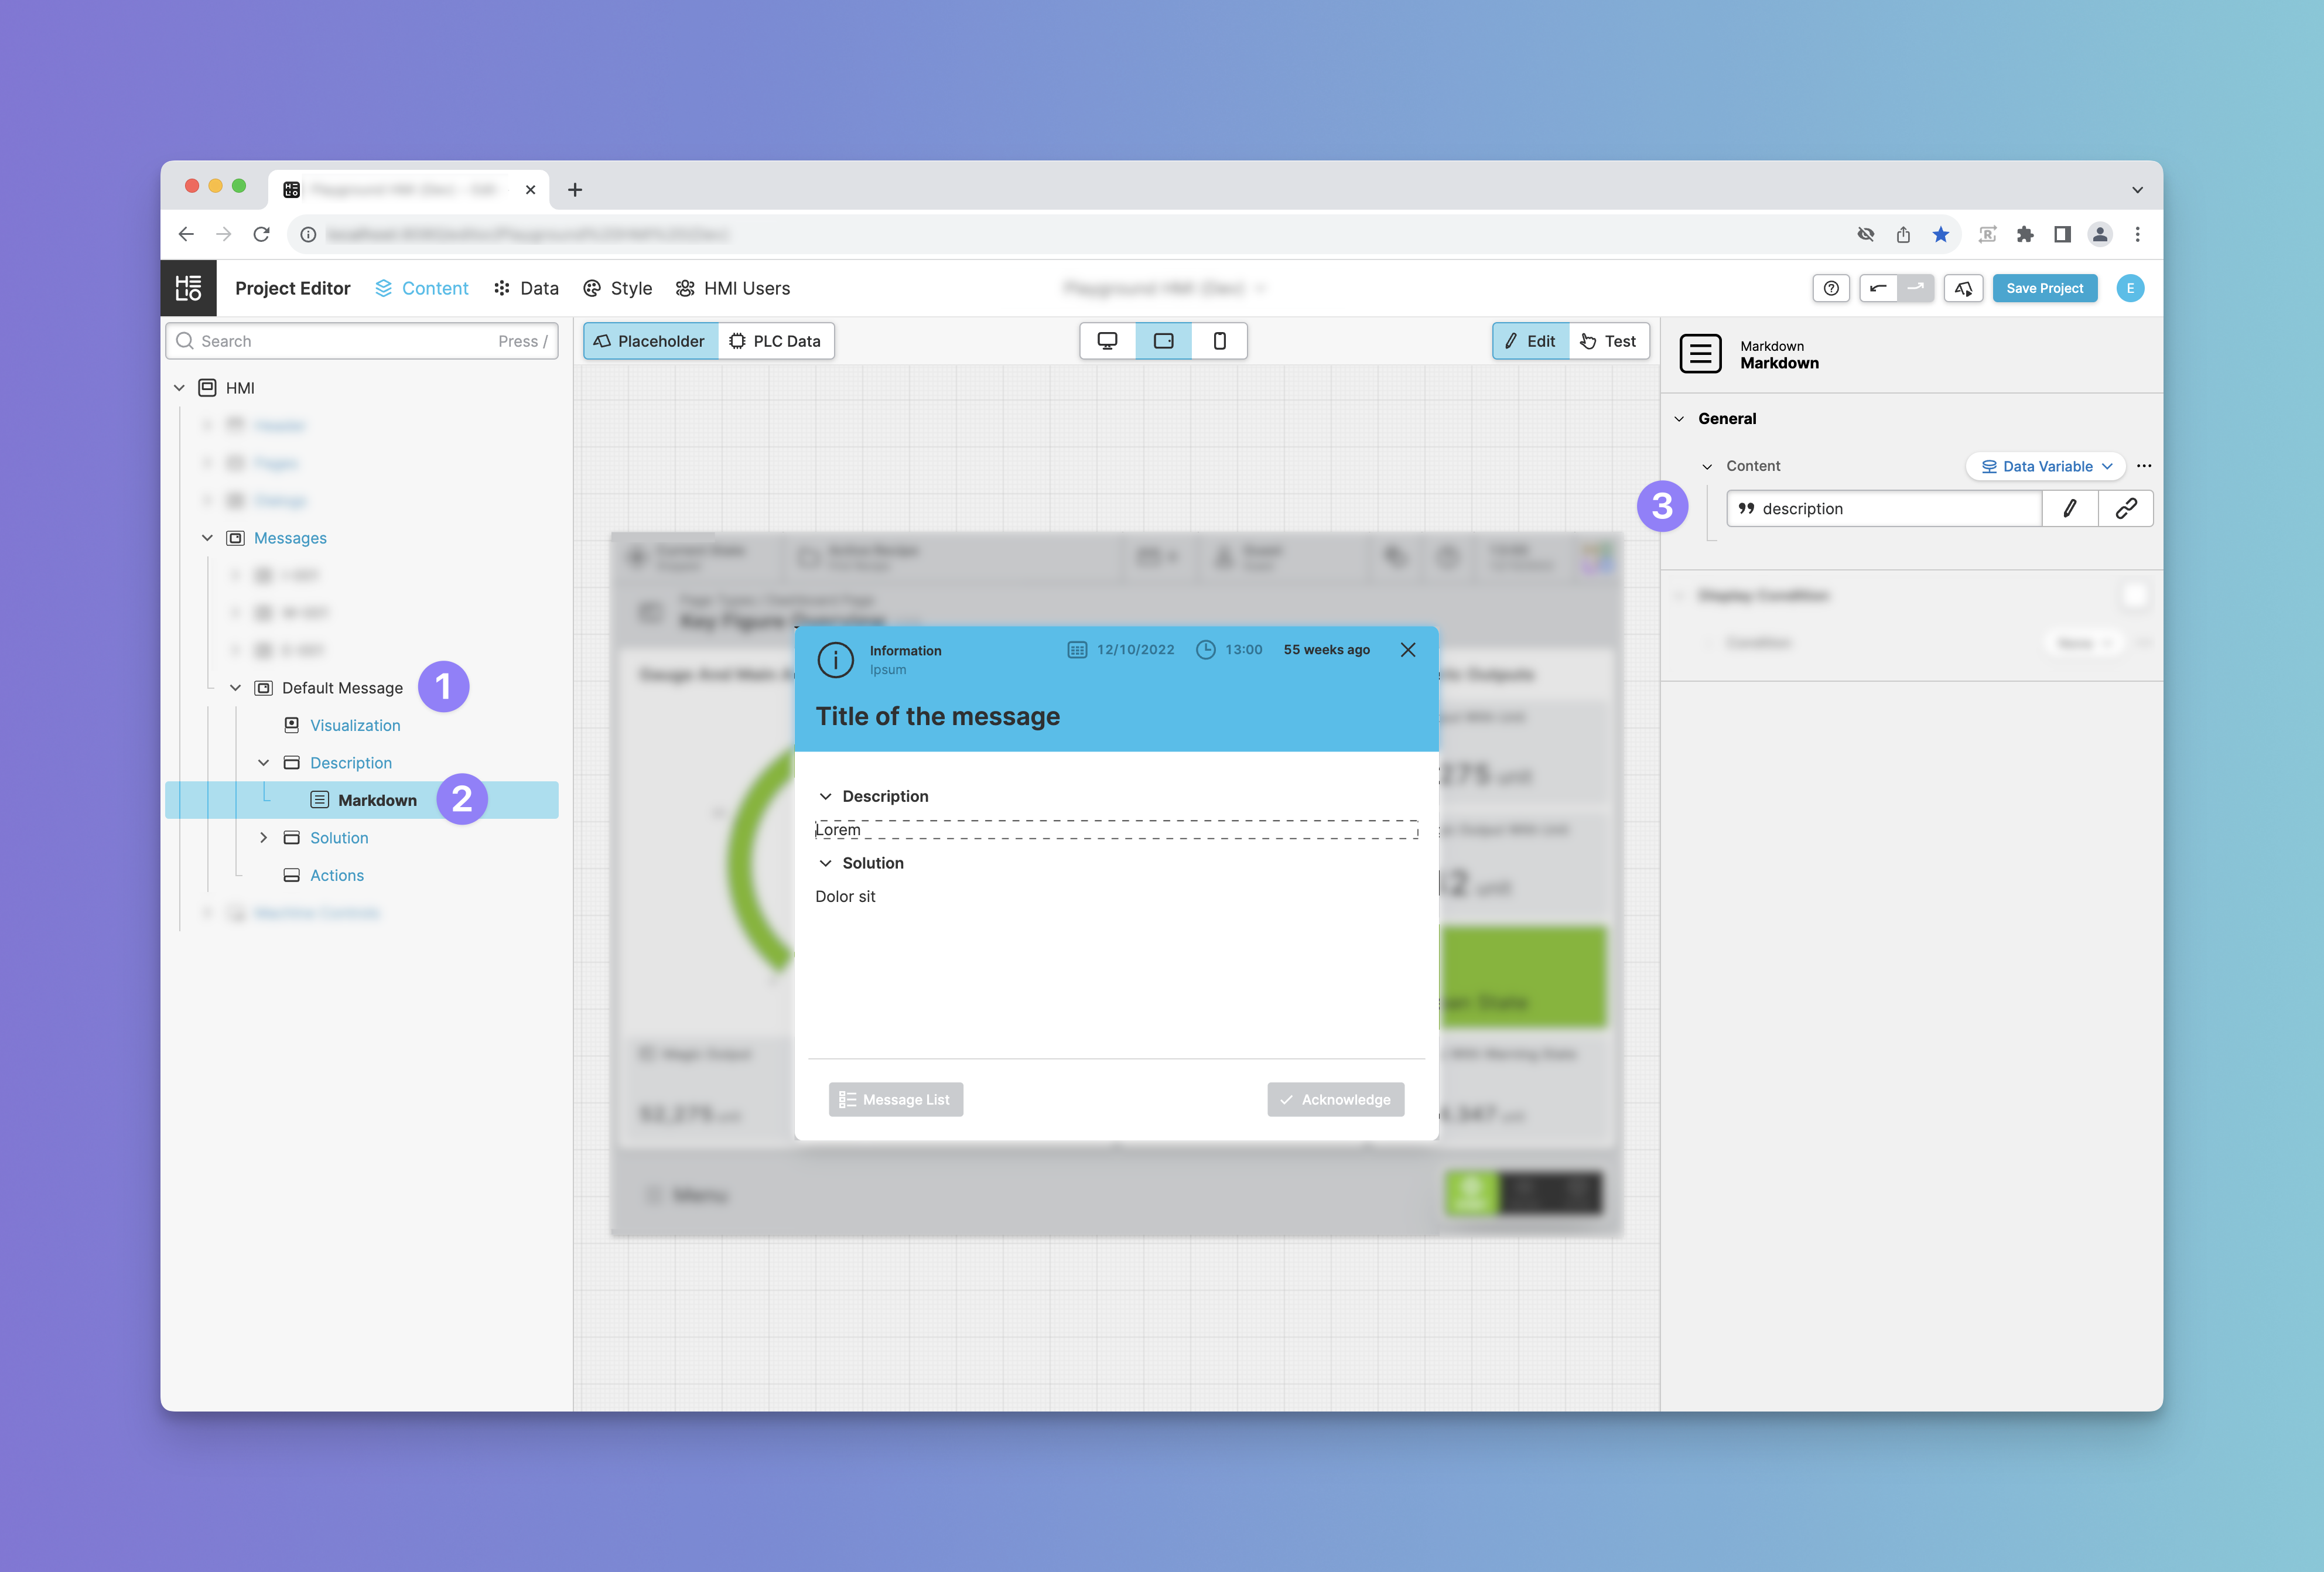
We’ll start by defining the Default Message:
- Add a new element to your
Messages: ChooseDefault Message. - Add more details to this message, such as a description of the information or error.
- Link those elements to the blueprint of your
MessageListitems to display dynamic data.
Step 5: Defining Custom Messages in the Project Editor
Under Construction…
- We’re currently working hard to improve this section.
- Contact us at [email protected] if you have questions, feedback or ideas on this topic.
Step 5: Setup A Message Page
Under Construction…
- We’re currently working hard to improve this section.
- Contact us at [email protected] if you have questions, feedback or ideas on this topic.
Step 6: Add Message Header Cell
Under Construction…
- We’re currently working hard to improve this section.
- Contact us at [email protected] if you have questions, feedback or ideas on this topic.