Restrict Access to Data
In a previous step, you defined two User Roles. Now, let's actually make use
of them. We're going to dive into how roles work in the
Data View. You can use them to ensure specific roles
can't modify data they shouldn't be touching.
- Define
HMI DataforOperators
Open Data View and define a variable called
WritableByOperators.
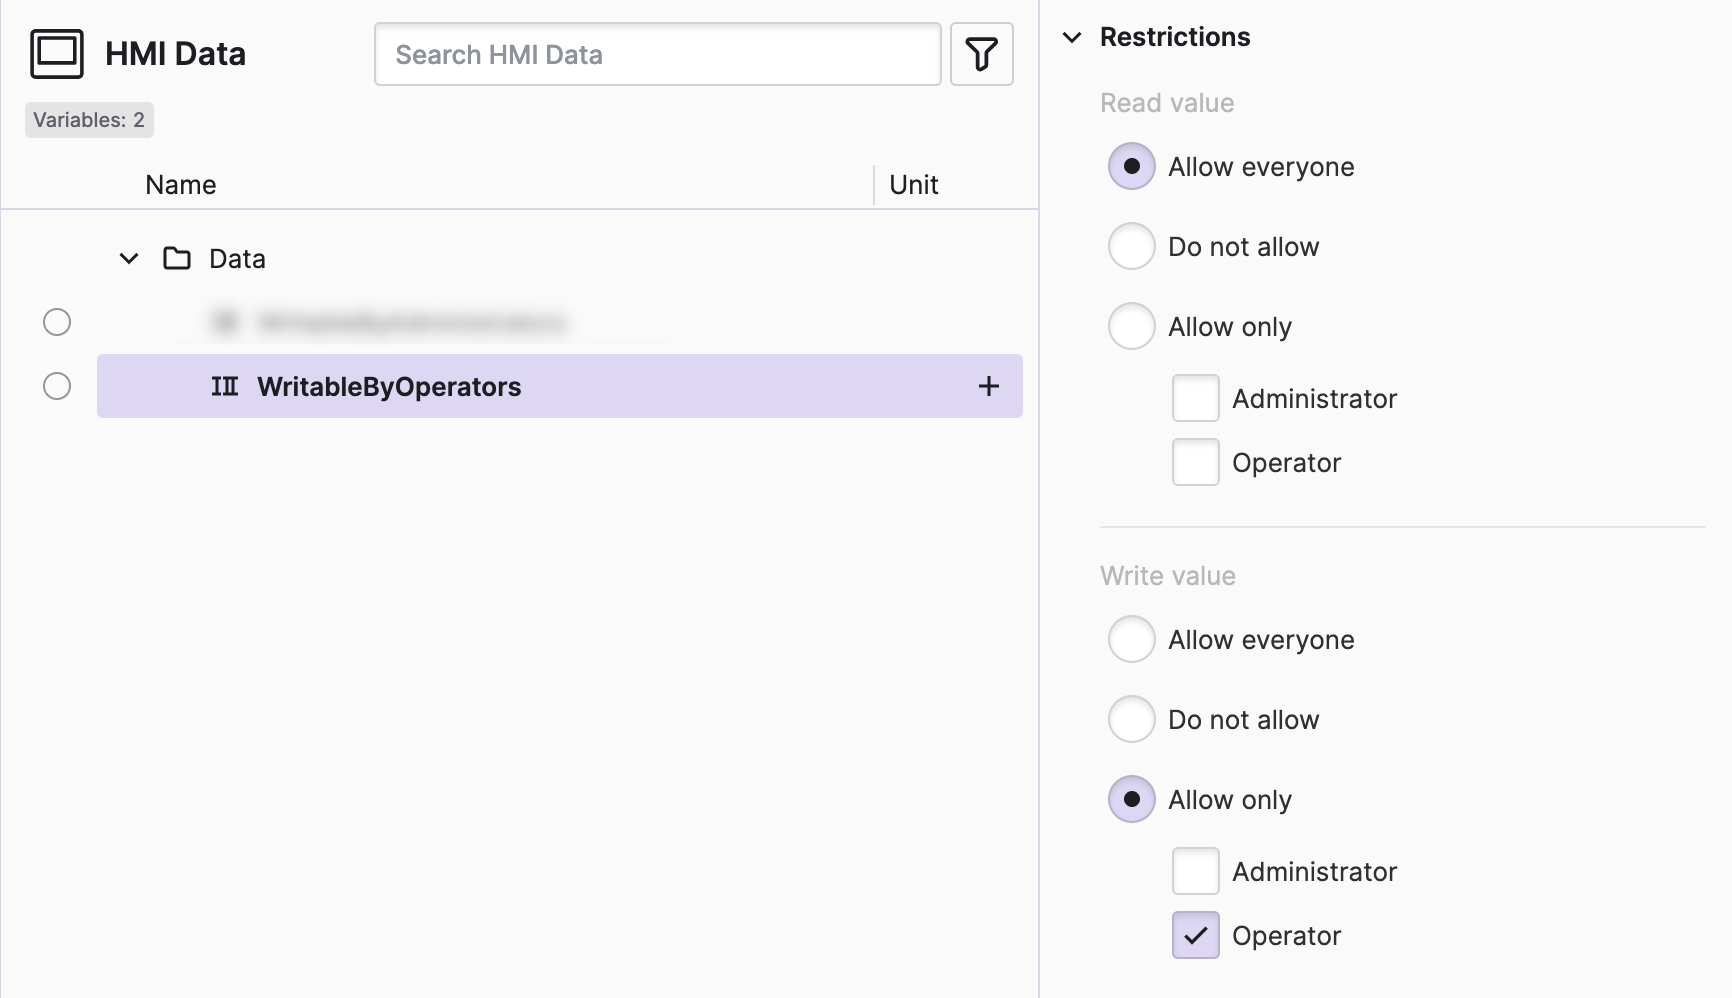
Default Restrictions
By default…
- …all variables can be read by everyone
- …but writing to them is prohibited for security reasons.
You explicitly have to allow variables to be writeable!
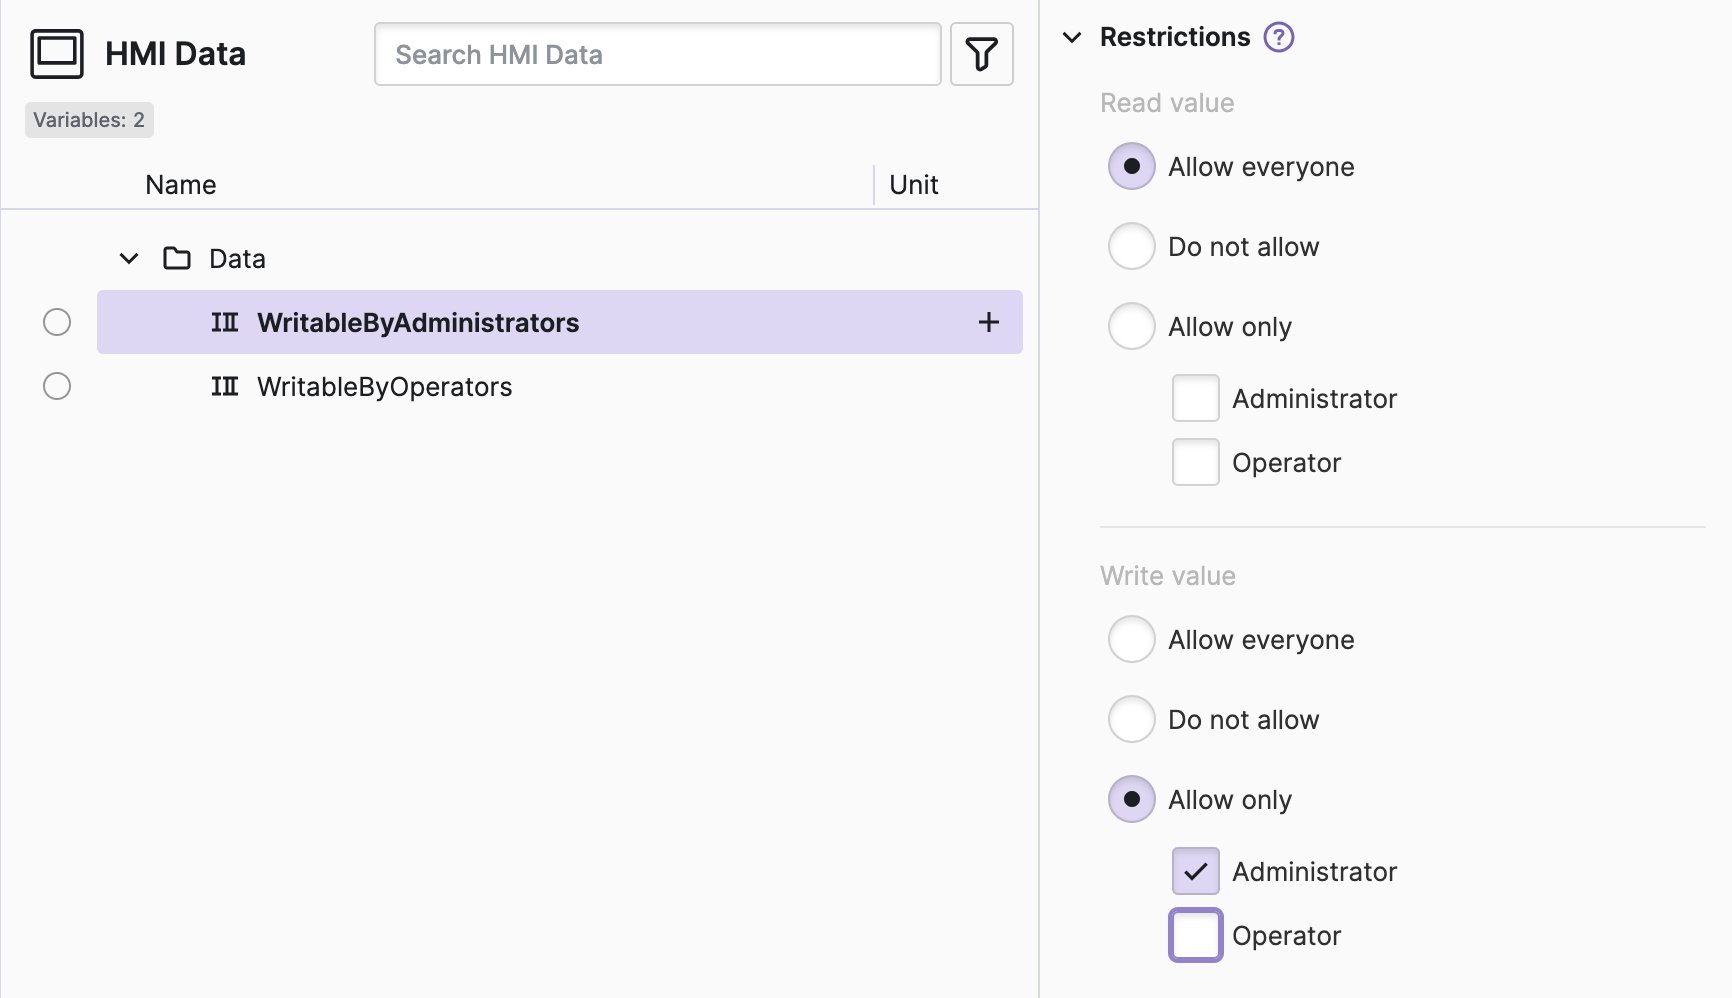
- Define
HMI DataforAdministrators
- Create a page to manipulate the data
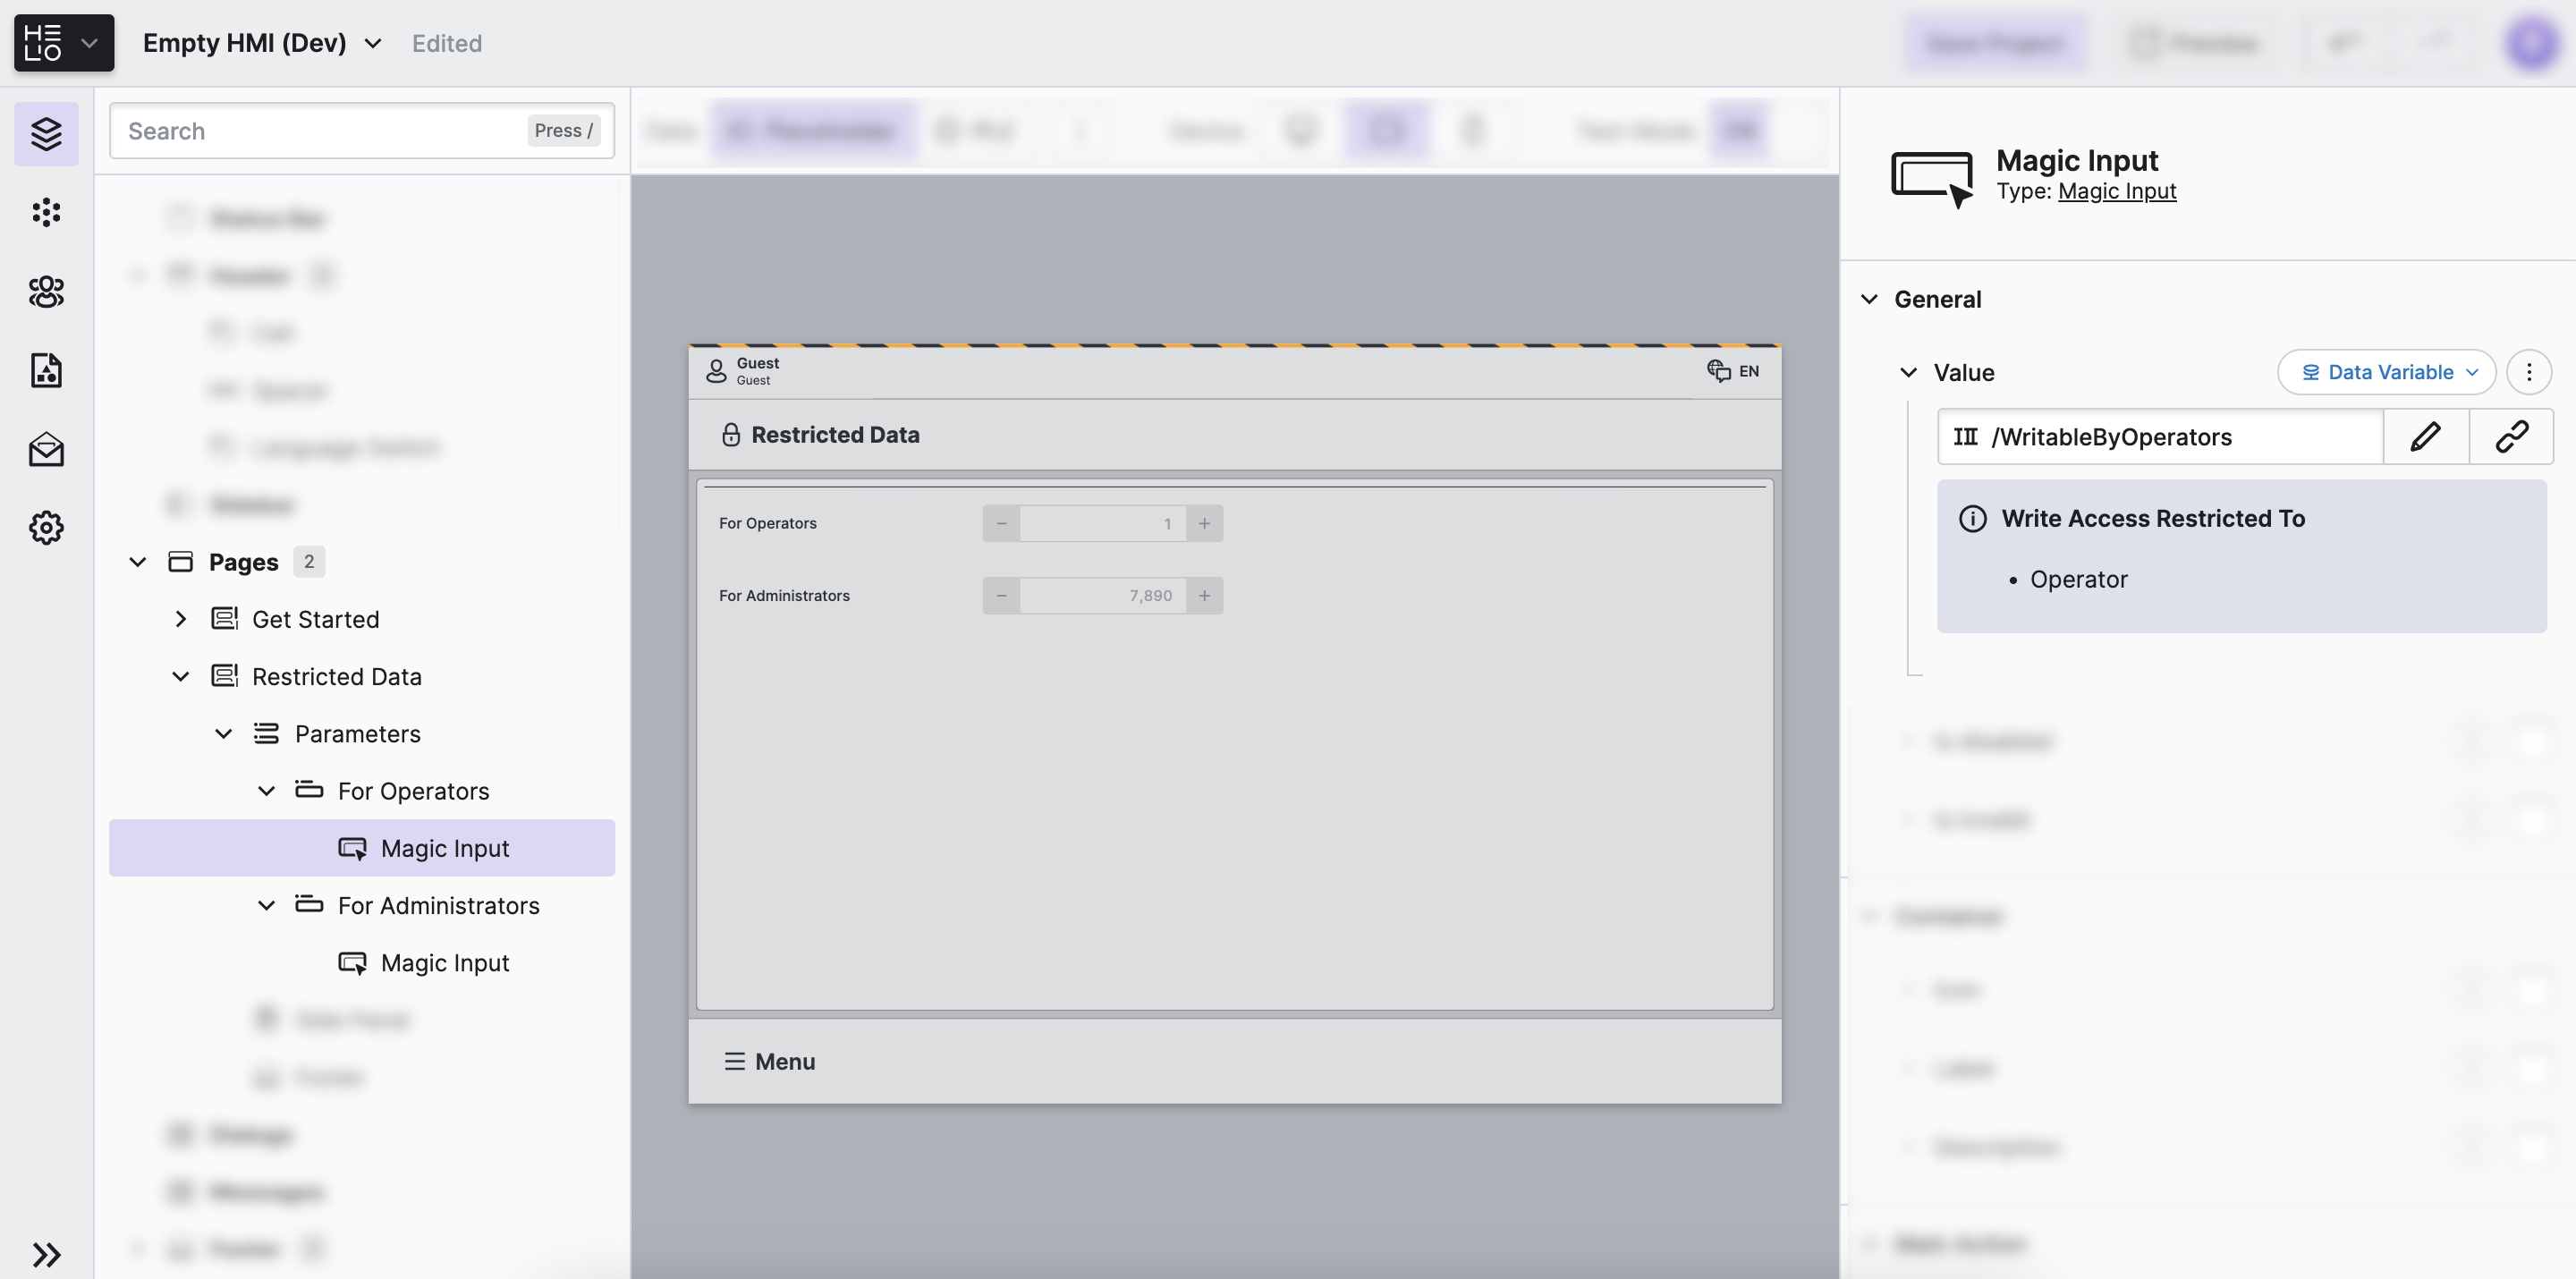
To test the restrictions let's add a new Parameter Page to our project with two Magic Inputs that can be used to change those two variables:
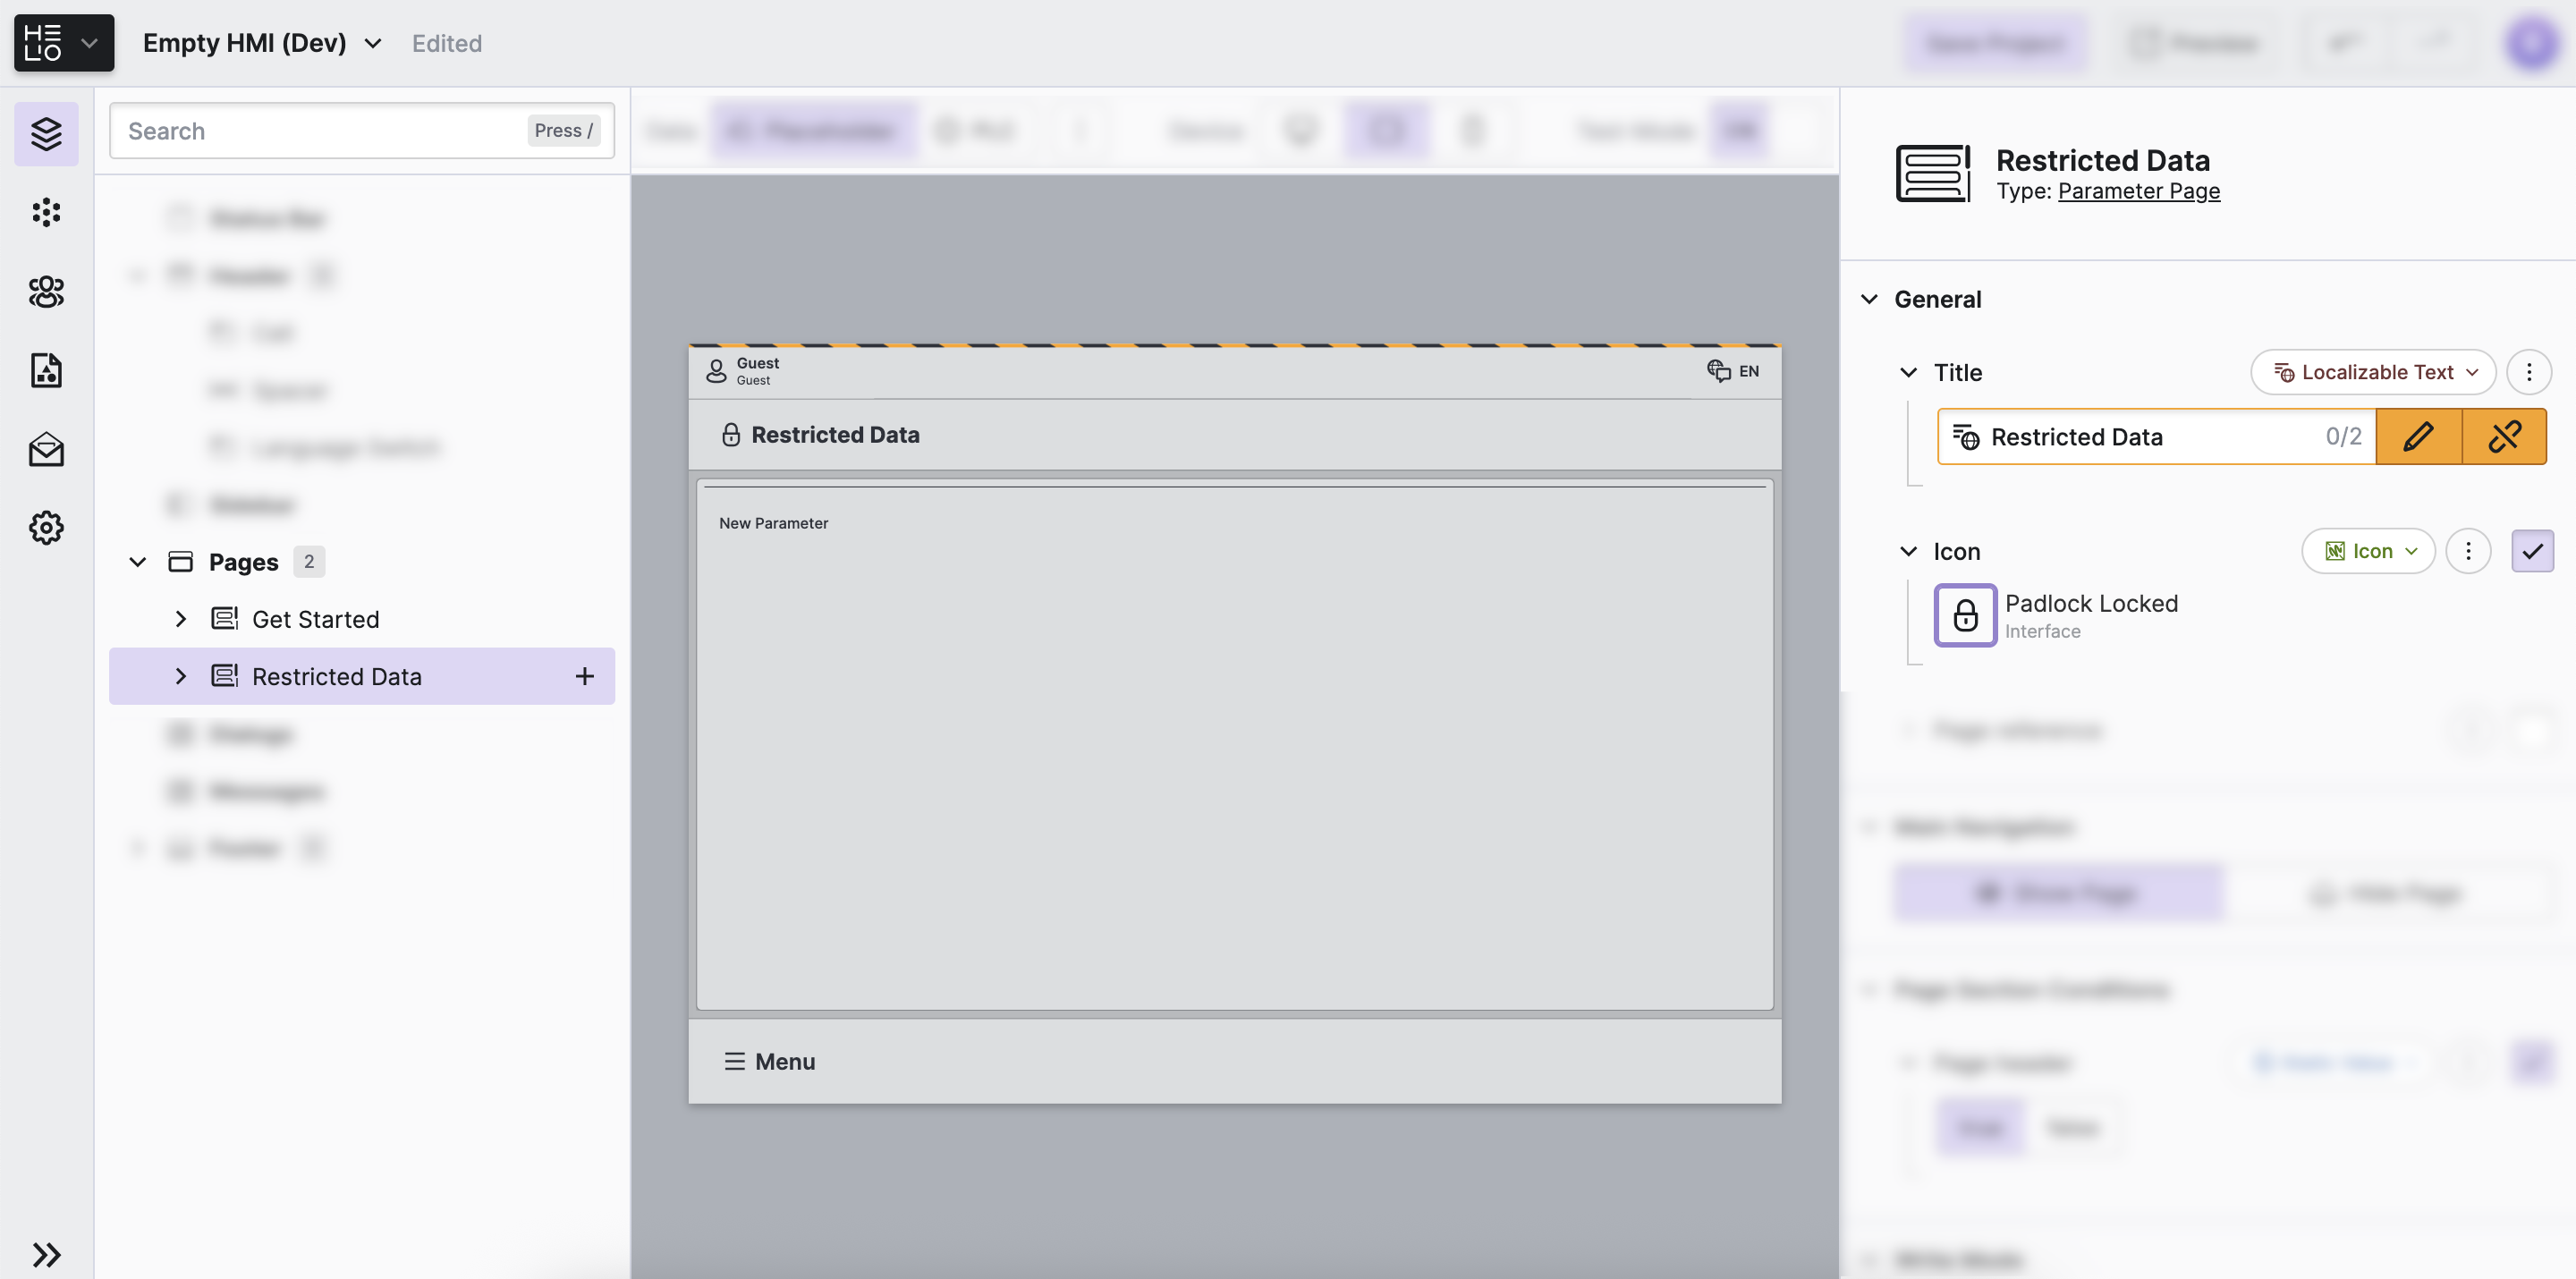
- Add Inputs to manipulate the data
- Next, add two Parameter elements, each with a Magic Input.
- Give each parameter a descriptive
Labeland theirValueproperty to those variables, we've just createRenderer.
- Test the restrictions
Seems like we're ready to give our HMI a test drive. Switch to the
Test mode and and play with the new header cell:
- Guest that are not signed in cannot manipulate the data at all
- Only the users with
Bobshould be able to change the variable restricted to Admins.
Good Job! You’ve made your HMI more secure by restricting access to your PLC’s data. Let's move on by learning about how to Restrict Access to Pages.