Create a Secure Connection to the ctrlX OPC-UA Server
The OPC-UA Connection lets you connect HELIO to PLCs that comply with the
established
OPC UA
standard. Since the ctrlX OPC UA Server is a first class citizen
in the ecosystem, it is the preferred way to access any ctrlX data at the
moment.
Want Native Support For ctrlX Data Layer?
It's on our roadmap but we're also constantly trying to focus our resources for maximum output. We've got two quick questions for you to help us focus our development efforts:
- Is ctrlX Data Layer support crucial for your project and why?
- Data Layer Support vs. New HMI Elements: Pick one and tell us why!
Let's Talk!
Contact our Professional Services specialists or our Support team – we're always ready to listen.
A. Install the ctrlX AUTOMATION - OPC UA Server
Make sure the ctrlX AUTOMATION - OPC UA Server app is installed and properly configured on your device.
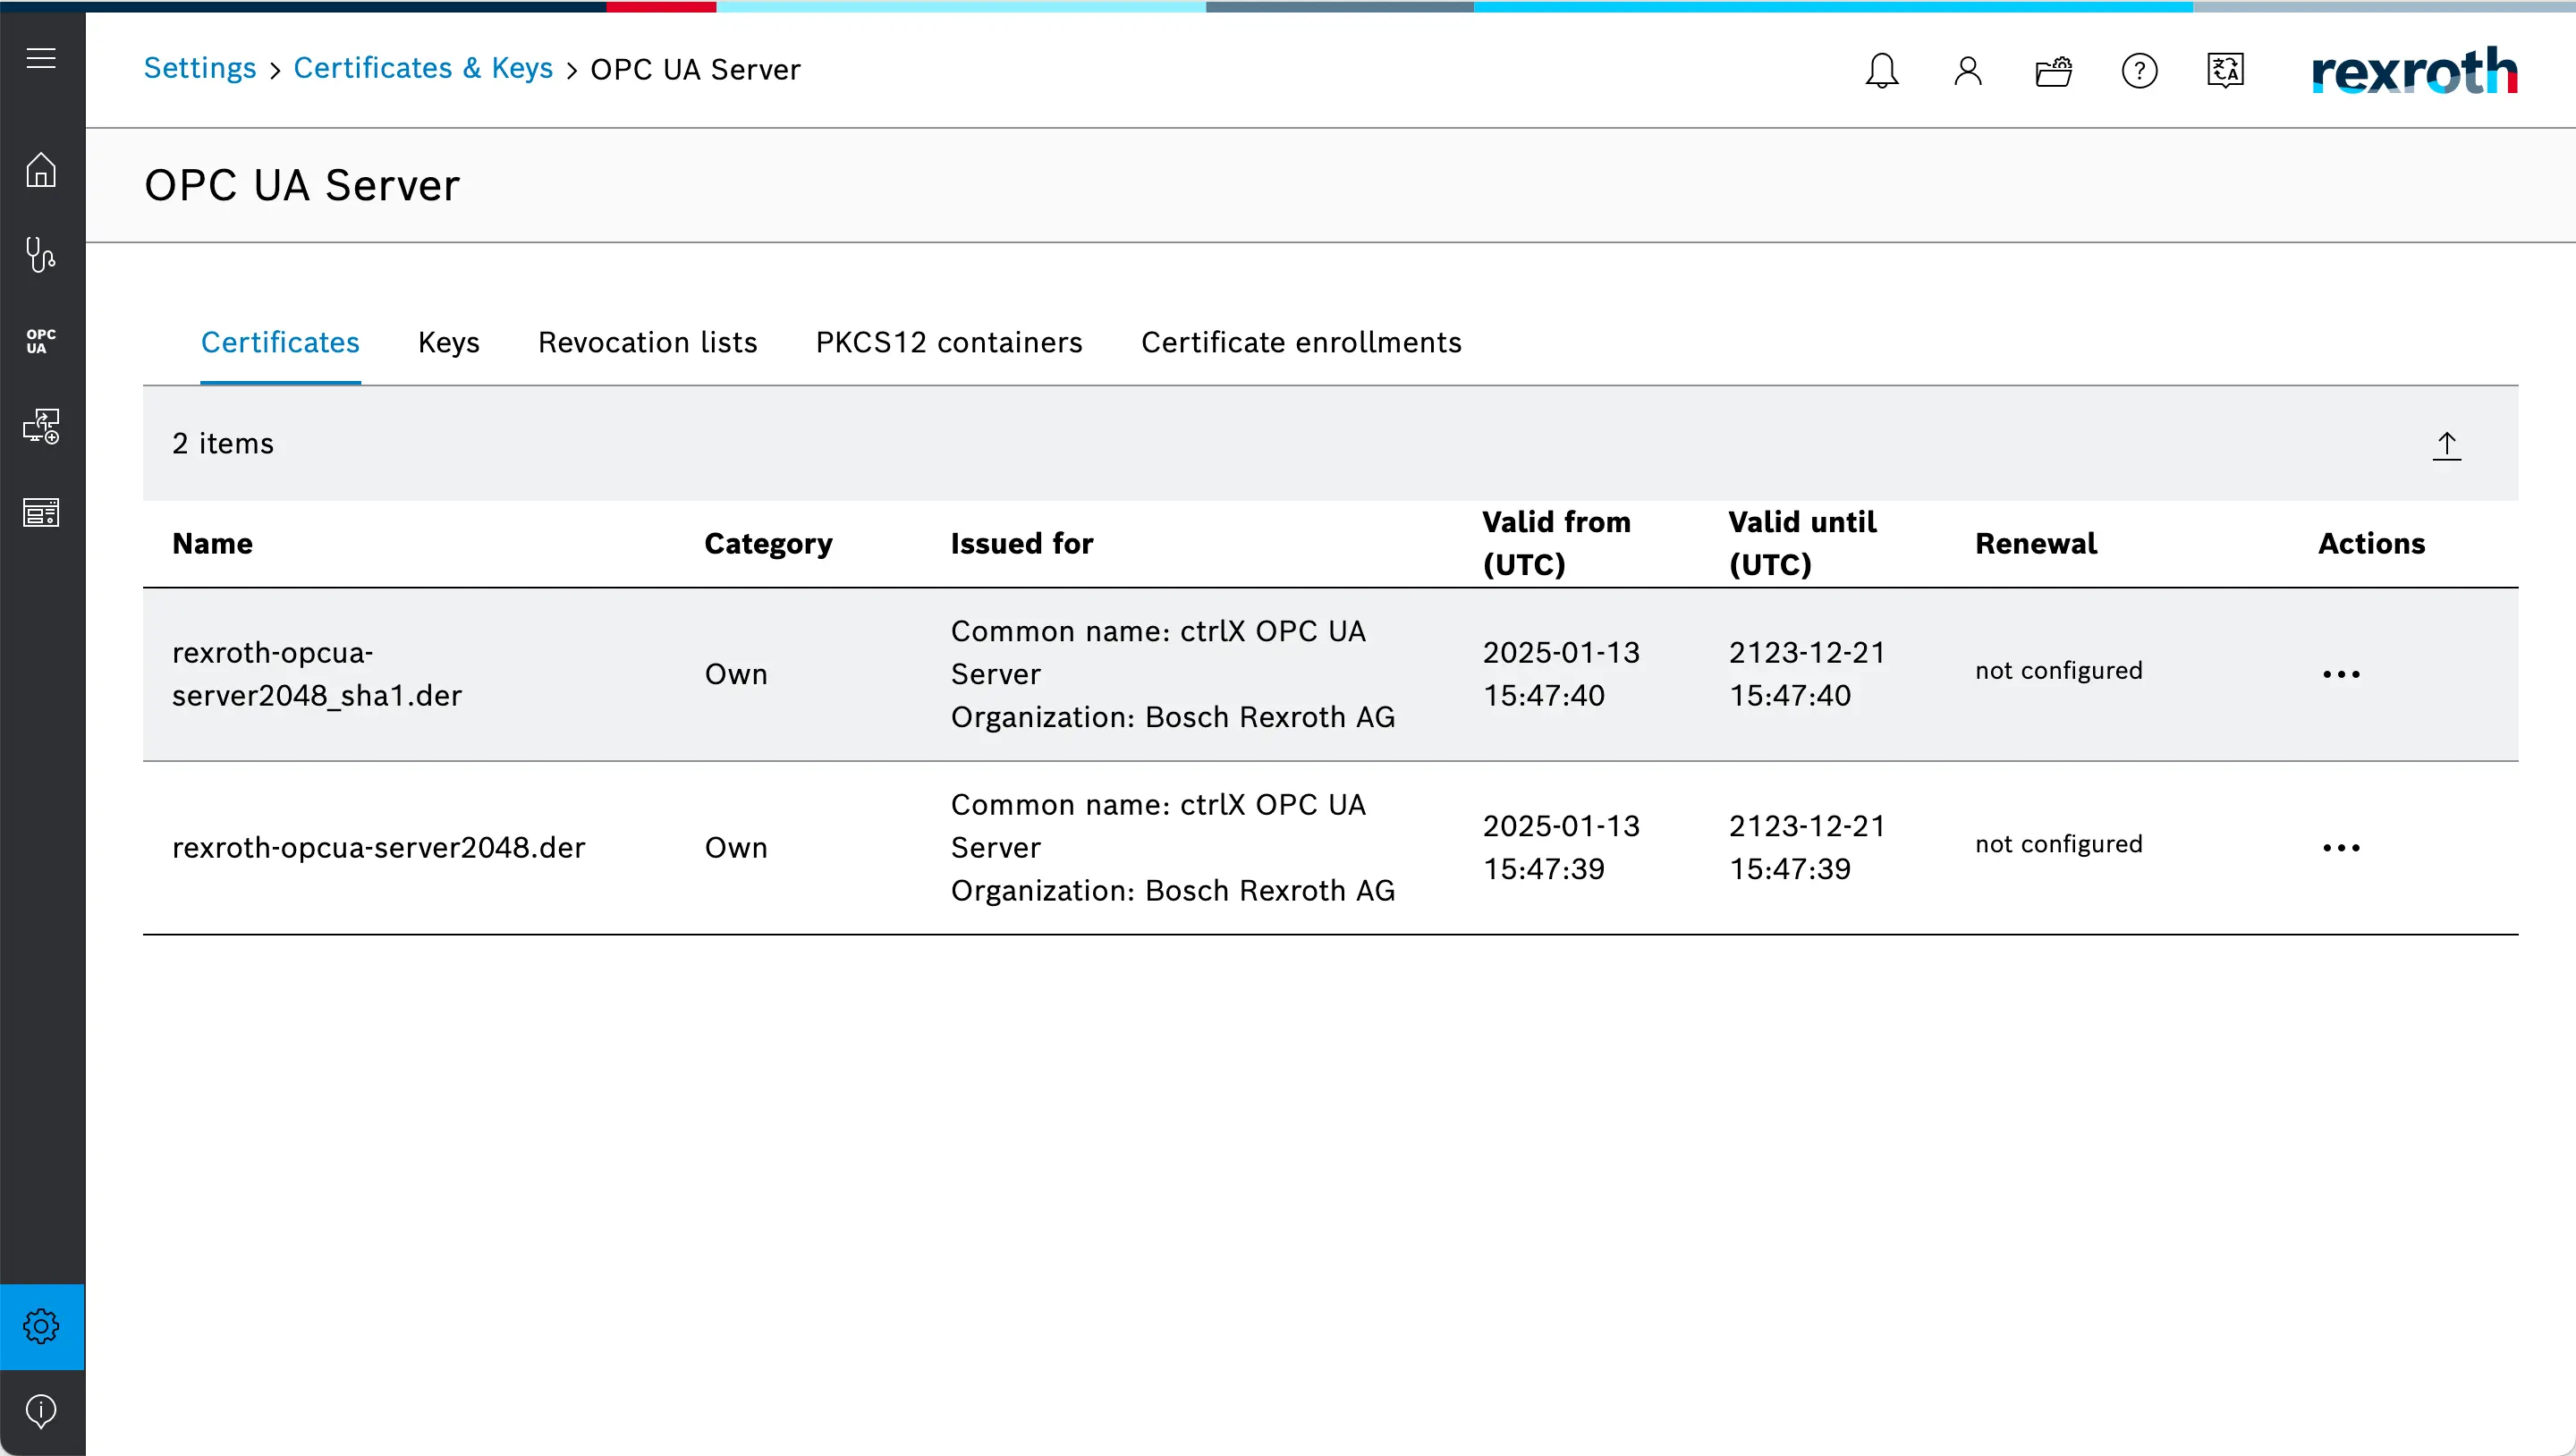
- This is the initial state of the
Certificatesview without any trusted client certificate. - You will need to come back to this view later in order to establish trust between the client, the HELIO Runtime and the OPC-UA server.
B. Create a New Project And a Connection
- Setup a Project
Next, we are going to connect to the OPC-UA server from within the HELIO IDE. So if you haven't already:
- Sign Into the HELIO IDE for the First Time
- Create a New Project
- And switch to the Data View
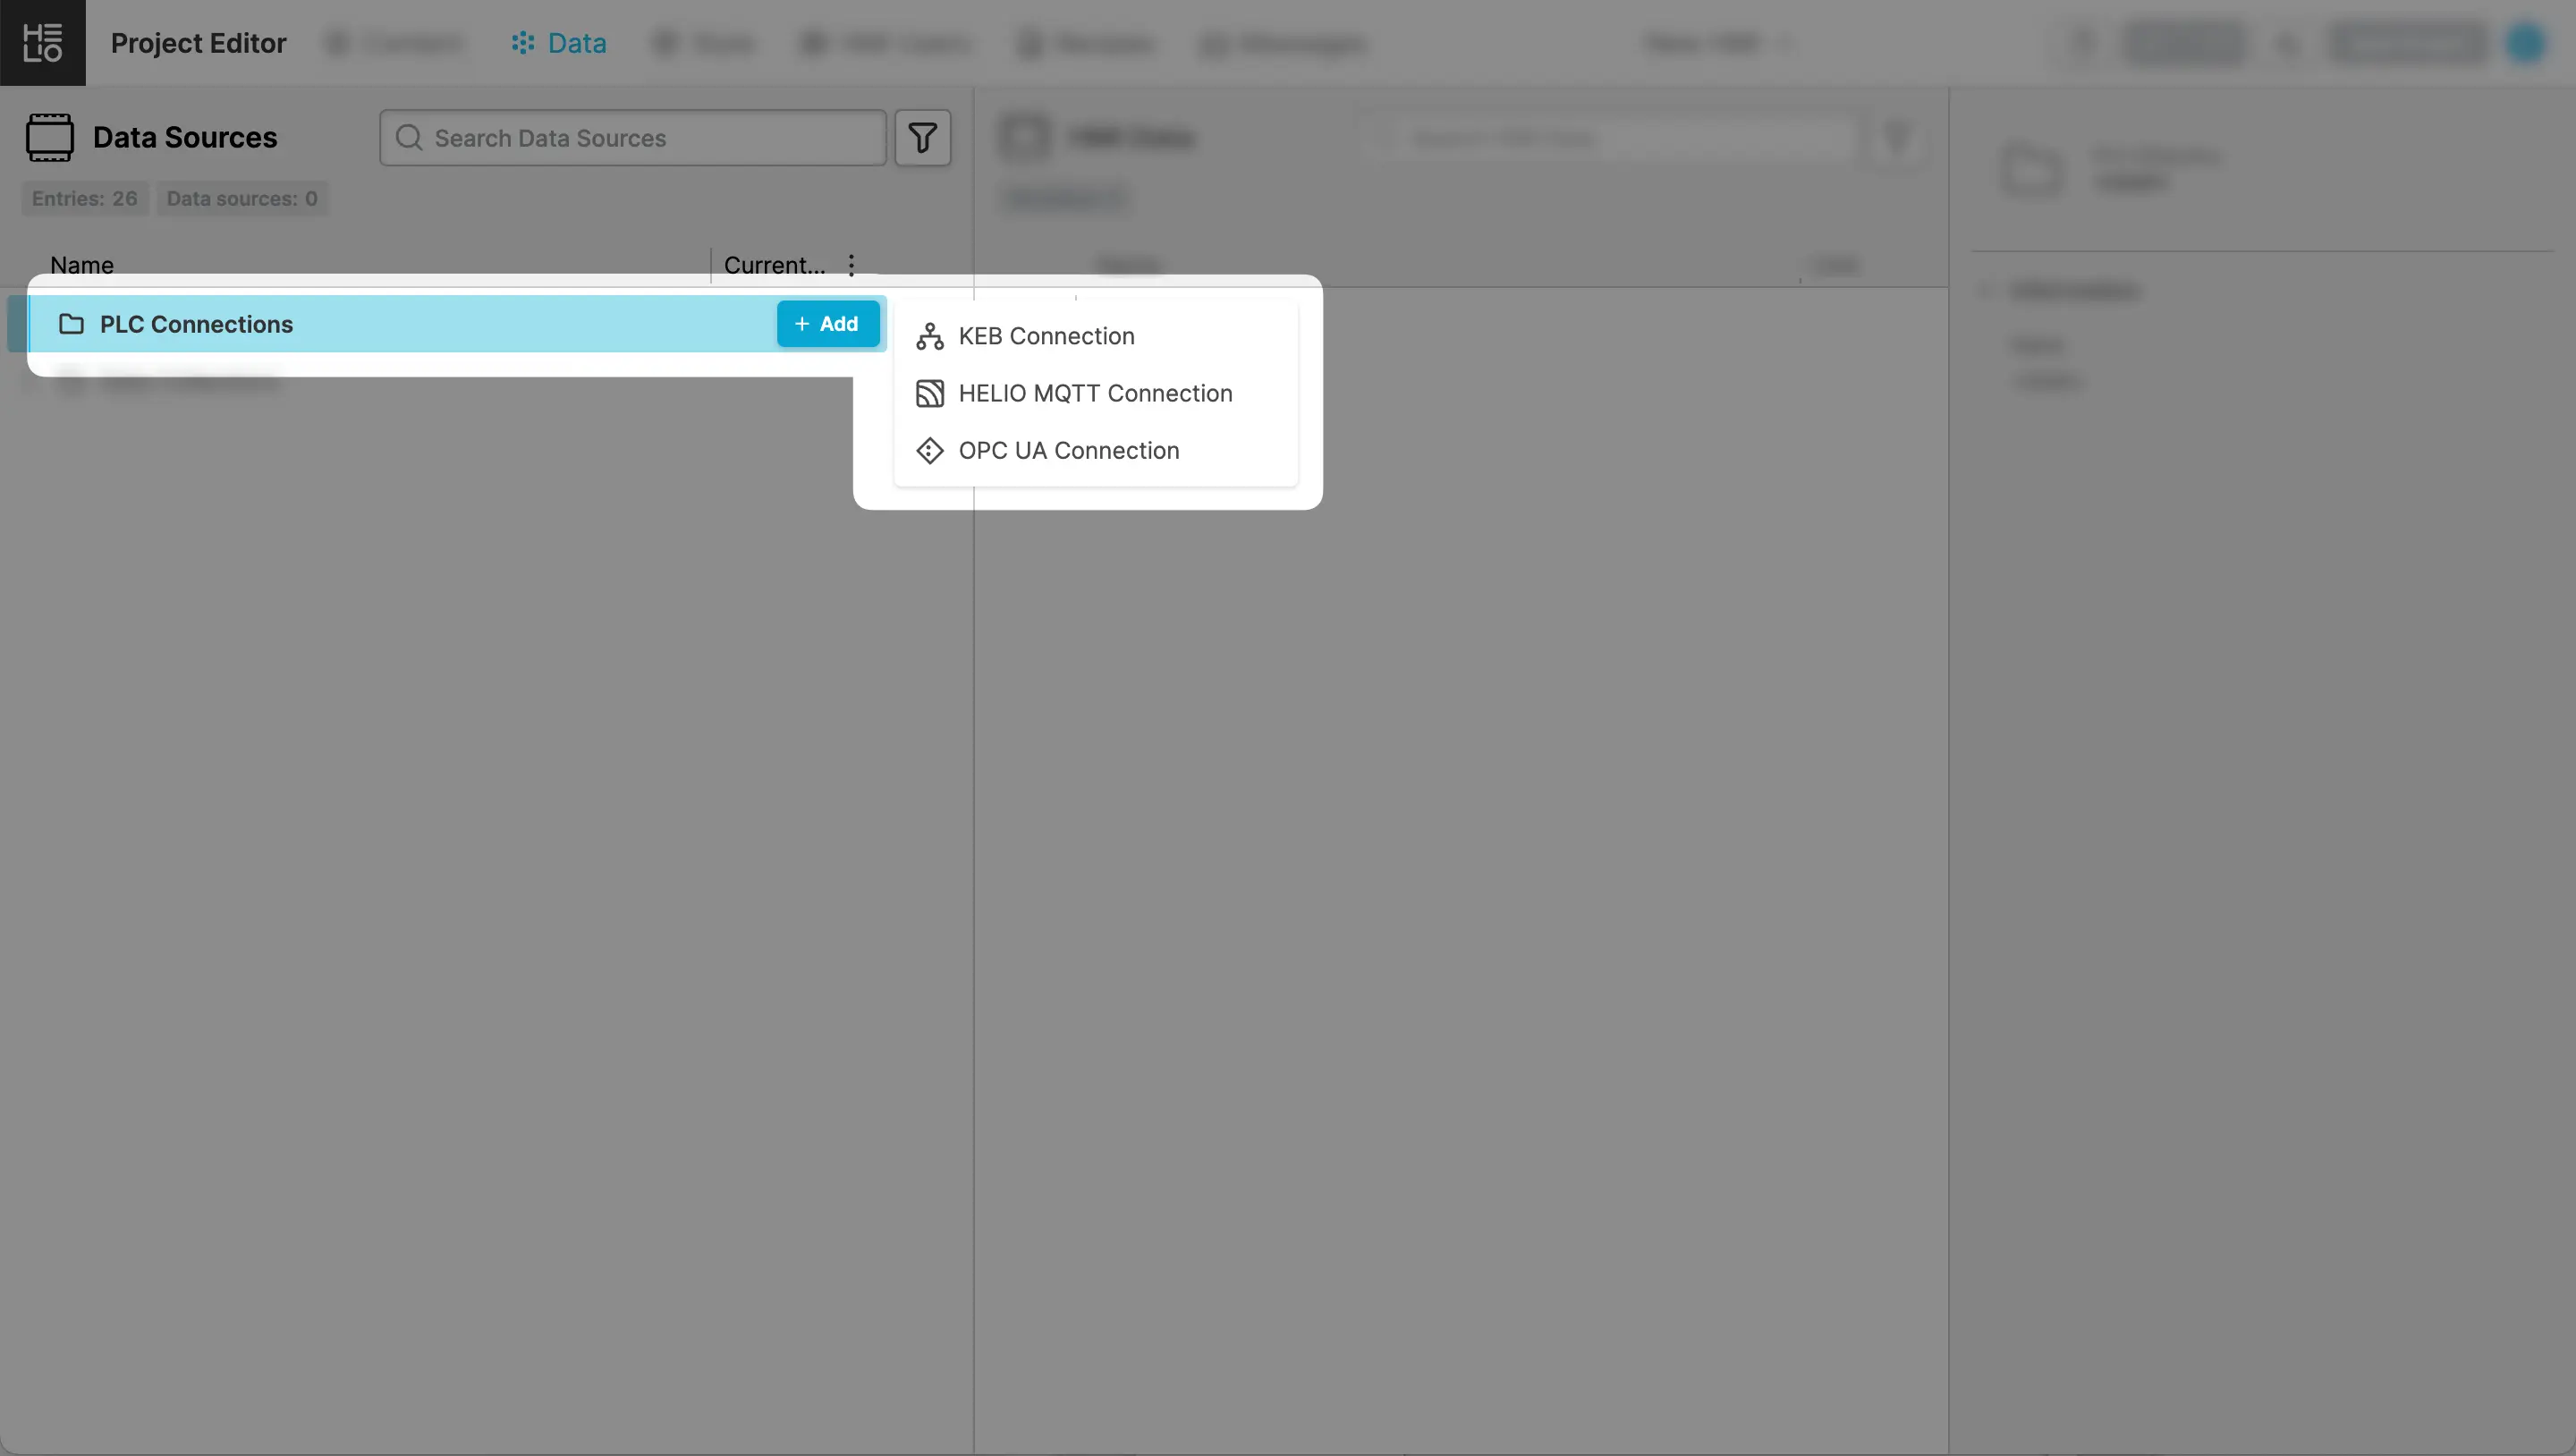
- Add New Connection
In the Data Source Explorer, add a new OPC UA Connection.
C. Configure the Connection
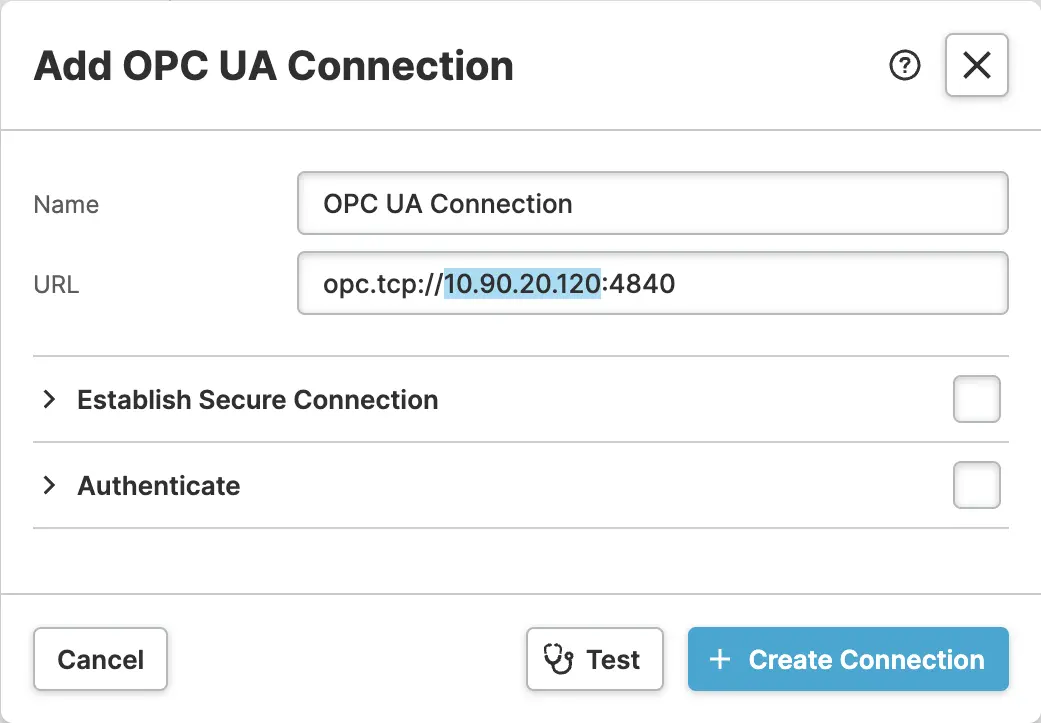
- Specify the
URL
We must first decide on a URL. The default value is fine in most cases, but it is still a good idea to verify that. The main question to ask yourself is this:
Where is the HELIO IDE that I'm using to establish this connection running?
- On the ctrlX
- On My Development PC

Beware of the ctrlX-CORE Hostname
In the ctrlX Web Interface, the OPC-UA Server display an Endpoint URL
with the value opc.tcp://ctrlX-CORE:4840.
However using this
hostname causes problems and is therefore currently not recommended.
Use either localhost or the IP address of the ctrlX device as
mentioned above.
- Activate Connection Security
By default, the ctrlX OPC-UA server prefers to have its clients with secure
connections. So let's make him happy and enable the Establish Secure Connection setting.
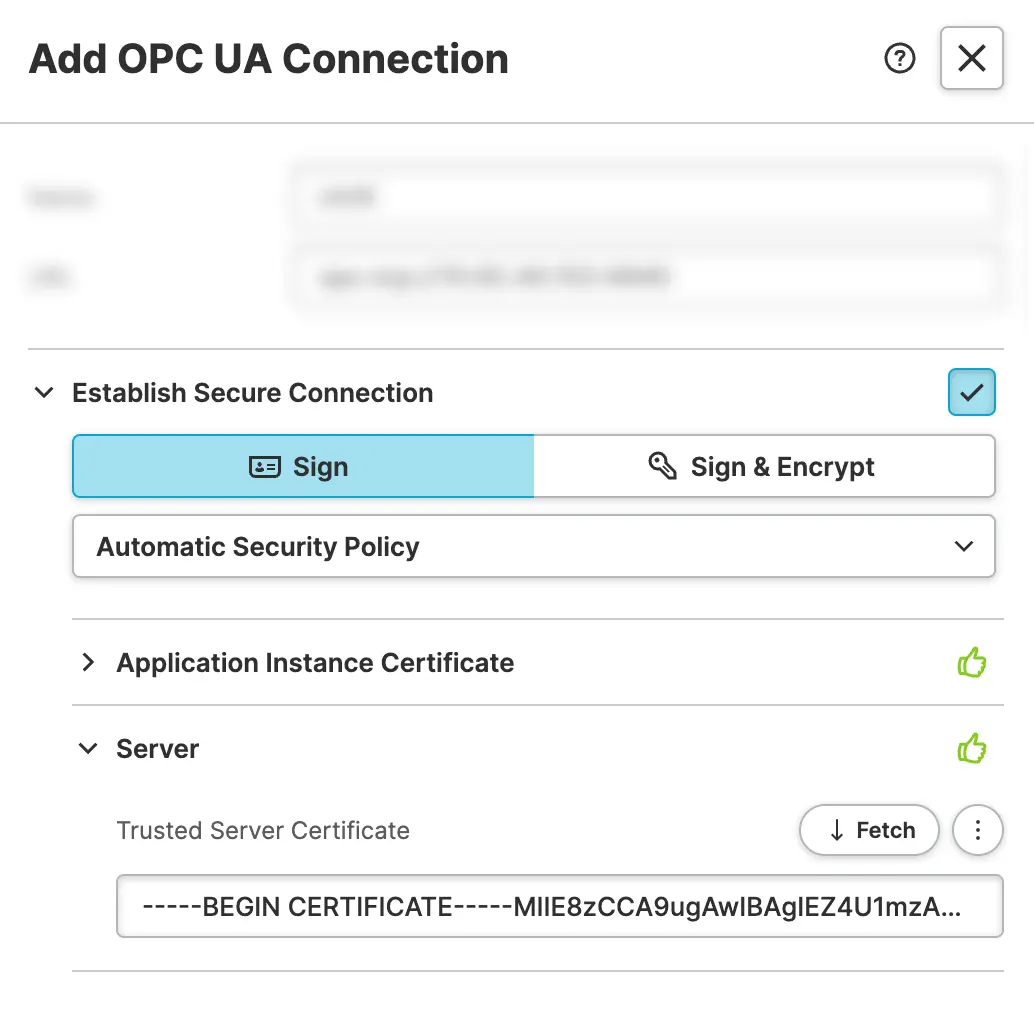
This will result in the following state. Let's go over each of these
sections and break down what they're telling us:
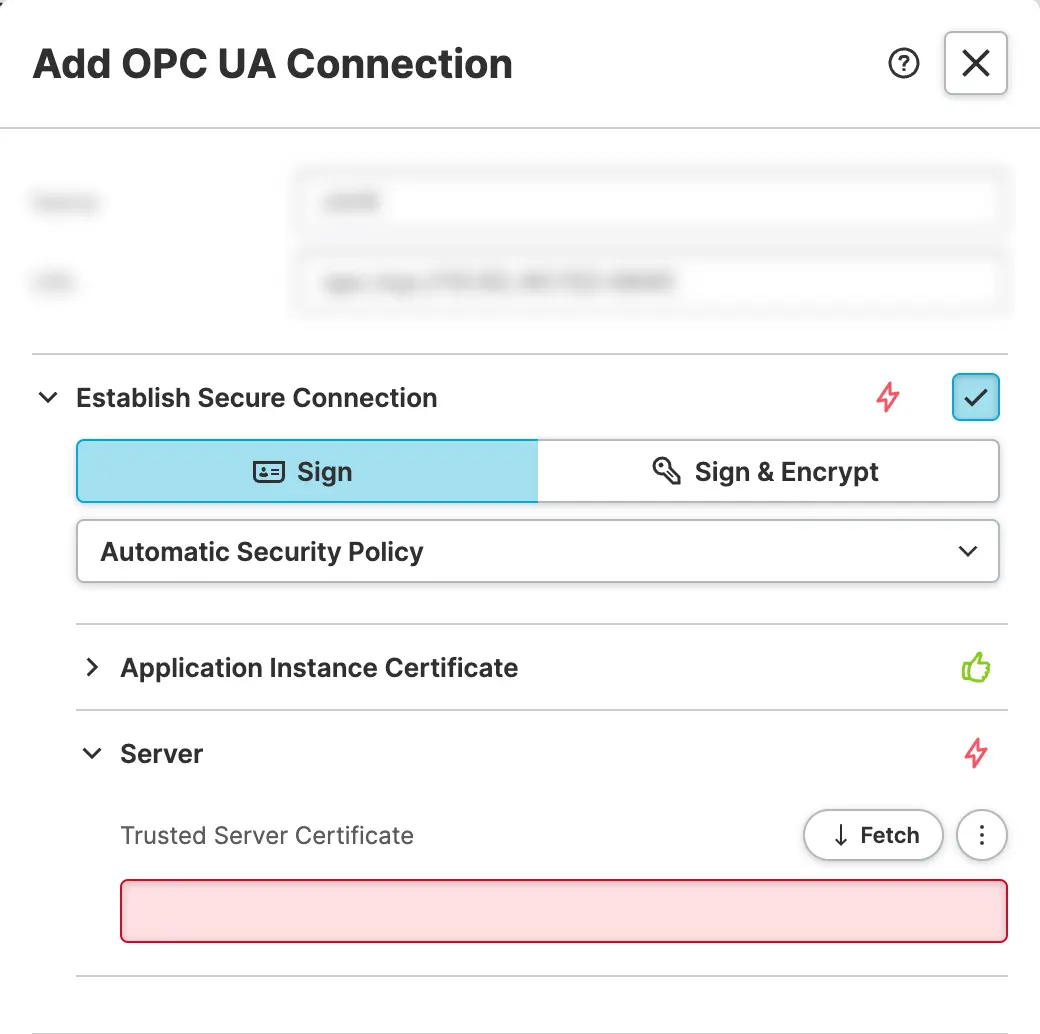
Application Instance Certificate
HELIO sets up brand new Application Instance Certificate for your
project and sends it to your server on every future request.
Learn More
The Application Instance Certificate is the certificate of an
individual Application Instance that has been installed in an
individual host. In your case your HMI project.
Did you know?
- Different installations of one software product have different
Application Instance Certificates. - It is sometimes also referred to as the client certificate as it is the counterpart of your server's certificate.
Trusted Server Certificate
This option let's your store the certificate of the server in order to to establish trust between the HELIO IDE and the server. Good news is that you don't have to provide it manually because HELIO will automatically try to fetch the server's certificate.
Confused by the Error?
Don't worry, this is actually a good sign! It tells you that your server's security is working as intended. Because it just doesn't trust HELIO - at least not yet.
And how could it? The two participants haven't been properly introduced. Let's change that, introduce both of them, and build some trust!
- Build some Trust on the Server Side
First we are going to switch to the ctrlX Web Interface and make sure to trust HELIO's Application Instance Certificate. The list of certificates should now look something like this:
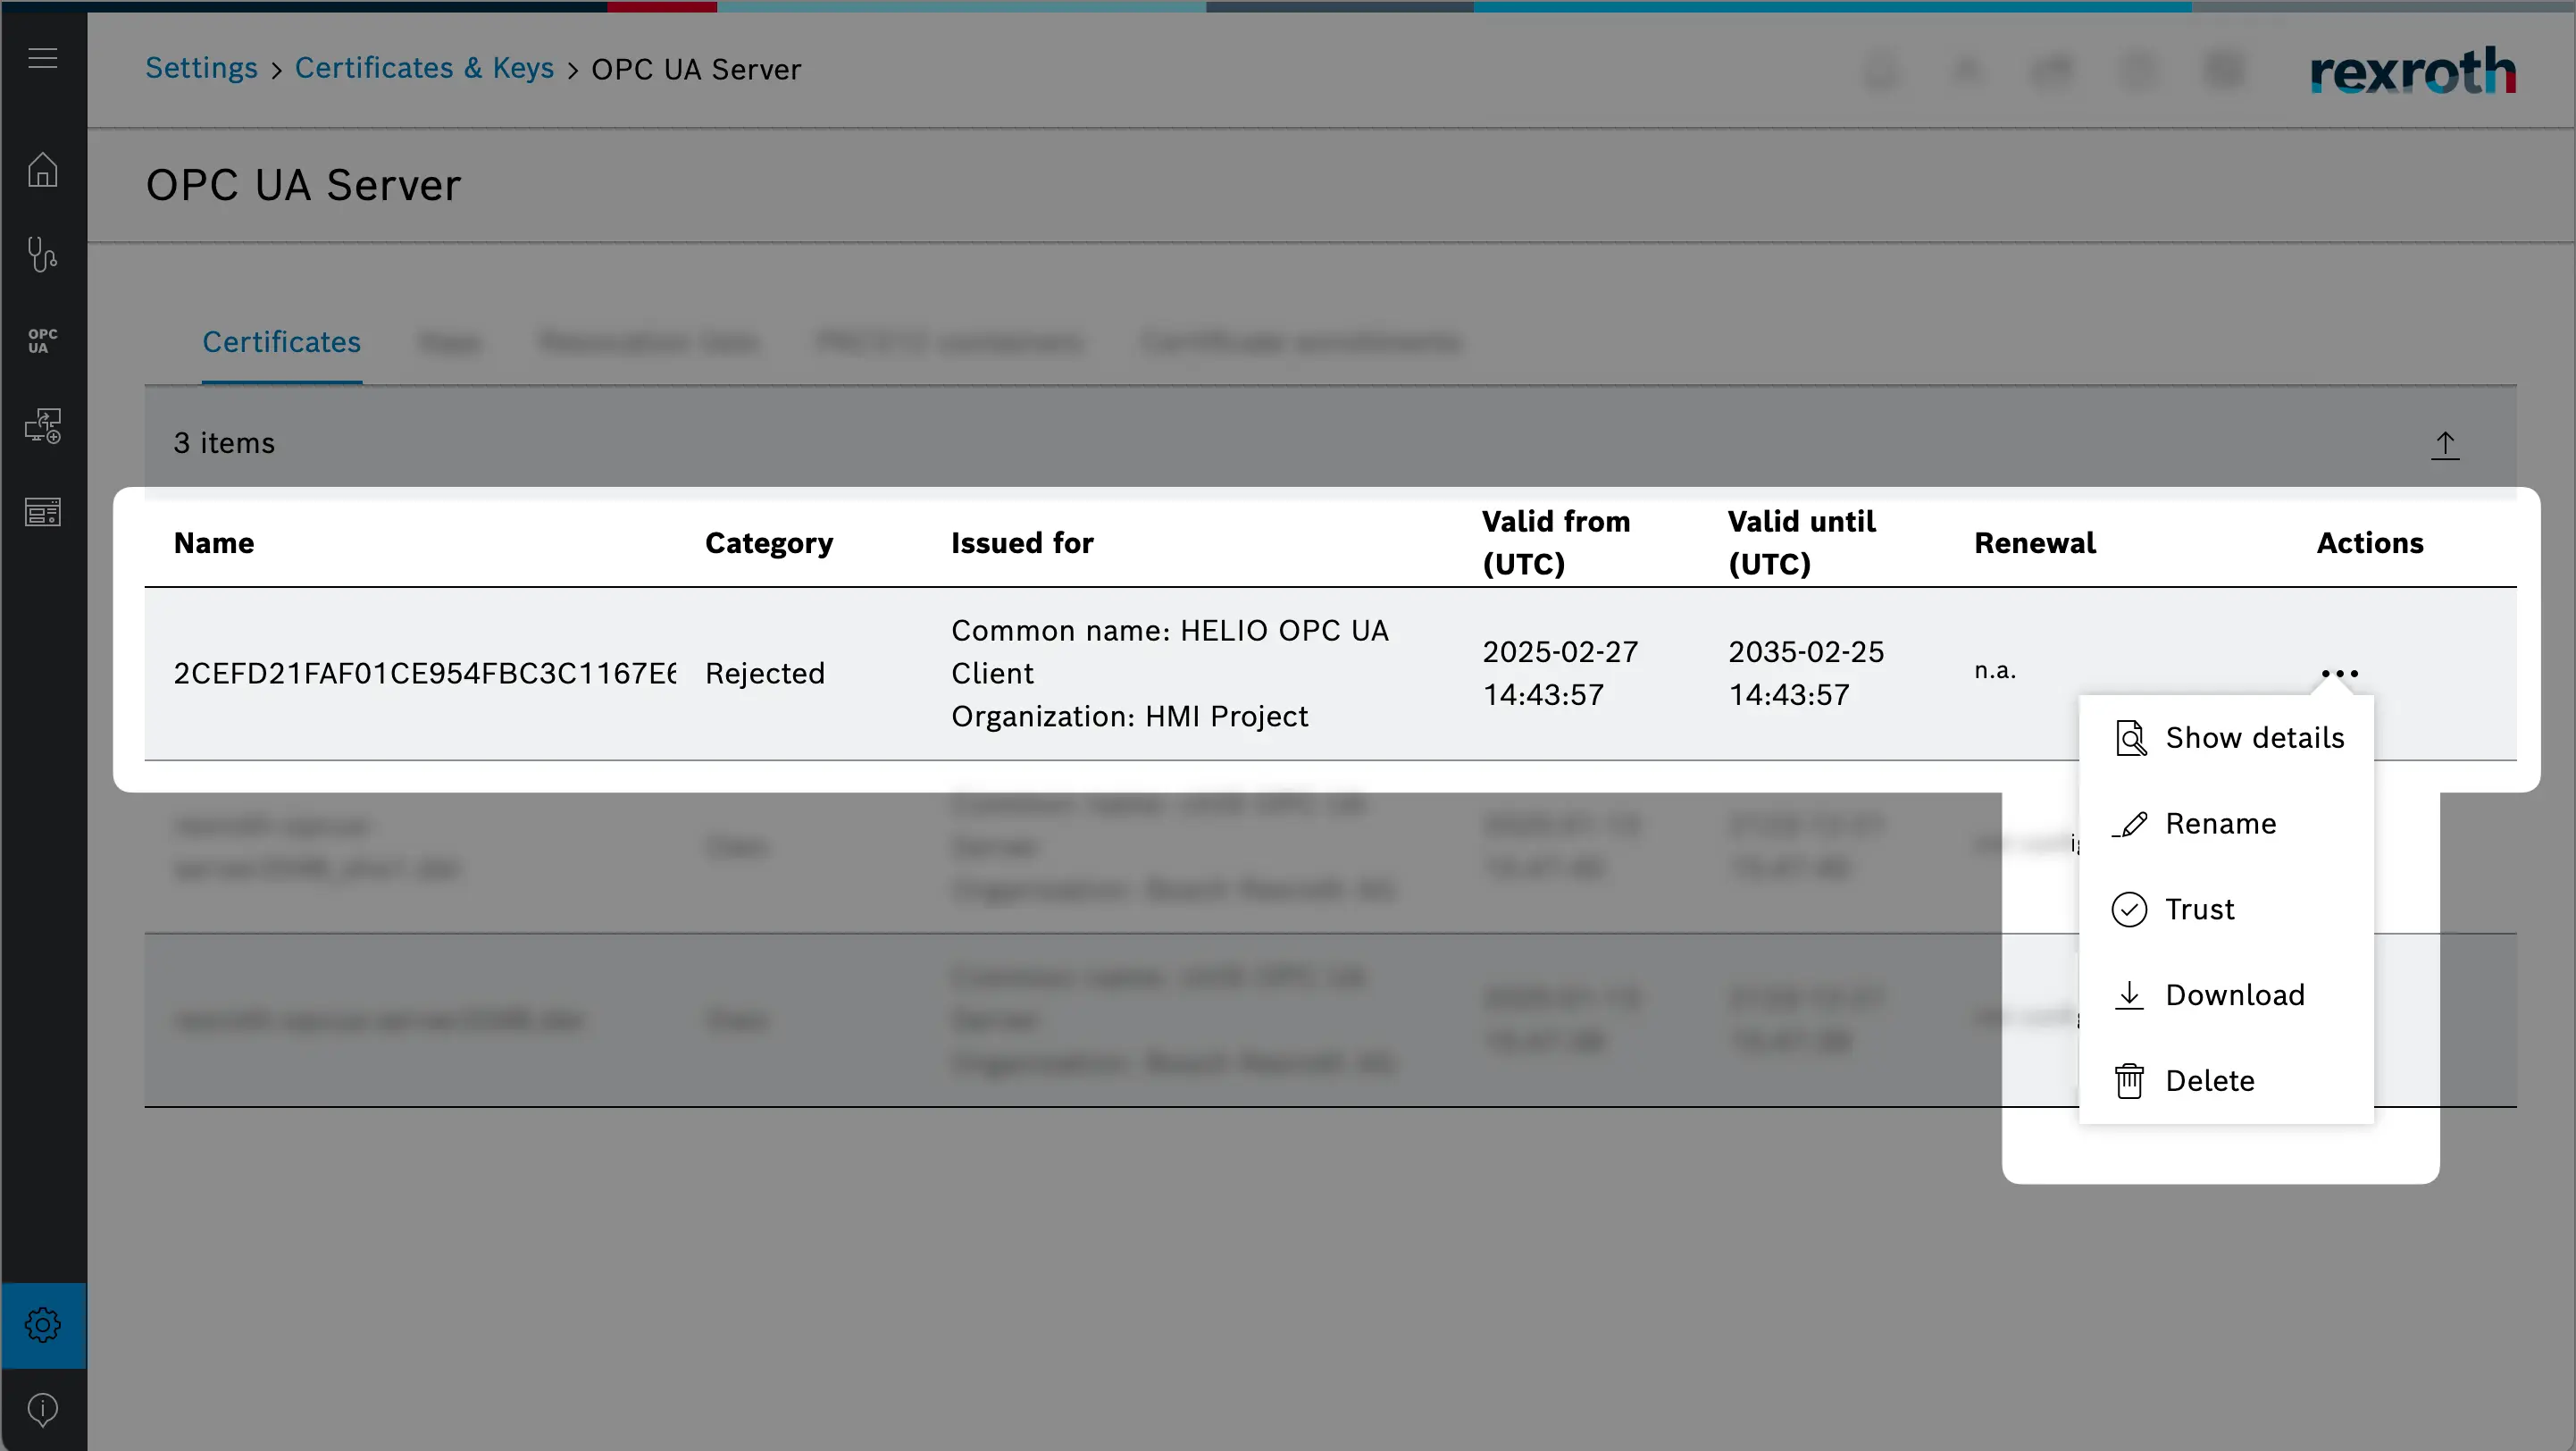
There should be a new certificate in the list by now. Make sure to Trust
HELIO's' certificate using the action menu.
You don't see a HELIO certificate yet? Fetch again!
If you do not see a HELIO certificate in the list, just click on
the Fetch button again. This will make sure HELIO will contact
the server once more and send the certificate again.
Let's recap: we have now made sure that the server trusts HELIO. This allows HELIO to retrieve the server's certificate. So let's do it!
- Establish Full Trust on the Client
Since trust is a two-way street, we need to make sure HELIO trusts the
server as well. In order to do that let's hit that Fetch button one last time and
make sure HELIO is able to get the certificate and store it as
the trusted server certificate. Your connection should now look something
like this:
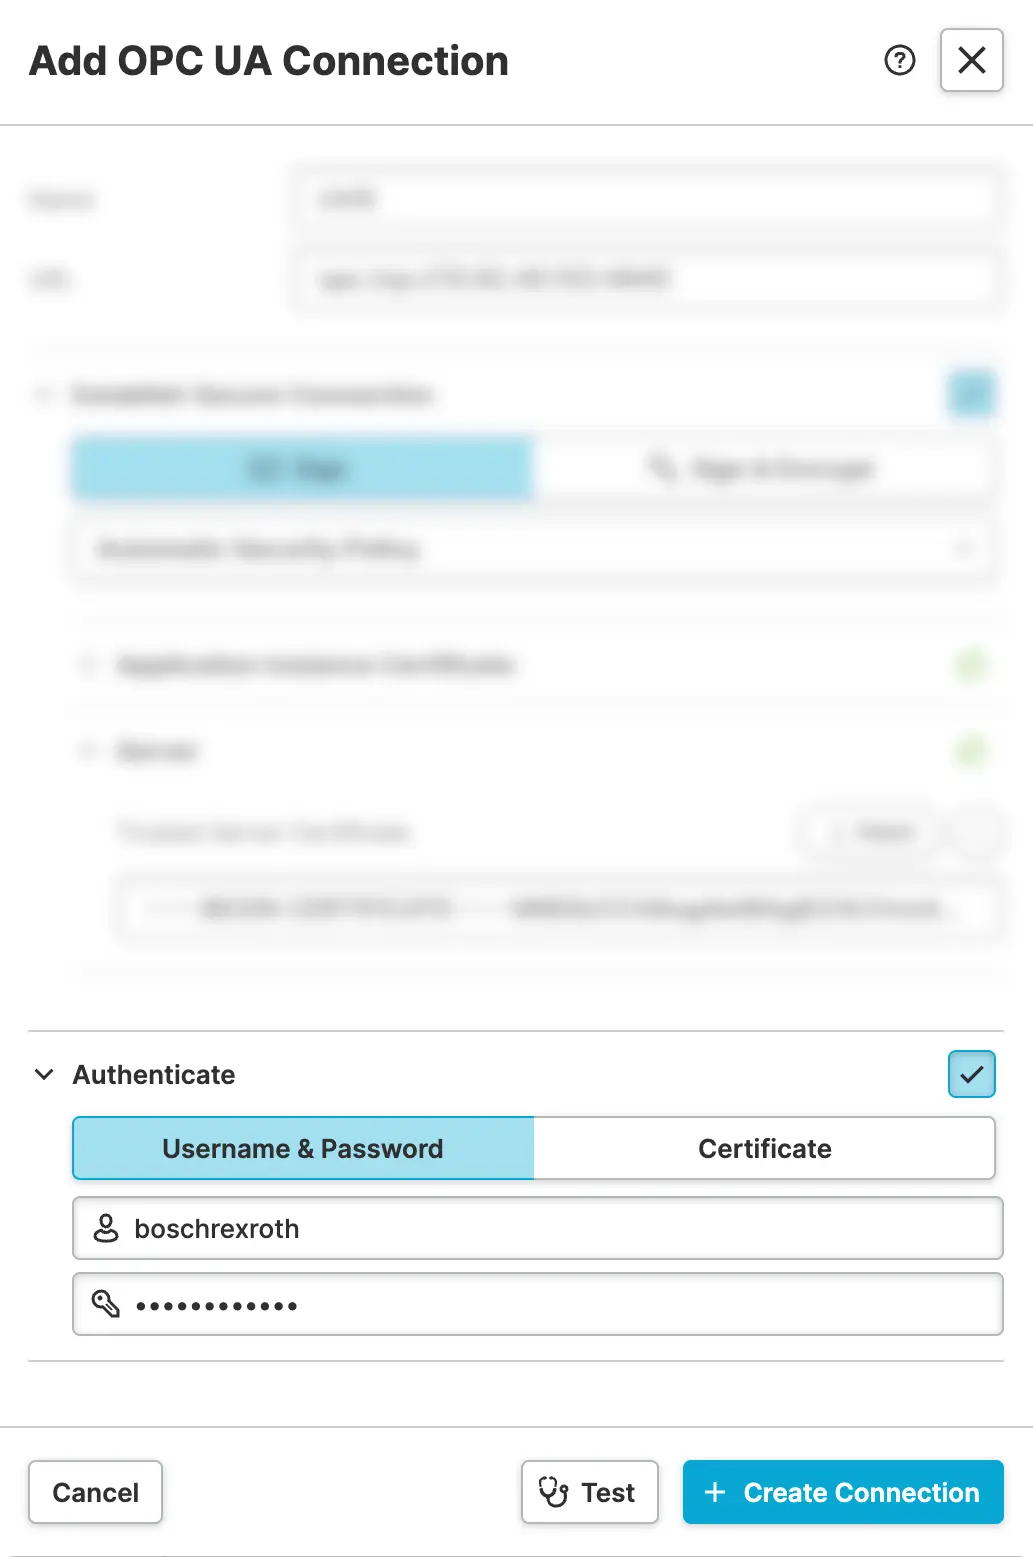
- Enable Authentication
Now the last thing we need to do is to make sure that HELIO uses the correct credentials when communicating with the server. By default the server has username and password authentication enabled:

Back in the HELIO IDE we're going to:
- Enable authentication by ticking the
Authenticatecheckbox - Stick with the default
Username & Passwordoption - Provide the correct credentials of the default
boschrexrothuser of our ctrlX device.
Of course, if you have already customized users and credentials on your ctrlX device, be sure to use those credentials.
Get Connected
- Do a final connection test using the handy
Testbutton - Hit the
Create Connectionbutton and wait for HELIO to connect, analyze and show the data tree of the PLC server
Then your IDE should look something like this:
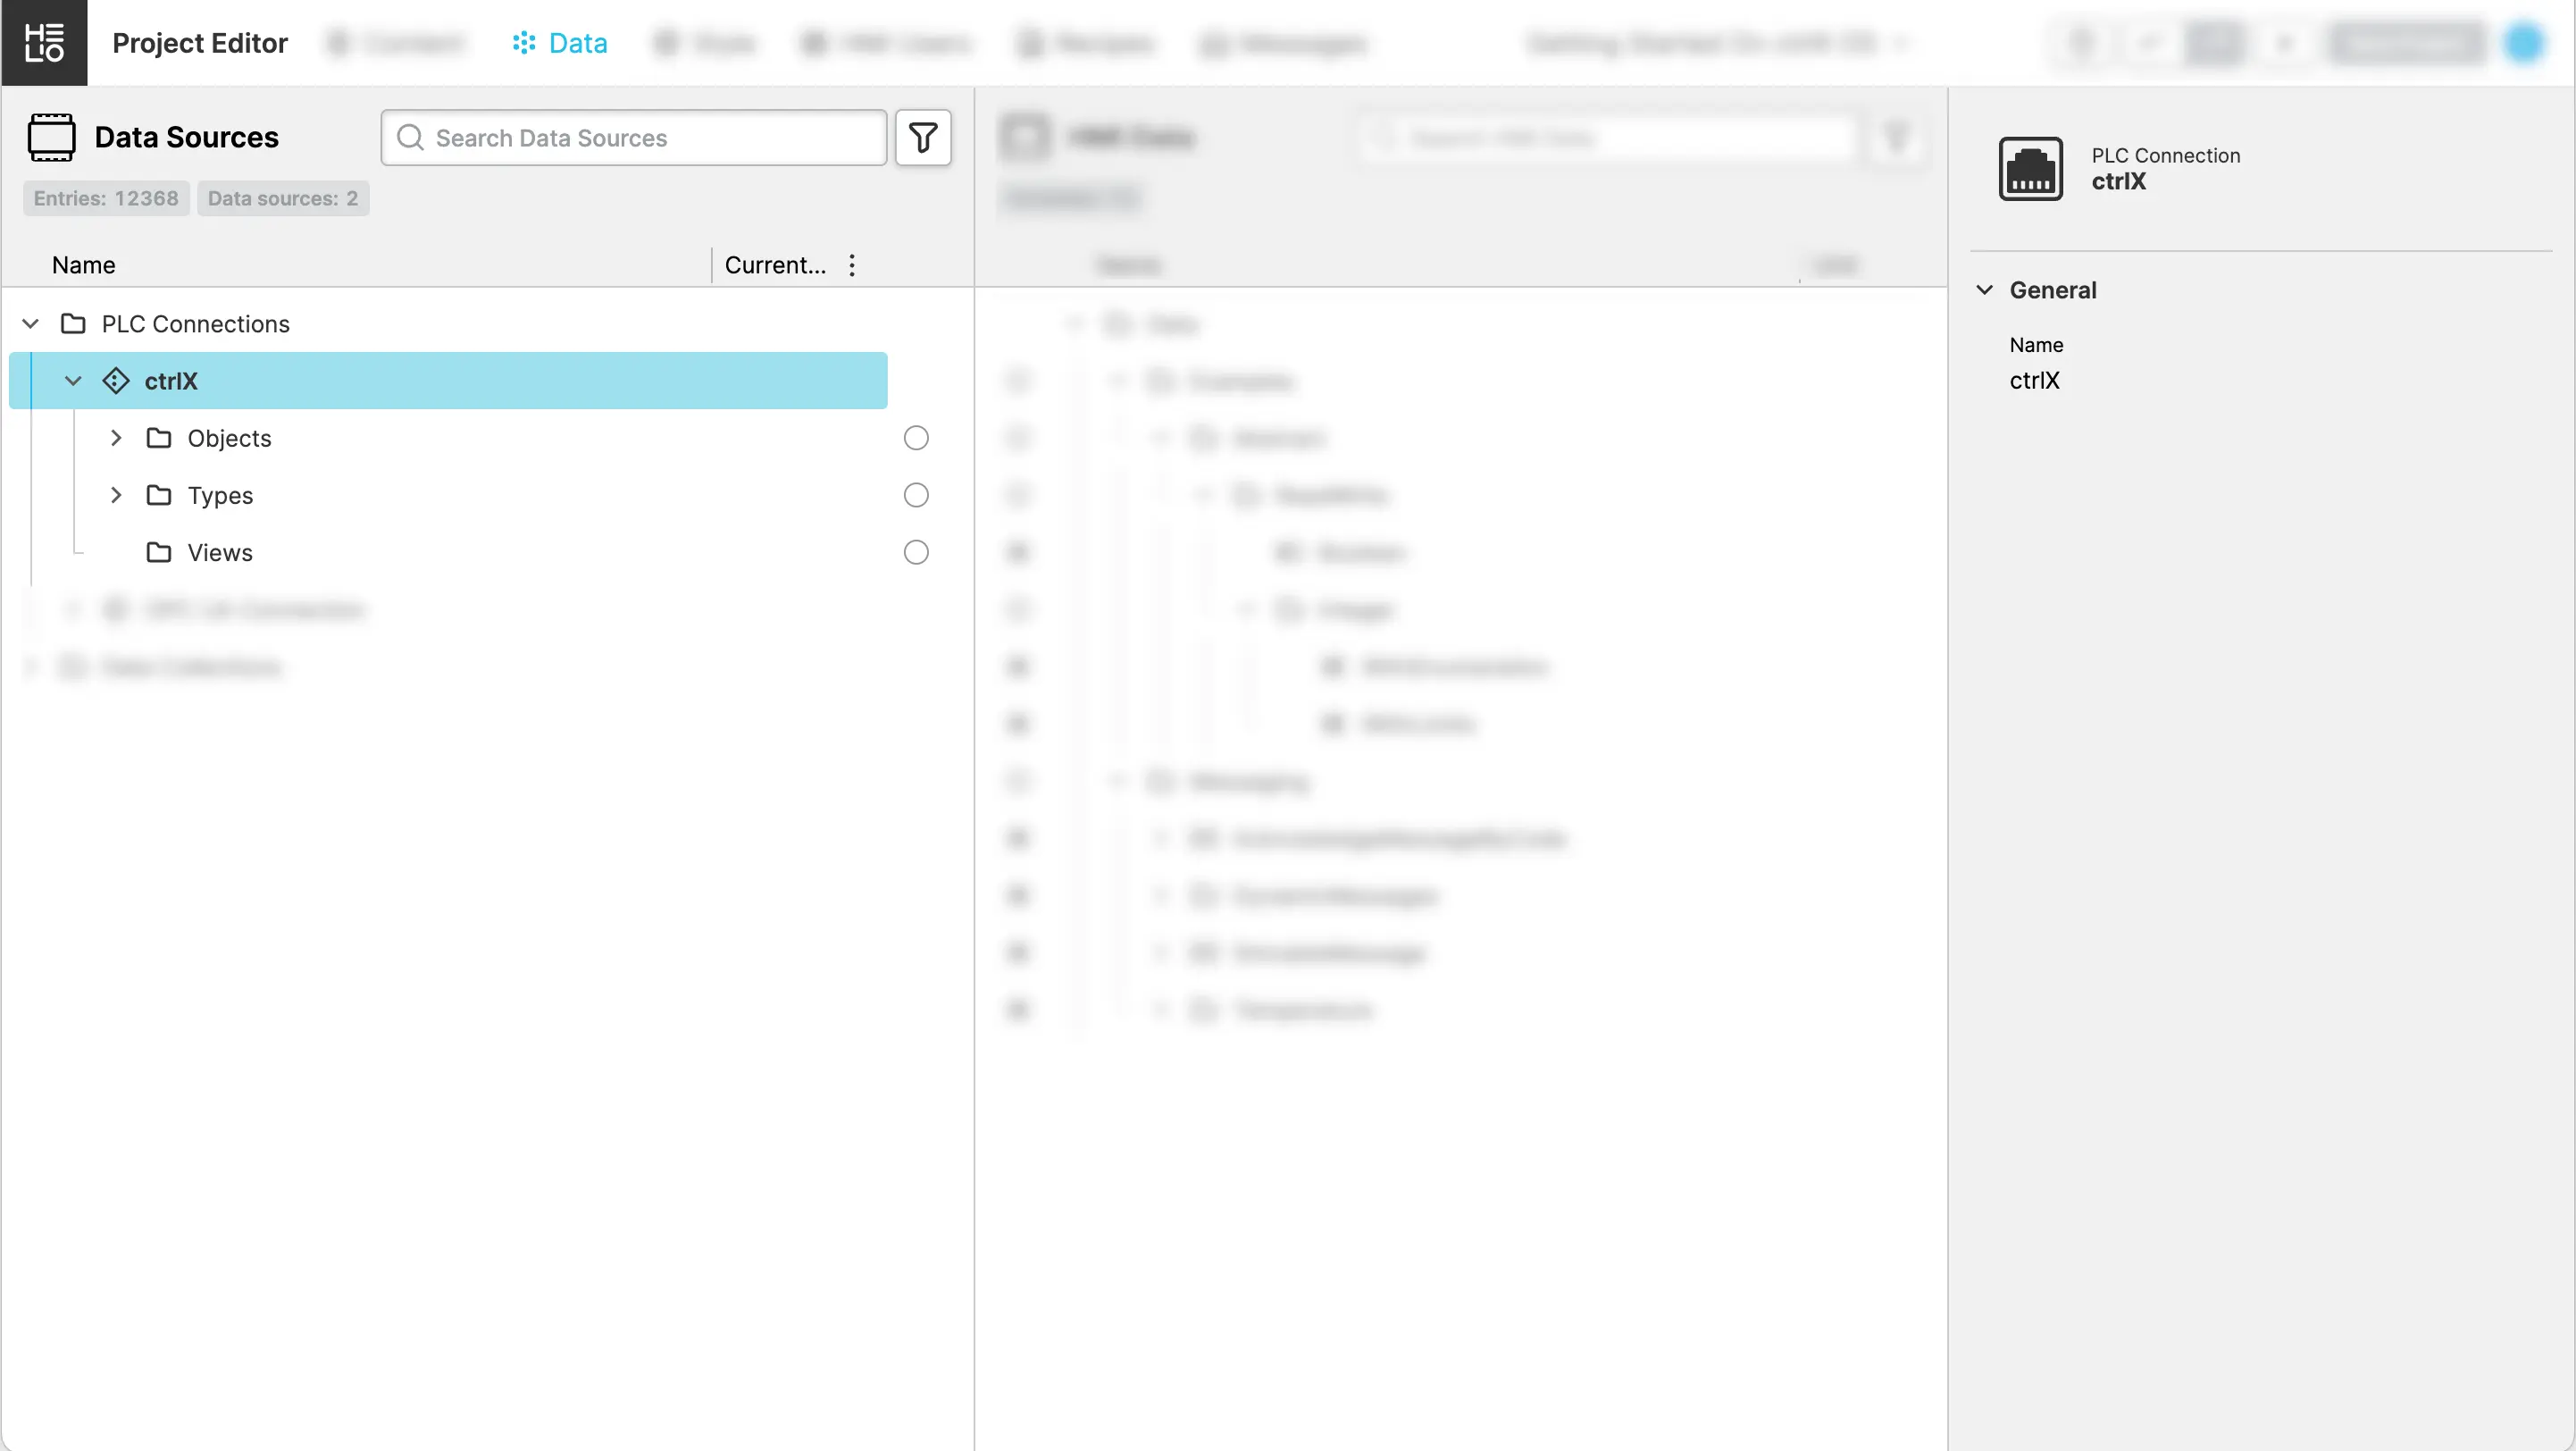
You've connected to the Data Layer using OPC-UA successfully!