Trigger Messages Using Dynamic Messages
In a previous step, we learned how to trigger messages by watching numeric variables or setting the bits of a variable. In more advanced scenarios these basic ways of triggering messages can be too limited.
For example:
- You have a huge amount of possible
Message Types. - You want the PLC to have control over message metadata like
Level,Title,Description, etc. - You want to add additional metadata to your messages from your PLC .
All those situations are perfect use cases for using the Dynamic Message triggers.
Let's find out how they actually work.
1. What is a Dynamic Message Object?
First, let's clarify what Dynamic Message Objects actually are. Each Dynamic
Message is a PLC data structure that can trigger messages and needs to adhere to
the following rules:
A Dynamic Message Object…
- Must be represented as a directory which contains child variables.
- Must contain a
Codevariable that will actually trigger the message. - Can optionally include additional variables that can be be used to define message metadata.
Code (required)
Code (required)- Its value represents the Message Code of the message that shall be displayed
- Must be of type String. But can of course be used to represent numerical values as well.
- Signals HELIO to display a message, if the variable is set to a non-empty string e.g.
WARN-001 - Signals HELIO to remove the message, if the variable is set to an empty string again.
- Should best be called
Code, but you can actually call it however you like.
Level (optional)
Level (optional)- Is used by HELIO to determine the level of the message. See Messaging Basics: Storage, Codes and Levels for more details…
- Must be of type String.
- Allowed values:
Info,Warn, orError.
Title (optional)
Title (optional)- Is displayed by HELIO in the Message Dialog as the title of this message.
- Must be of type String.
- Can be a Translation Key. HELIO will translate it automatically.
Description (optional)
Description (optional)- Is displayed by HELIO in the Message Dialog as the description of this message.
- Must be of type String.
- Can be a Translation Key. HELIO will translate it automatically.
2. Create the Most Basic Dynamic Message Object
- Locate the
Examples/Concrete/Messaging/DynamicMessagesVariables
Locate the Dynamic Message objects in the Data Source Explorer.
You should spot them in this directory:
Examples/Concrete/Messaging/DynamicMessages.
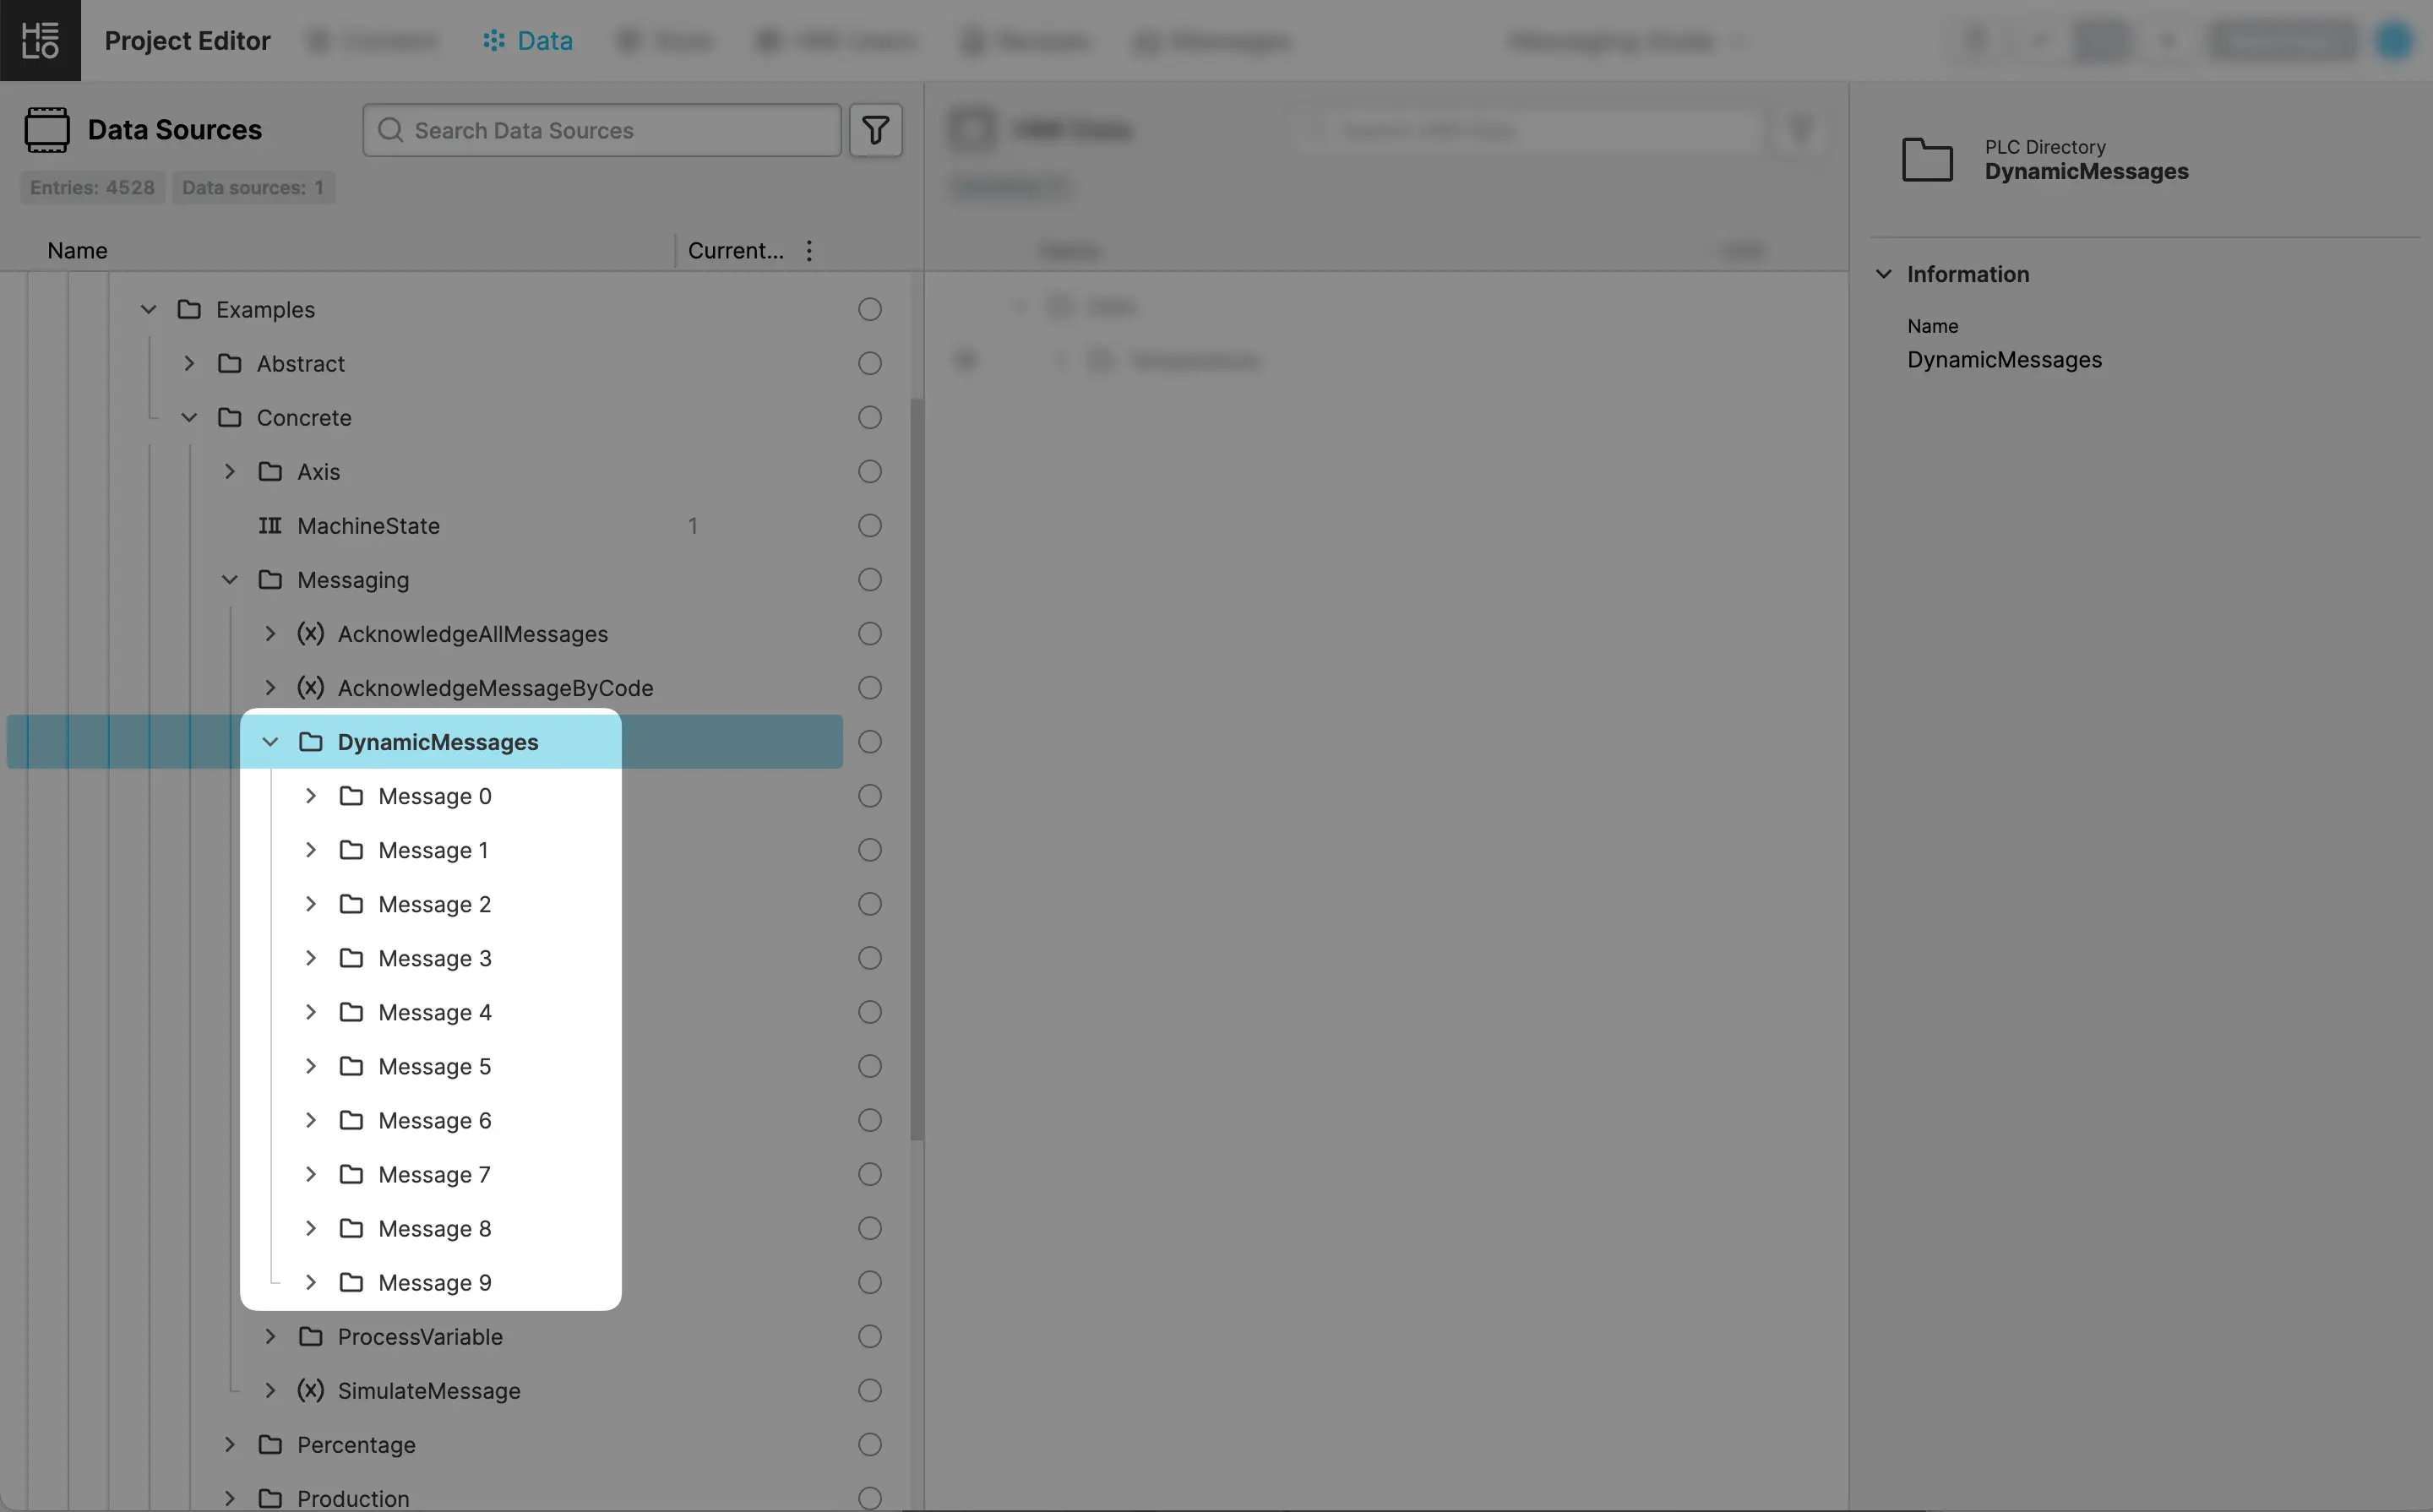
- Import the Variables
Let's import the variables and method into the project so that we can use it in our HMI.
- First of all import the whole
DynamicMessagesfolder as it contains our dynamic objects. - We're also going to use the two methods
AcknowledgeMessageByCodeandSimulateMessage. Make sure you import those, too.
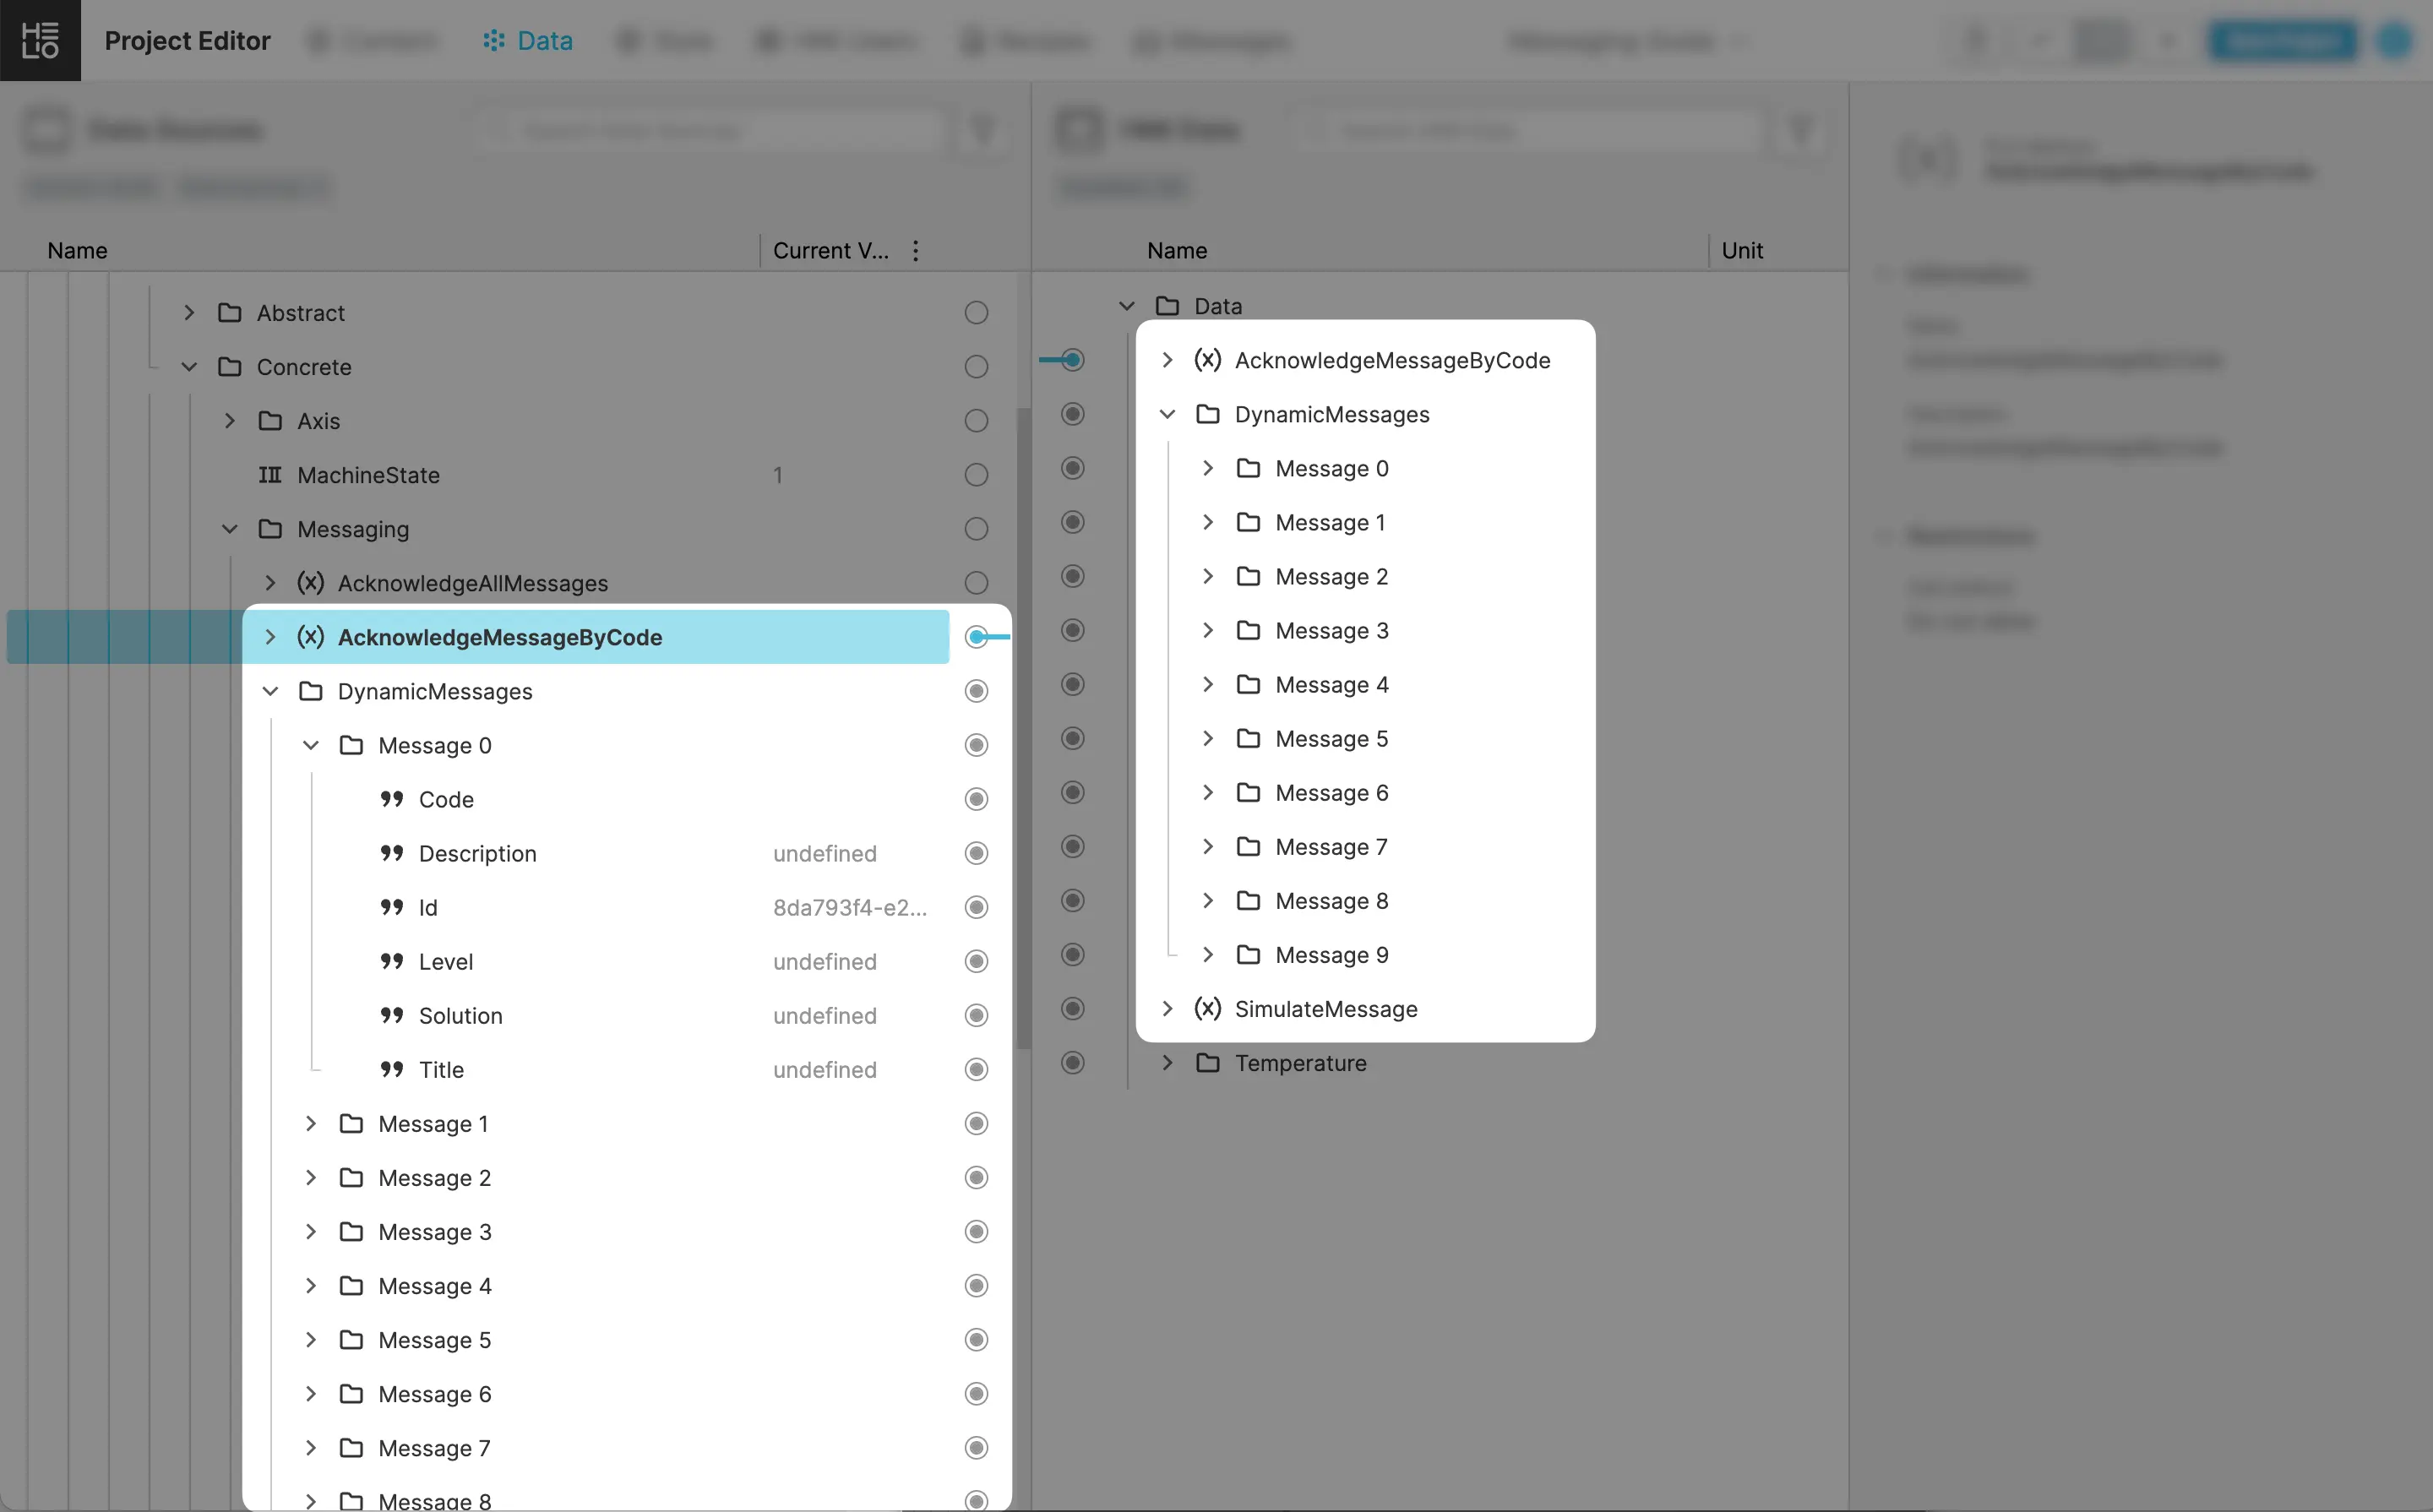
Why Do We Need those methods?
The SimulateMessage method is only needed for simulation purposes; it
tells our PLC to fill one of our dynamic objects, so we can simulate a message
appearing on our PLC.
The second method, AcknowledgeMessageByCode, is also required when you
deploy your HMI to your customers. It's how HELIO tells your PLC that
operators have acknowledged a message. This is important because your
PLC might need to react to these acknowledgements.
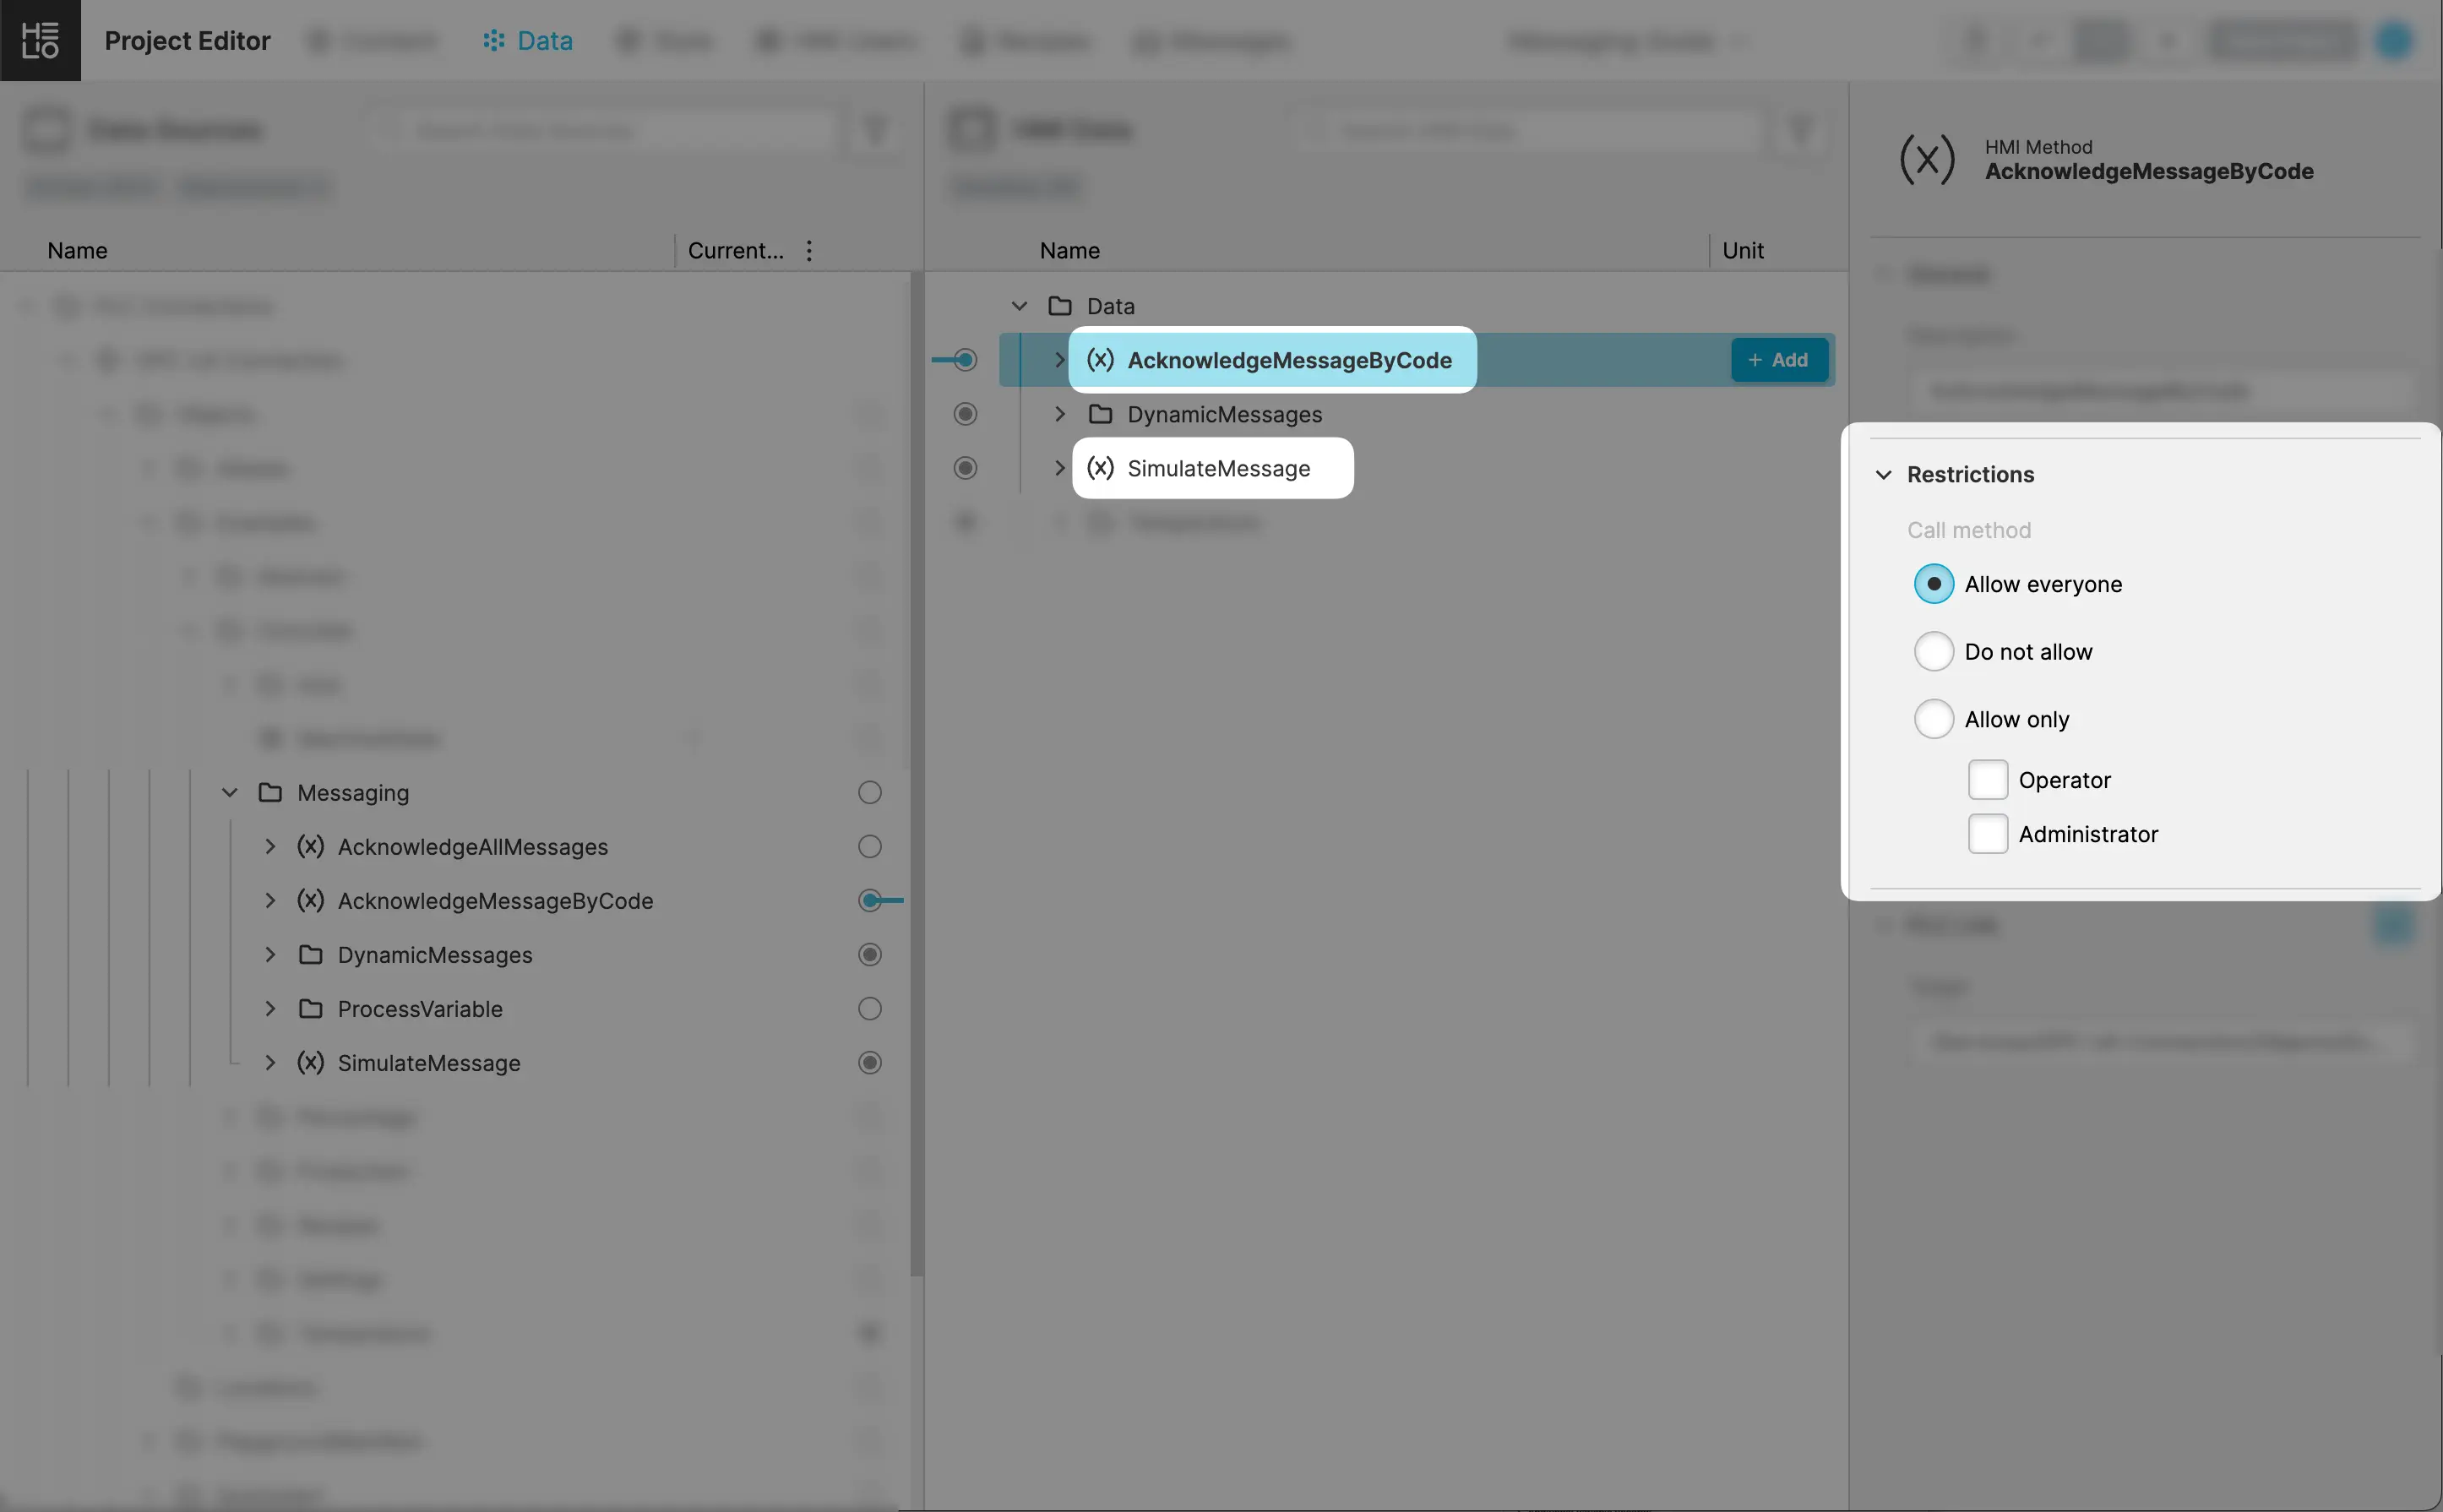
- Set Restrictions
3. Setup Your Triggers
Now that we've got a possible source, we need to define an actual Message Type that will get triggered and displayed.
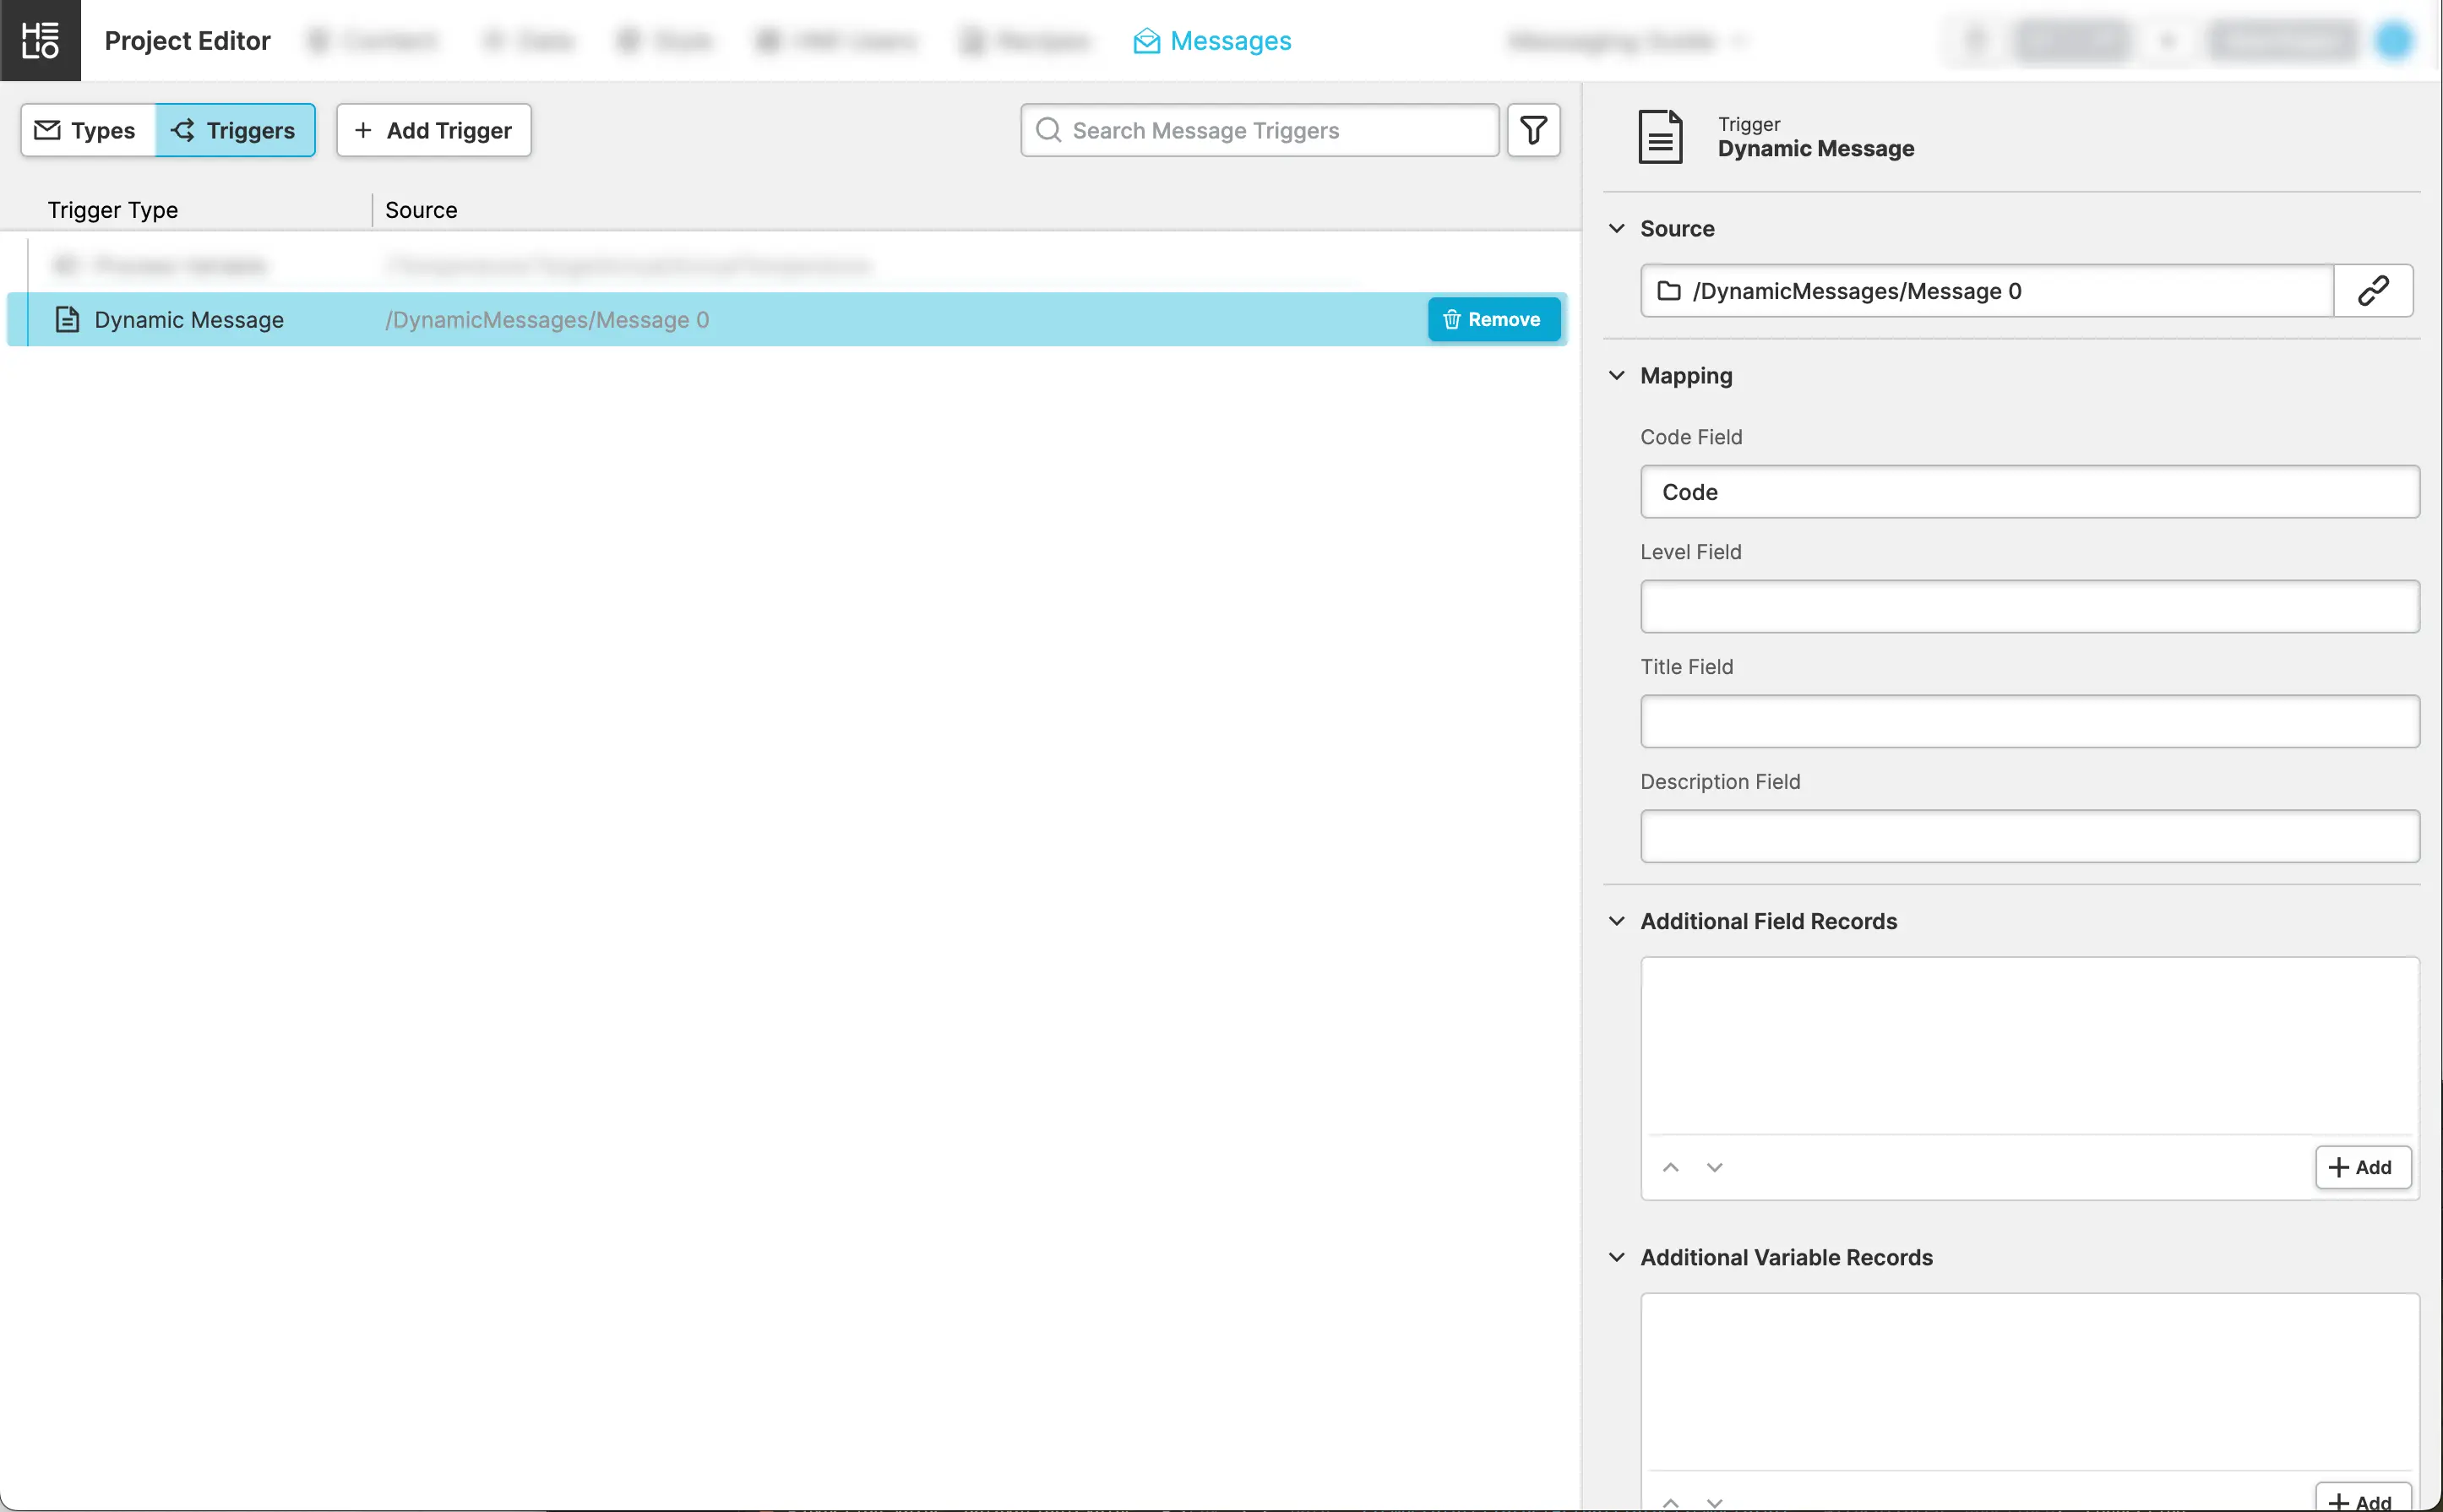
- Define Your First Trigger
Switch to the Message Triggers View, click
the Add Type action and choose Dynamic Message as a trigger type.
- Configure the Trigger
The main difference from the triggers we've defined before is that we
won't hard code a particular Message Code for each trigger. Instead, we'll
set the Source property to the first message directory that we imported in the
previous steps.
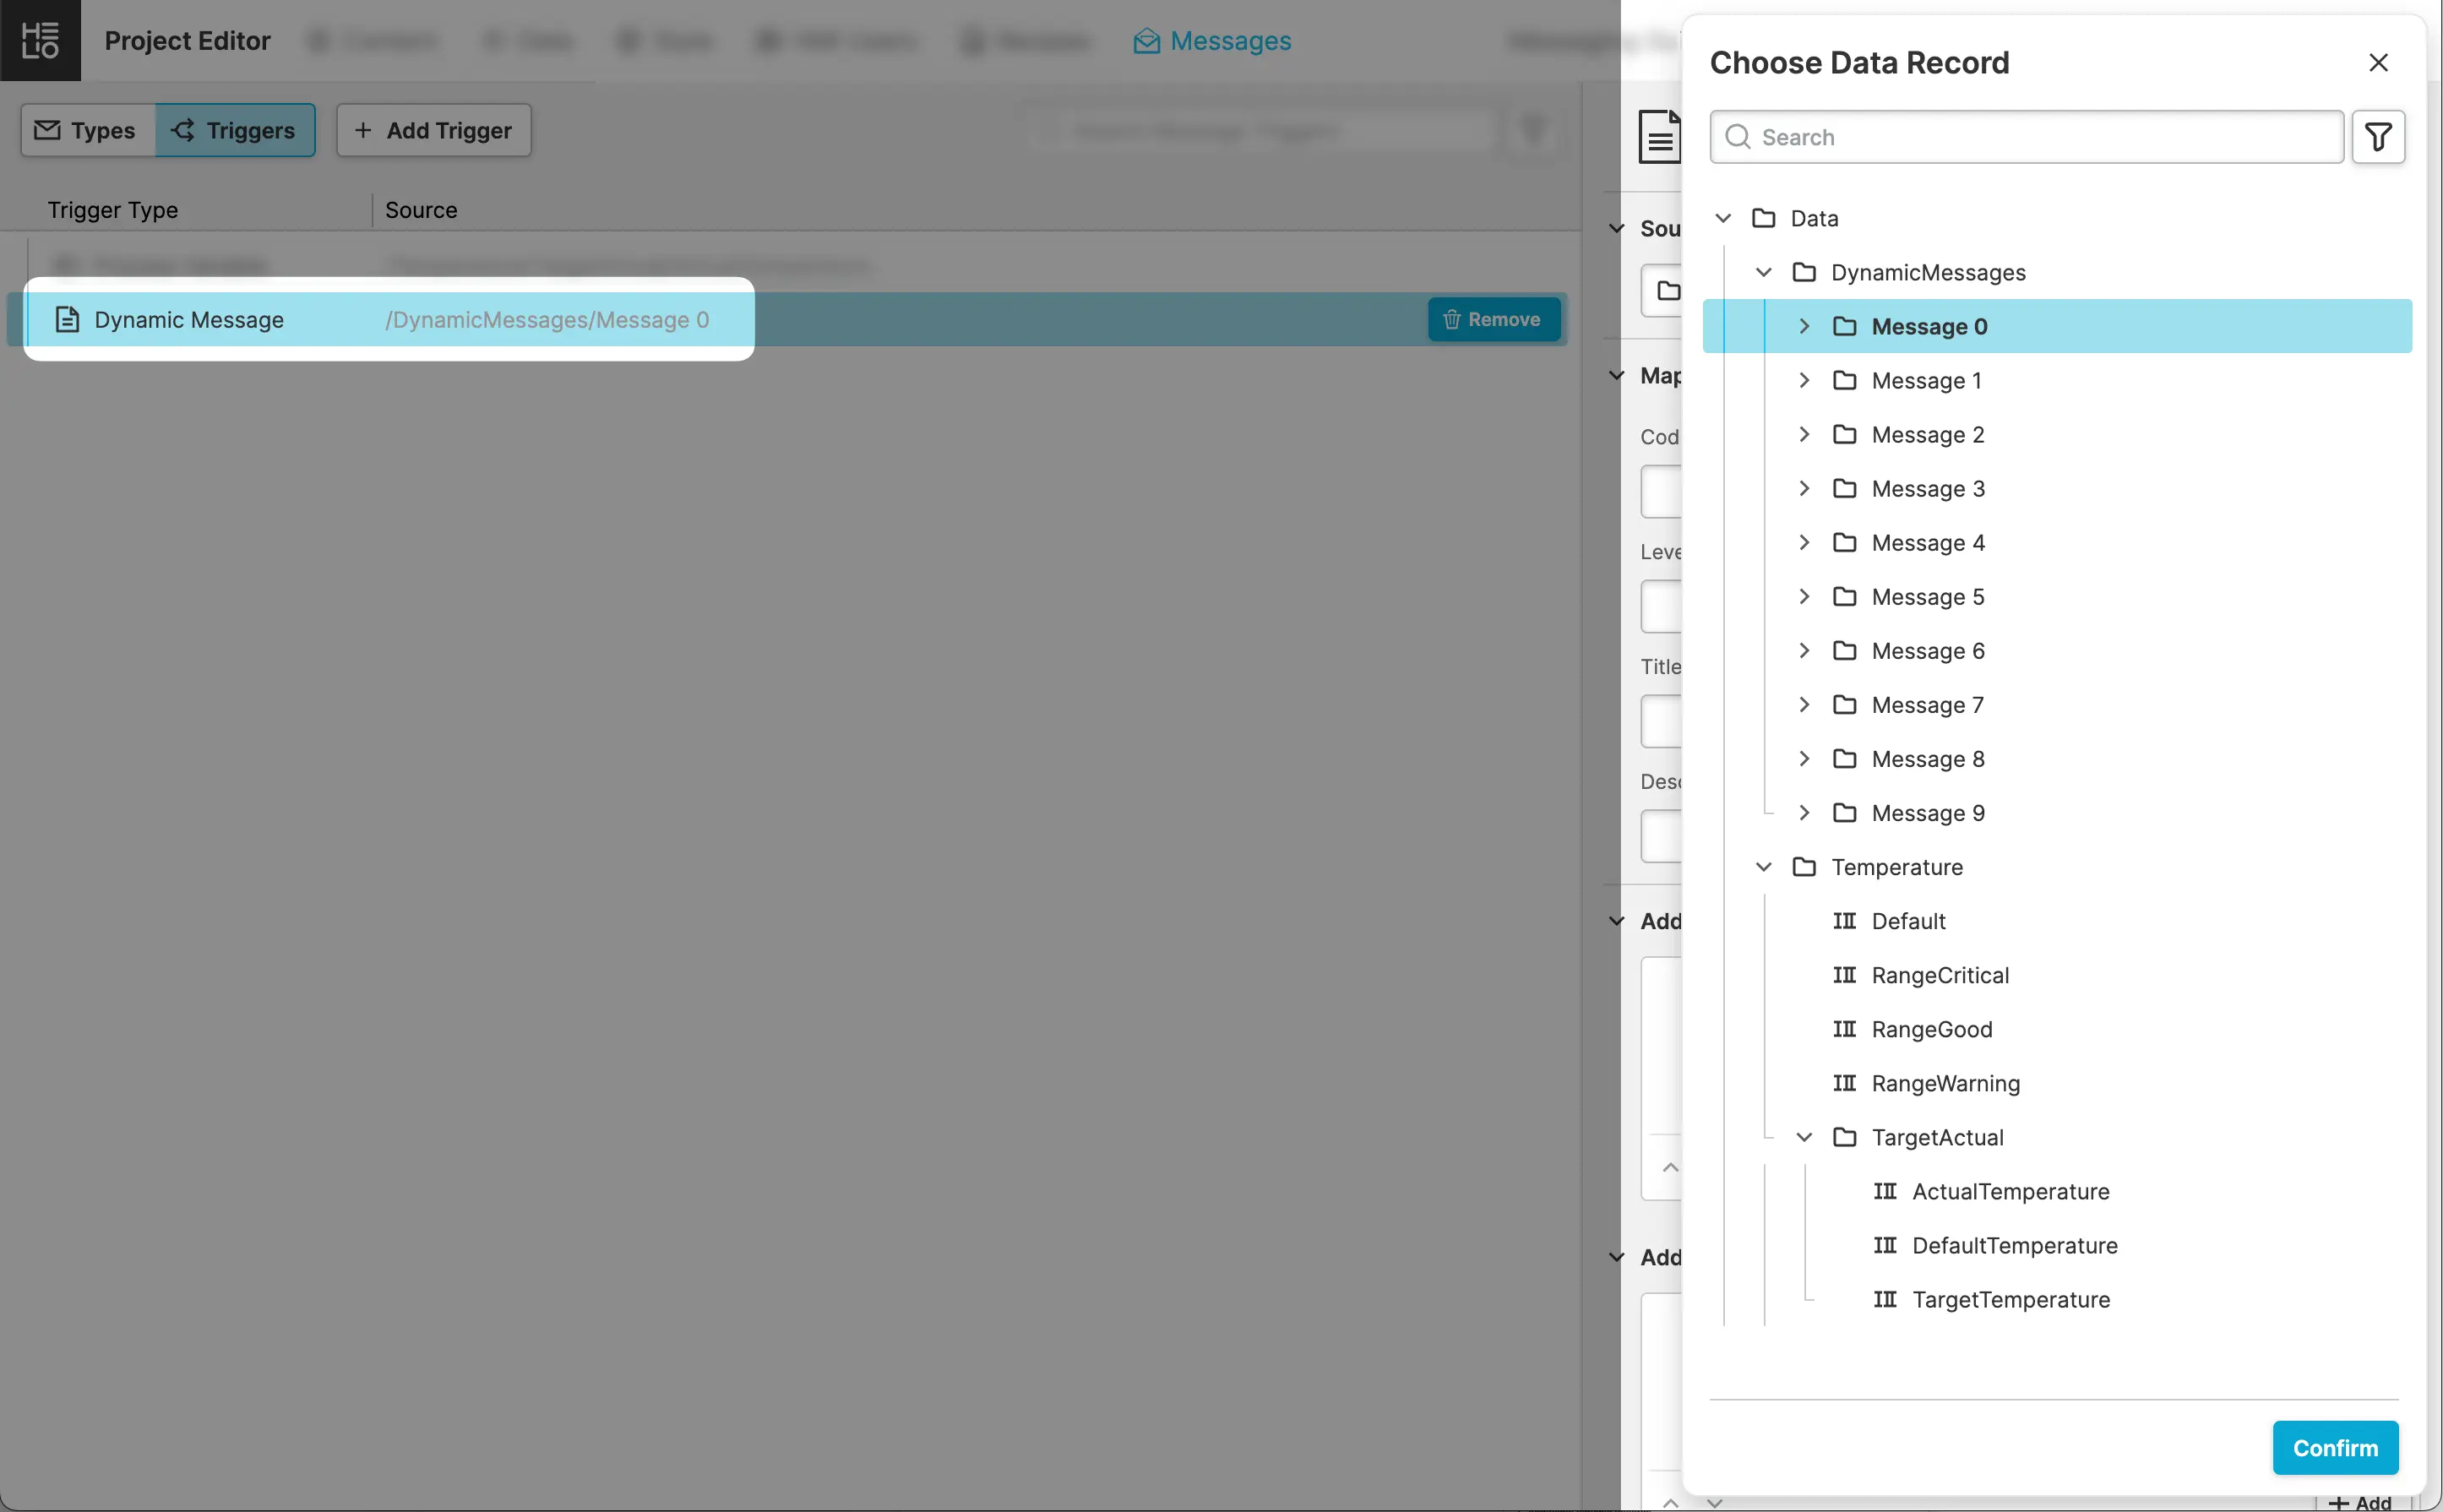
Next we're going to set Code Field to Code so HELIO will actually look into
the directory and grab the Message Code from the Code variable.
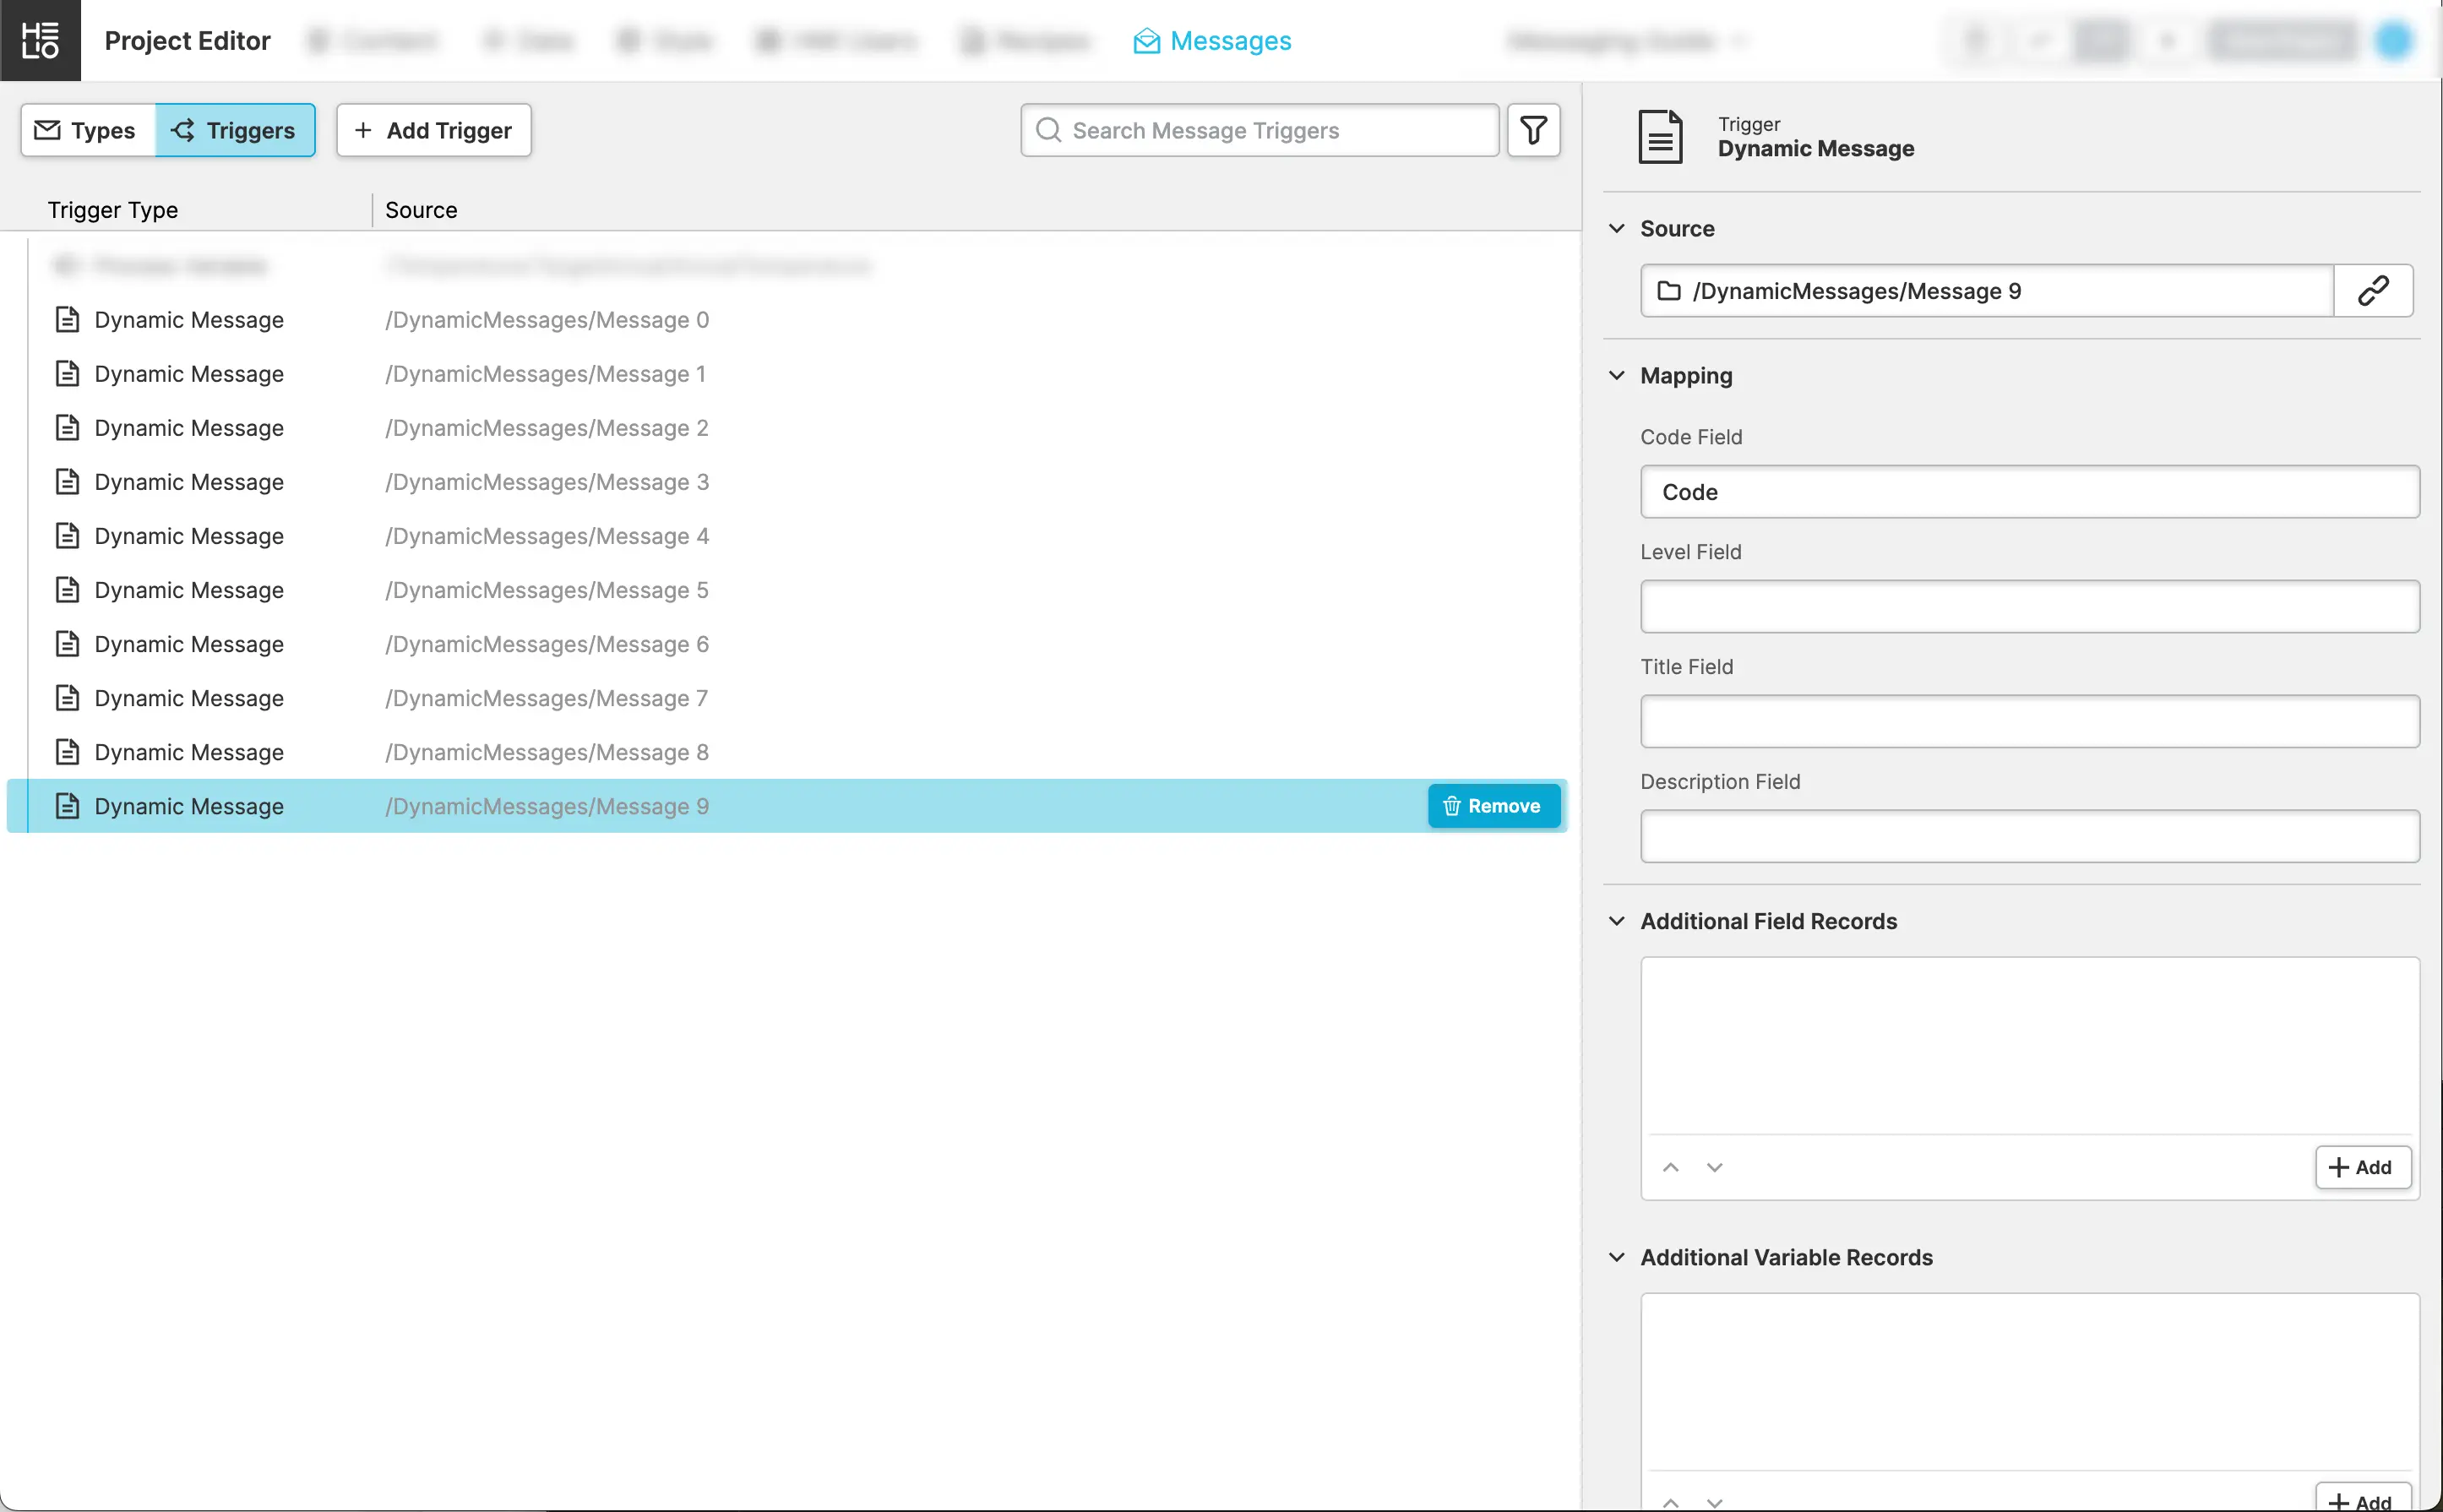
- Add Additional Triggers
4. Create a Page to Trigger Messages
The excitement is building because we're all set to start sending messages to our HMI. All we need to do is create a small page to simulate the whole thing. Let's get started!
- Add a
ParameterPage
First things first, we need to create a page. To keep it simple, we're just going to create a basic Parameter Page.
So switch to the Content View add a Parameter Page.
- Turn the Page Into a Component to Add Local State
In order to be able to send multiple Message Codes, we first have to turn the page into a Component (see HELIO Components to learn more about Components).
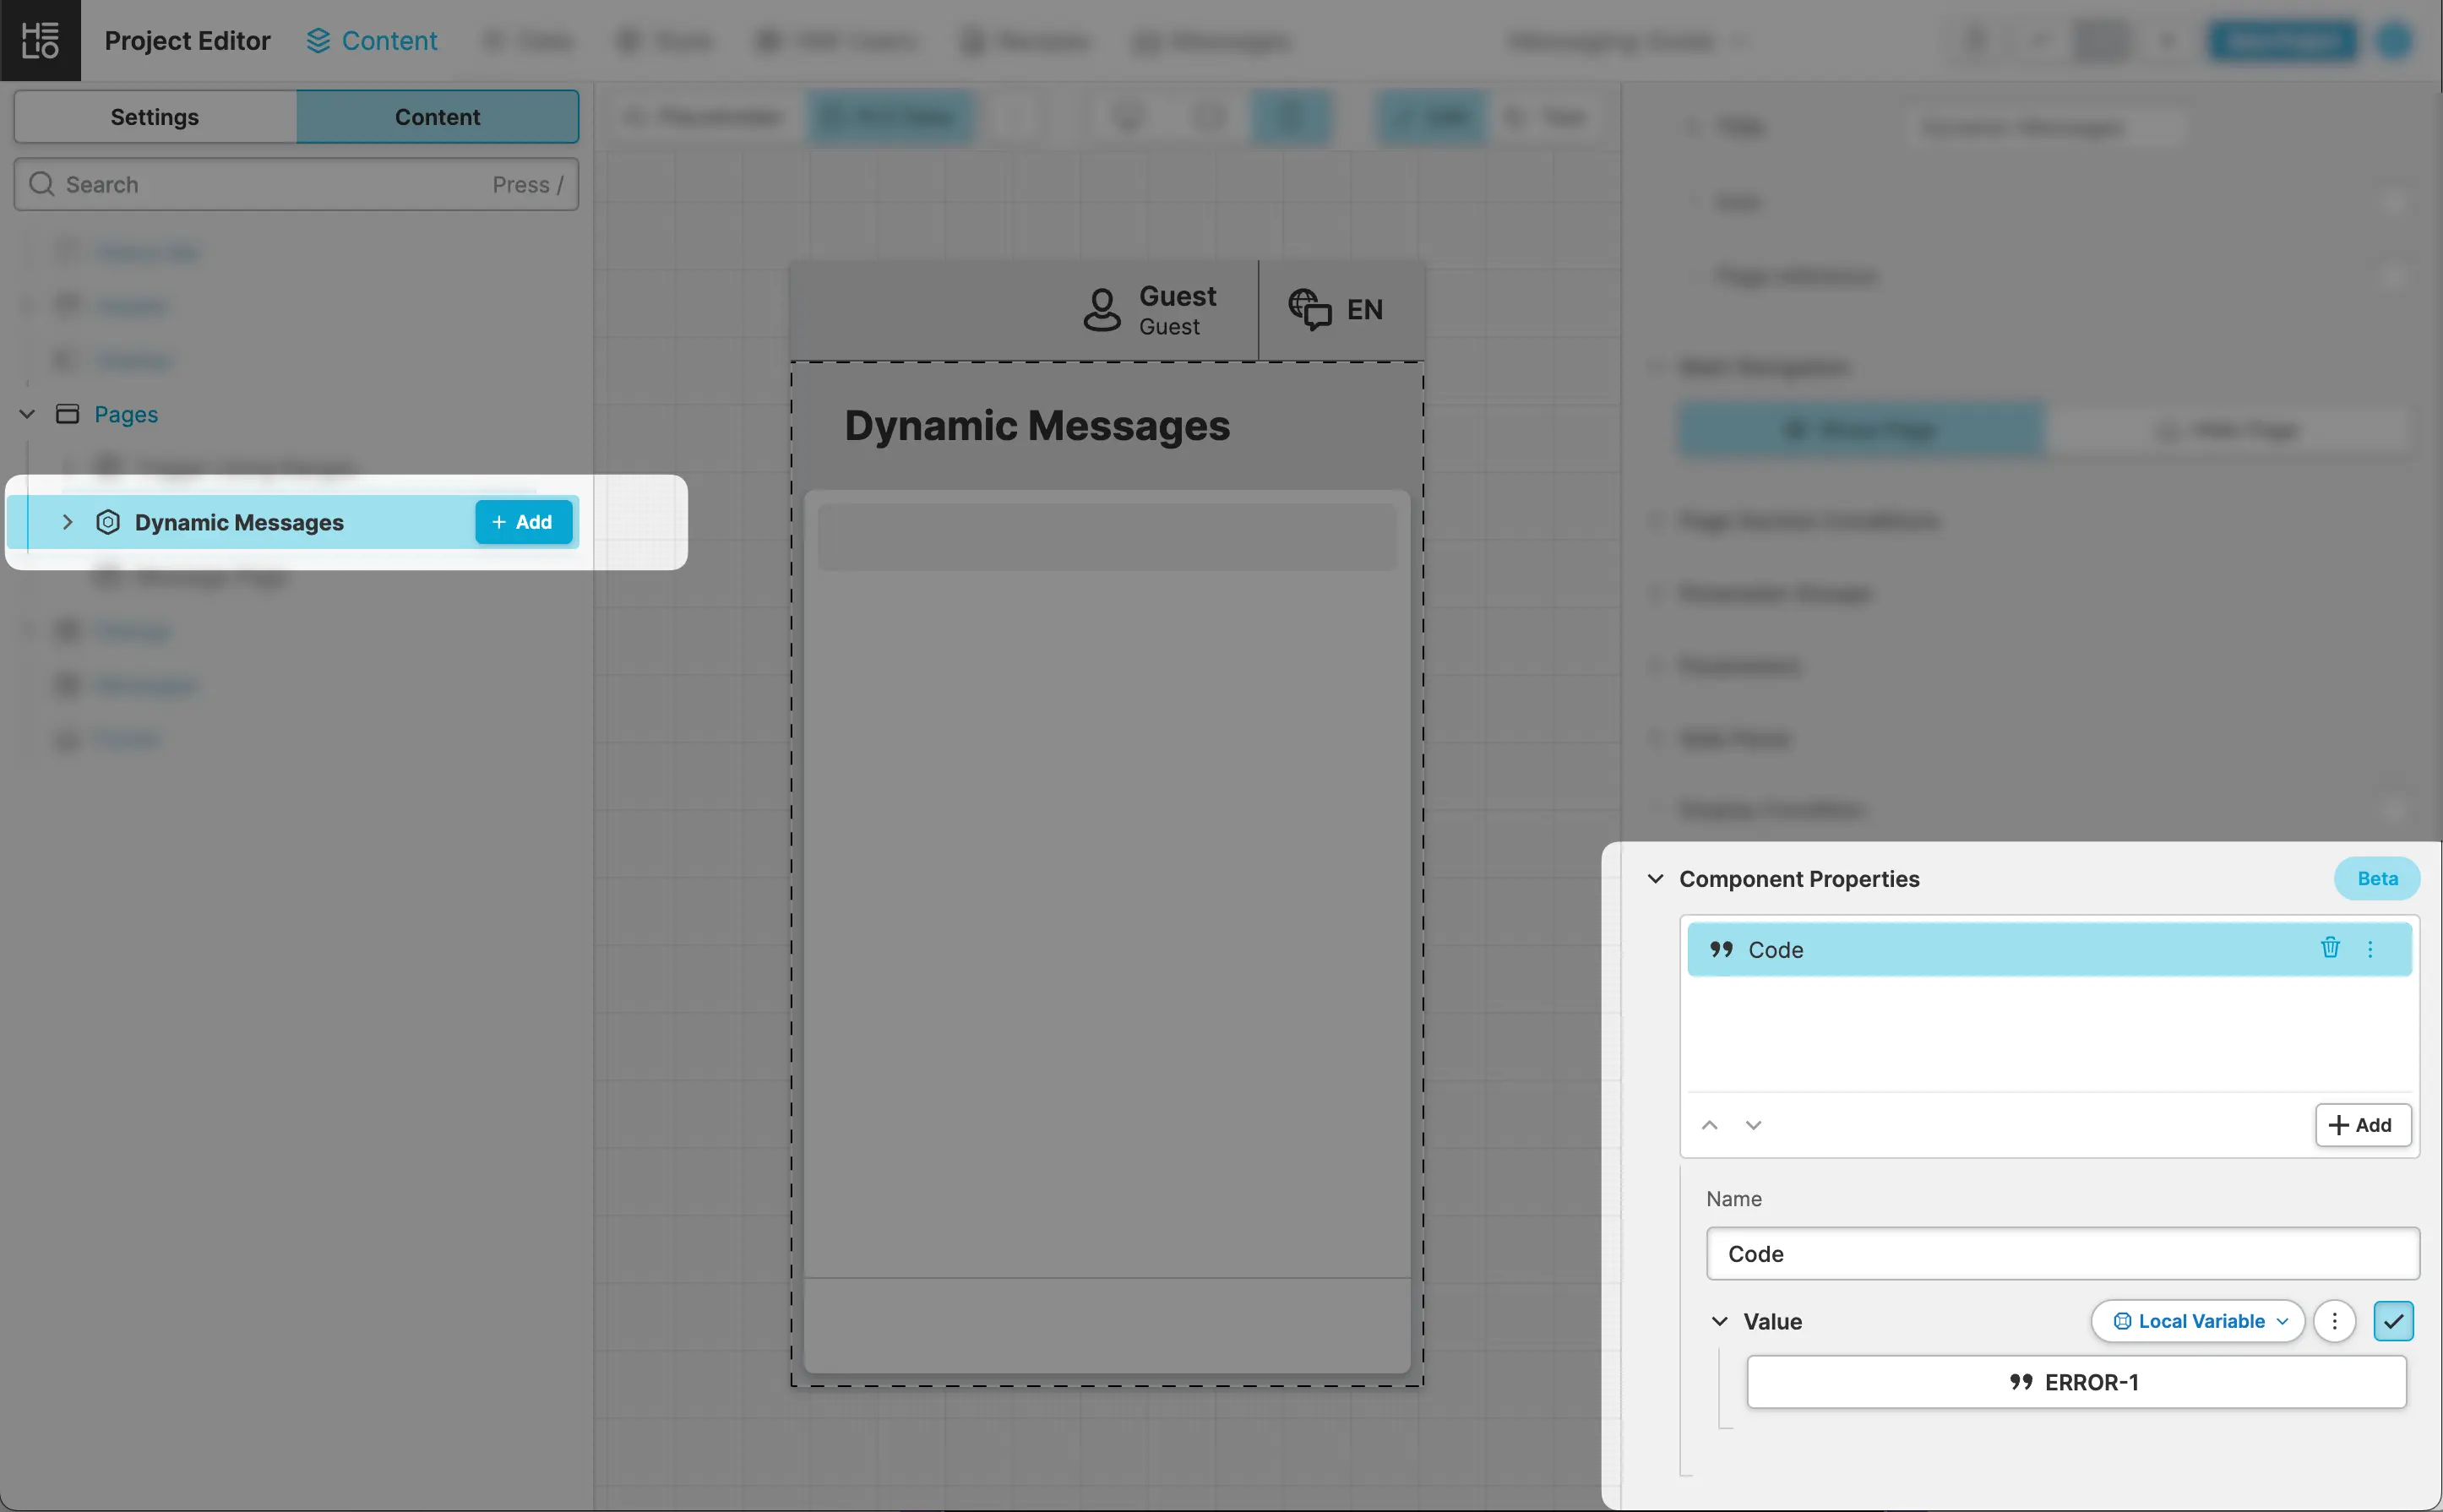
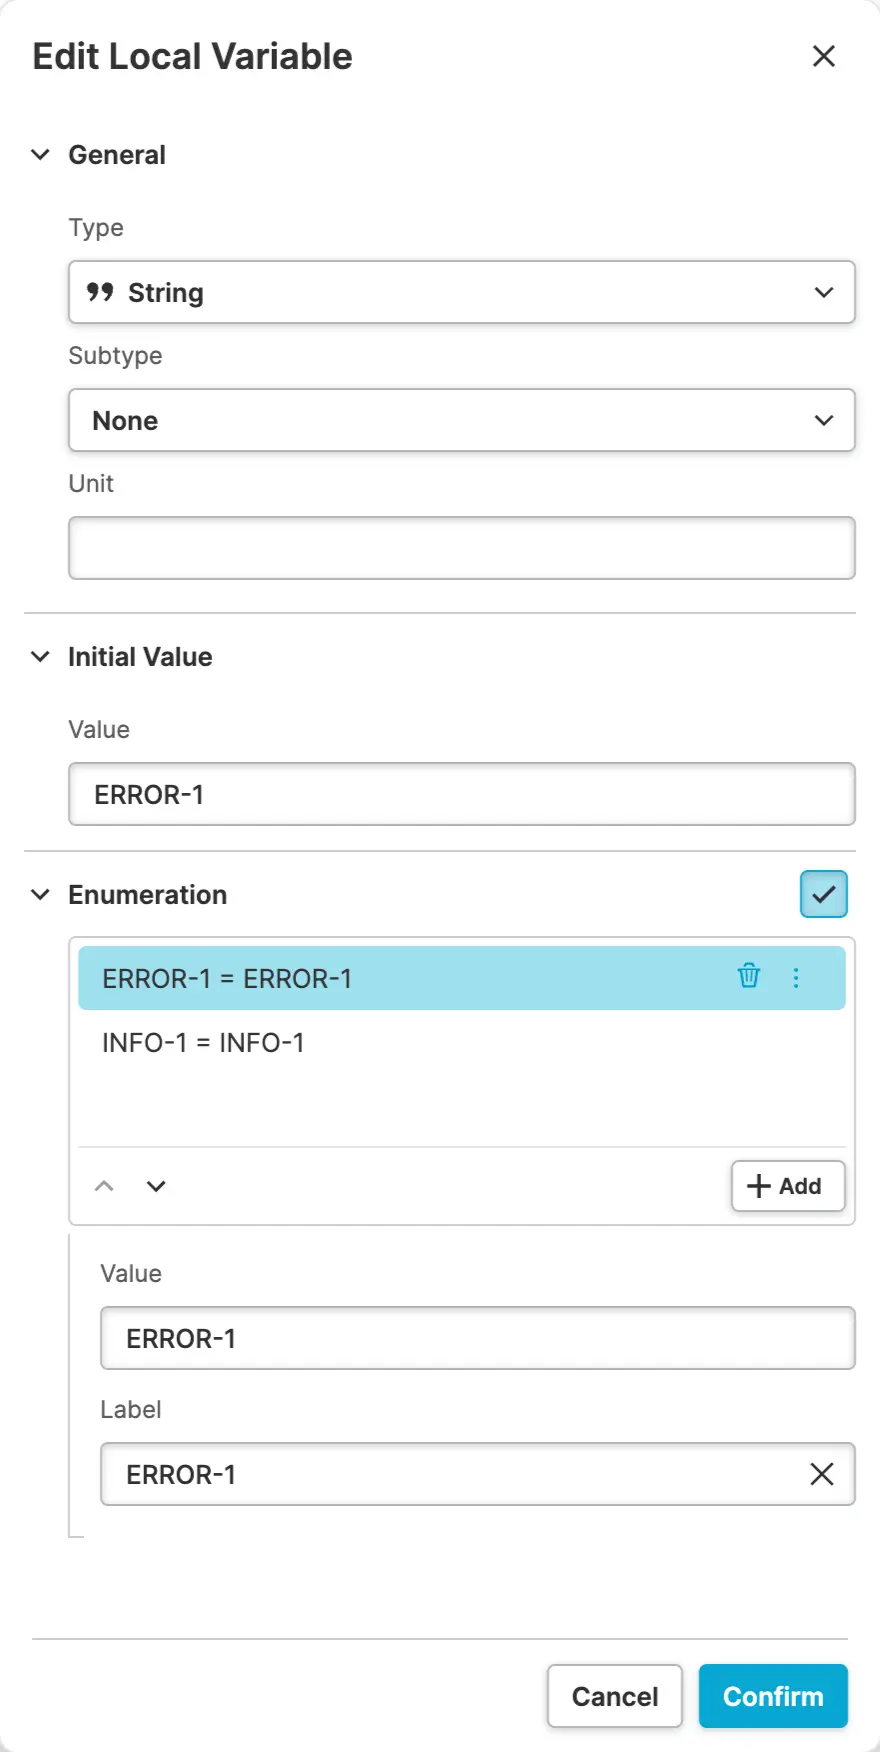
Define a Component Property named Message Code and add ERROR-1 and INFO-1 as possible values. This will allow
us to send these values to the PLC.
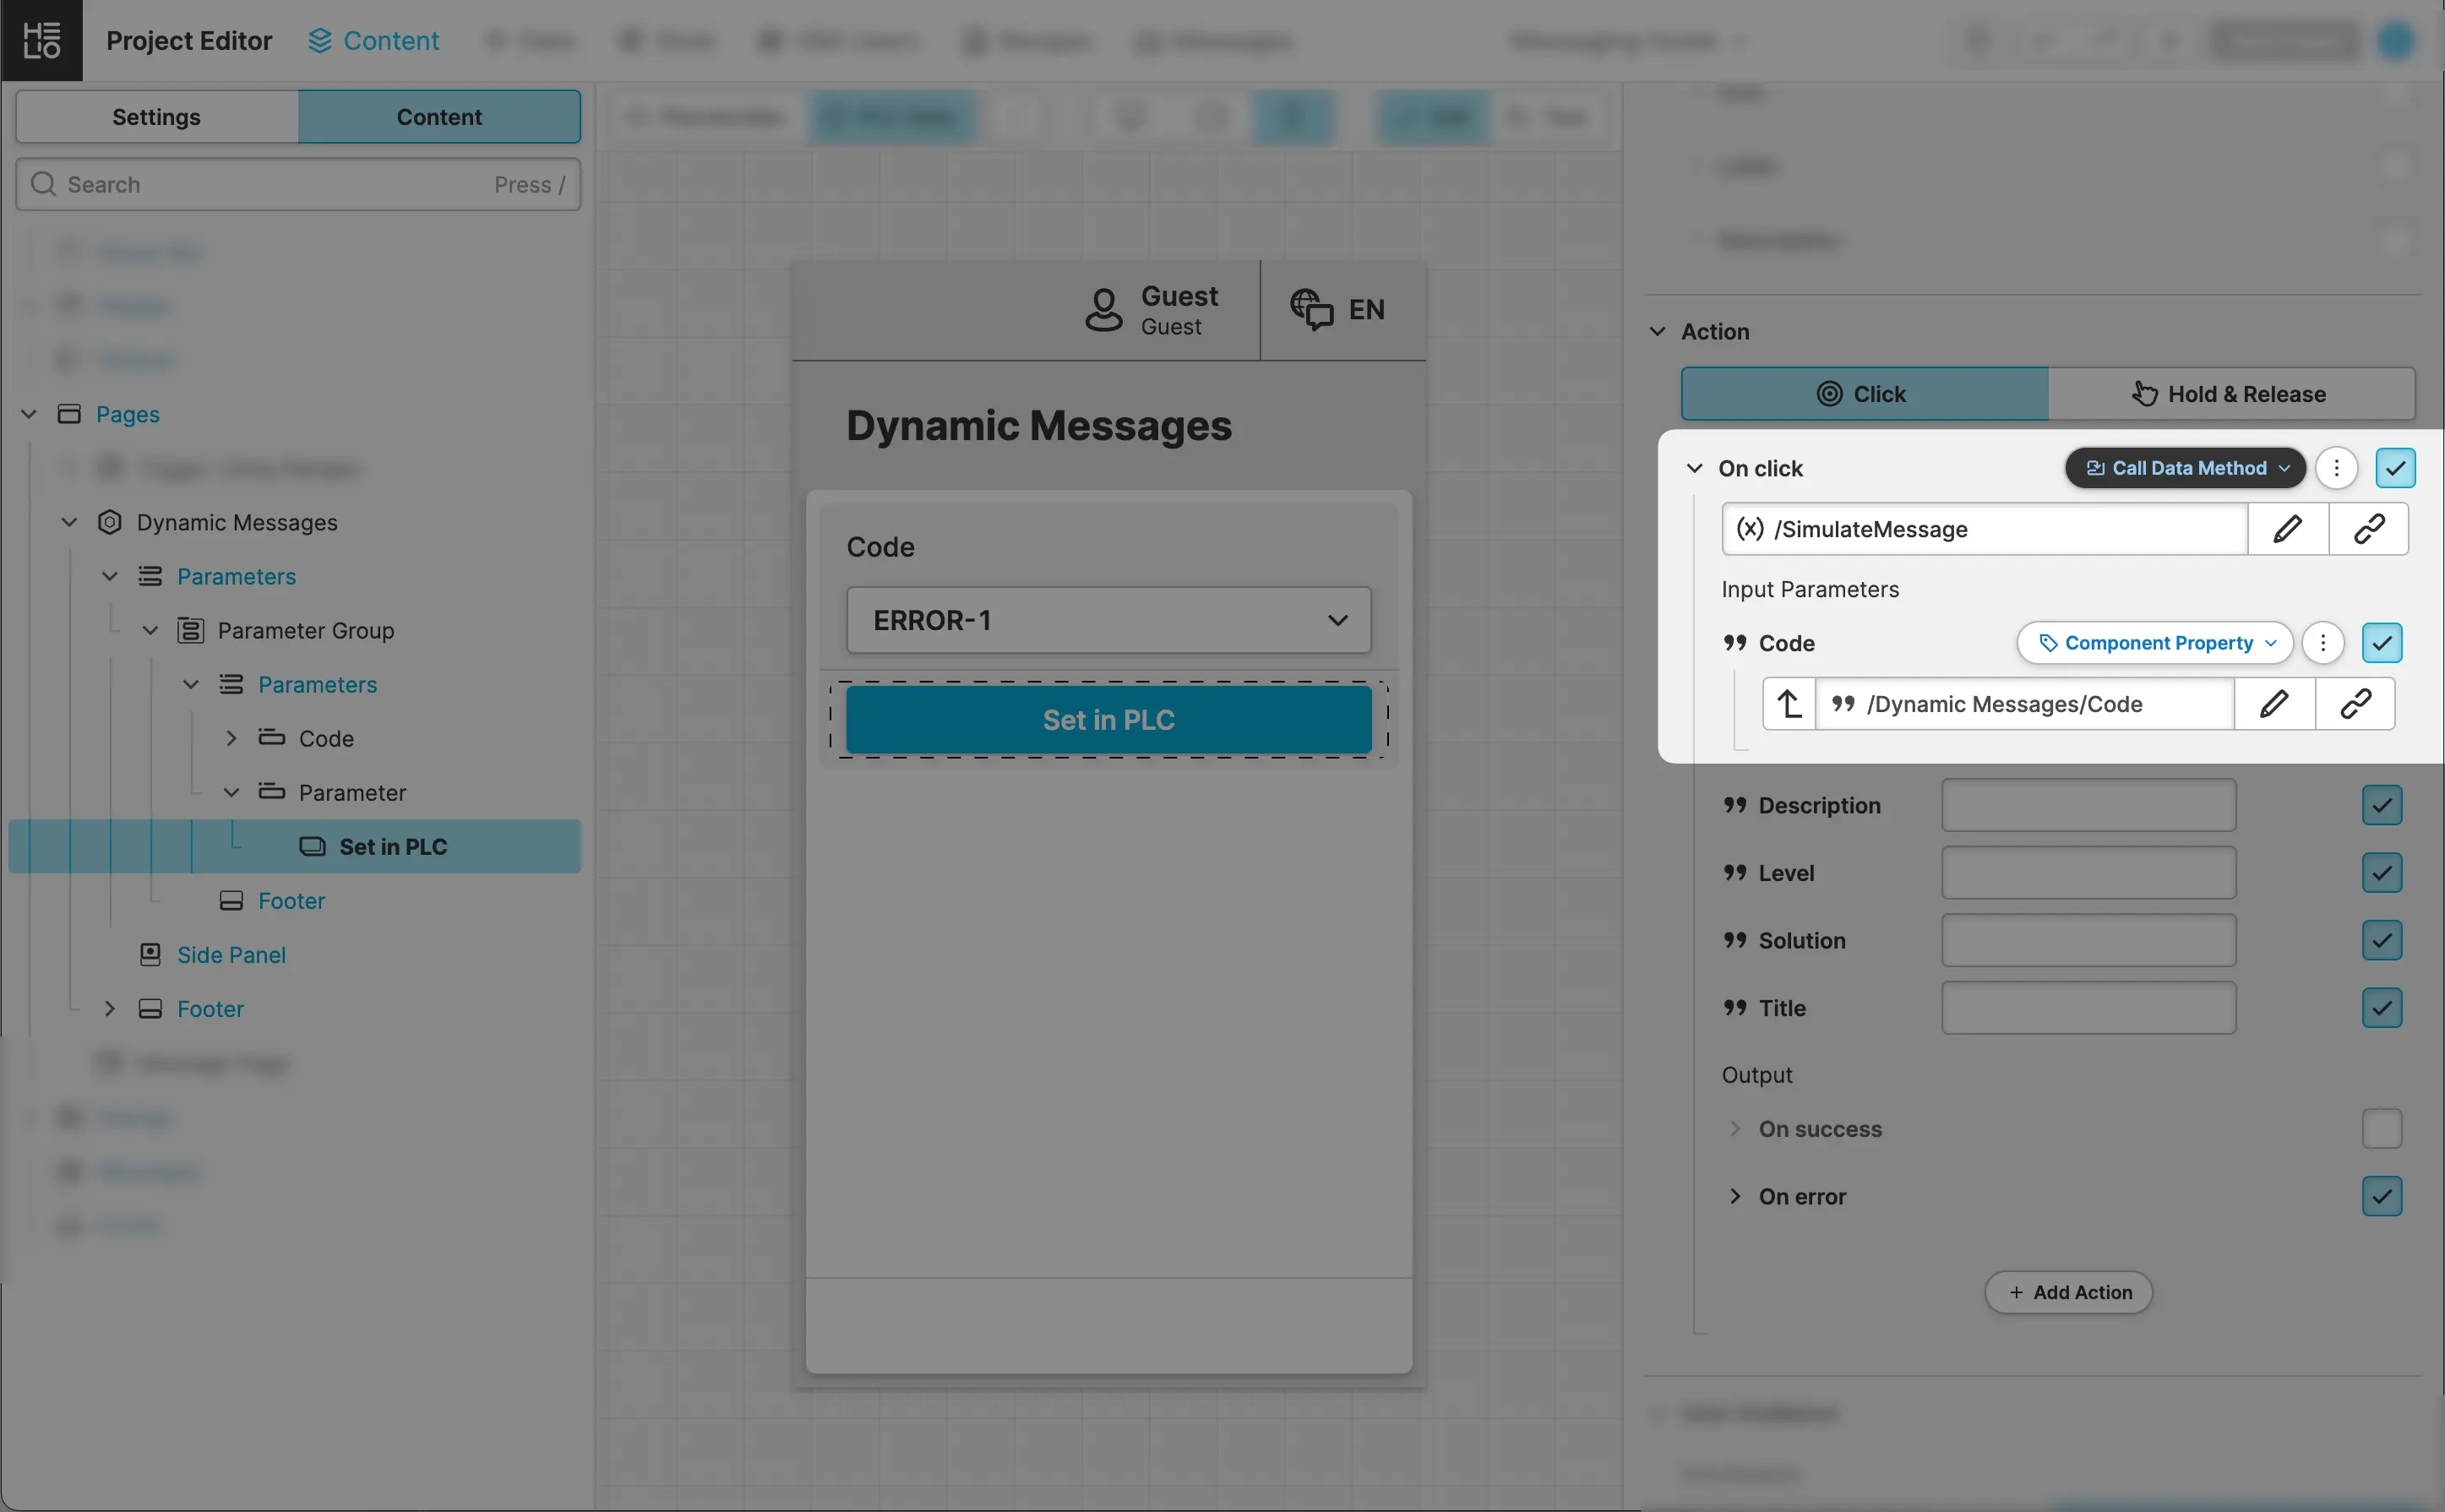
- Add a
Magic Inputto Control theMessage Code.`
- Add a
Magic Inputto control the Message Code that shall get sent to the PLC and set its value property to the Component Property that we've just defined. - Add a
Buttonto call theSimulateMessagemethod.
5. Let's Simulate Messages
Let's Get Those Messages Fired Up!
- Switch to
PLC Modeto make sure you will be writing to the actual PLC. - Switch to
Test Modeso you can toggle the inputs. - Click on the button to simulate messages.
Your HMI should behave something like this:
You've used all sorts of Message Trigger and Trigger Sources now.
Ready to learn about displaying active and archived messages within your HMI?