Setup HMI Users & Authentication
For each project you can create a list of initial HMI users that will be available for a project once it has been deployed and started on target device.
Read-only by Default
In HELIO all your project data, whether imported or defined by you, is in read-only mode. This intentionally designed protective layer prevents you from unwanted changes to your PLC.
However, this also implies that you'll need a method to authenticate and authorize users to make alterations to your PLC. This guide will take you through the steps to make this possible…
- The difference between IDE and HMI Users
Before we start, it is important to understand the difference between IDE Users and HMI Users in HELIO. Let's have a look at their differences:
| IDE Users | HMI Users | |
|---|---|---|
Who? | You and your team will using their | Once your HMI is deployed to the actual machine, the operators in the
factory will sign in as |
When? | While you are developing & engineering the HMI. | Once your HMI is deployed to the actual machine and running inside the factory. |
Where? | Use the IDE User Manager to define and configure IDE Users. | Use the HMI Users View of the Project Editor to define and configure Initial HMI Users & Roles for your project. |
Limitations |
| HMI users are only used for signing into an HMI. They can NOT be used to sign into the HELIO IDE. |
This Guide Focuses on HMI Users
Because its goal is to illustrate how to manage and restrict access to your HMIs. So, let's dive right in.
- Create a new project
- Open the Home Page and click
Create New. - Let's kick things off by picking the
Empty HMItemplate. It lets you start with a clean canvas.
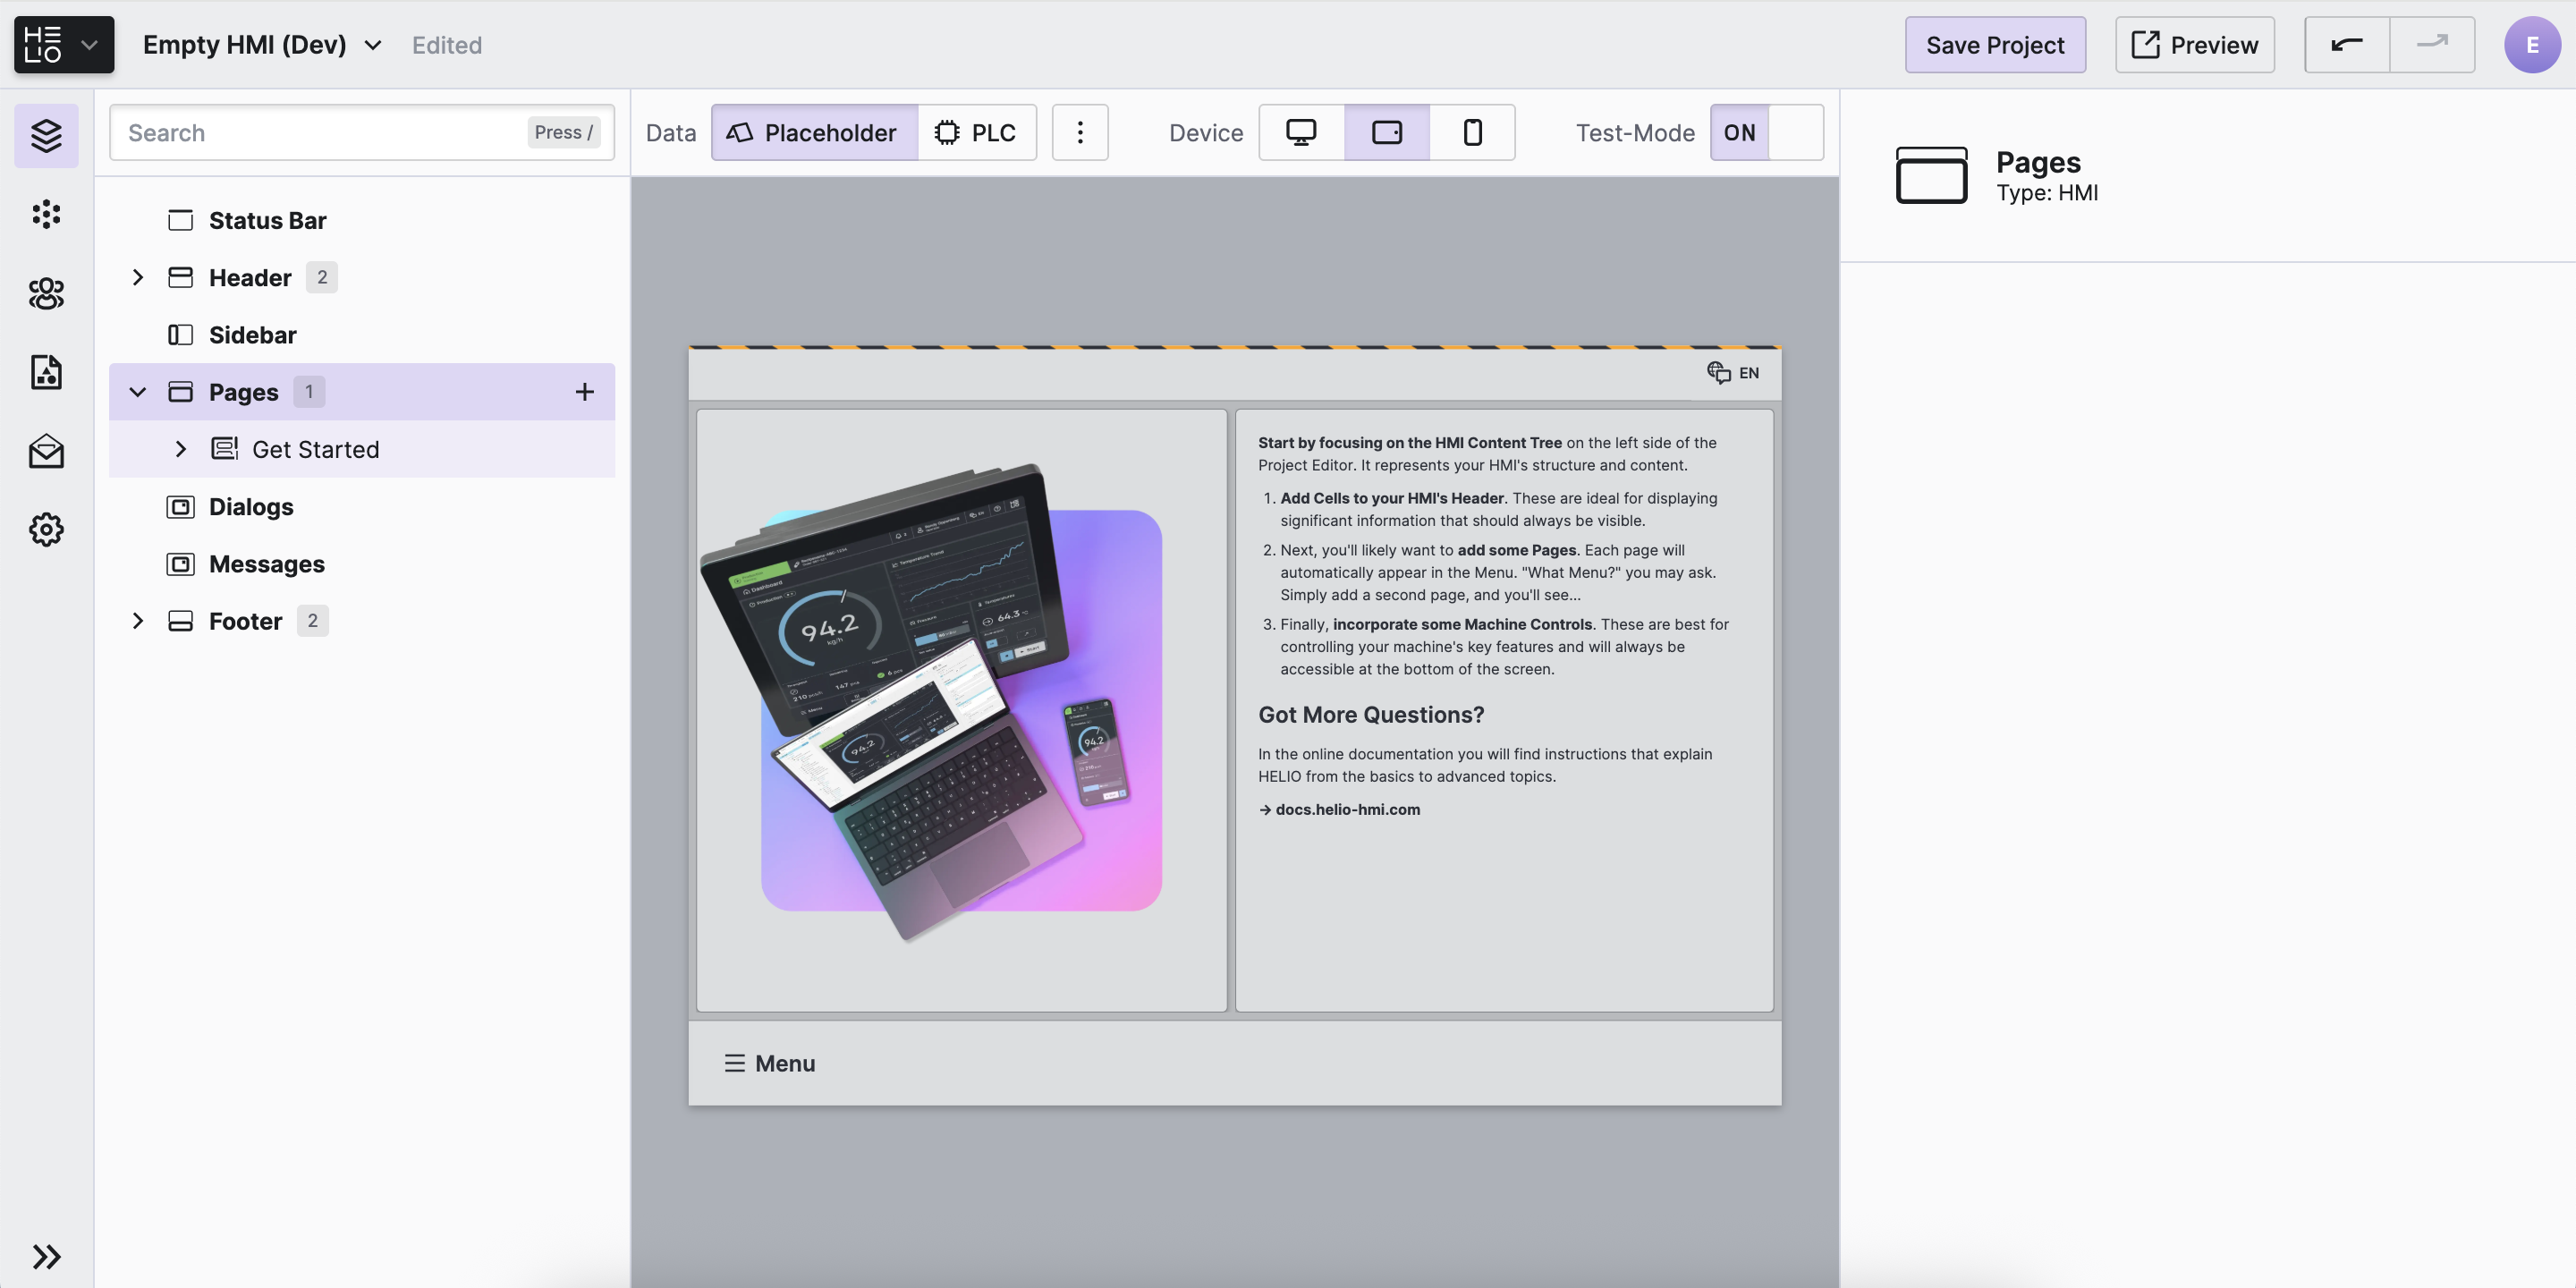
Your new project will open in the Project Editor as shown below:
- Switch to the HMI Users View
First, let's have a look at the tow important sections of this view:
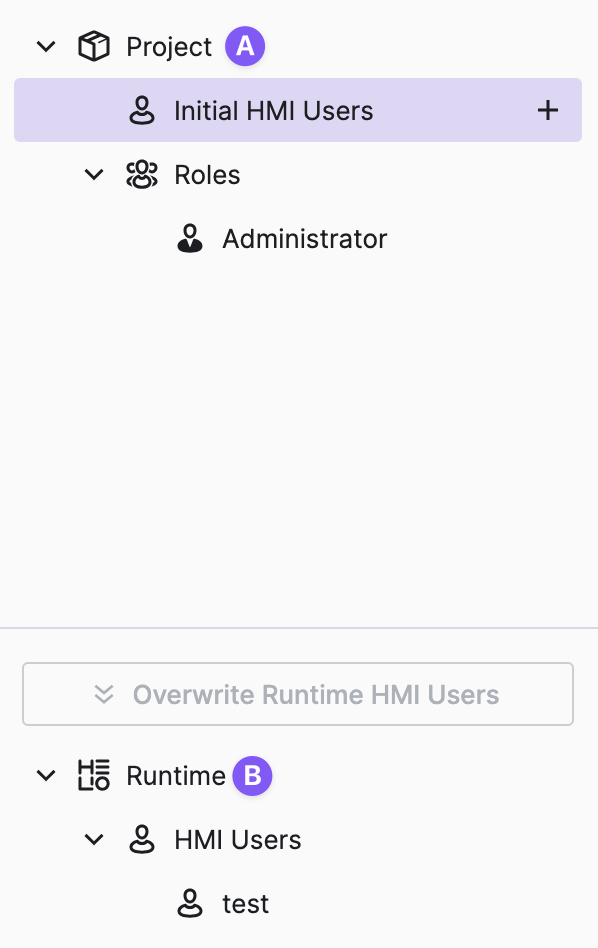
The
Project Explorerdisplays the settings used to initialize your HMI. This initialization takes place when your project is first launched on a HELIO Runtime, during which the initial users and roles are created.Once you begin testing your project within the IDE, this initialization also occurs in the
Runtimepowering the IDE on your dev machine. Therefore, theRuntime Explorershows the current state of this user database. As you test your project, this database may diverge from the initial settings since they can also be adjusted from within the HMI (more on that later).
To summarize, if you alter anything in the Project Explorer,
remember to use the Overwrite Runtime Users action to apply
these changes to the current Runtime if you want to test them out.
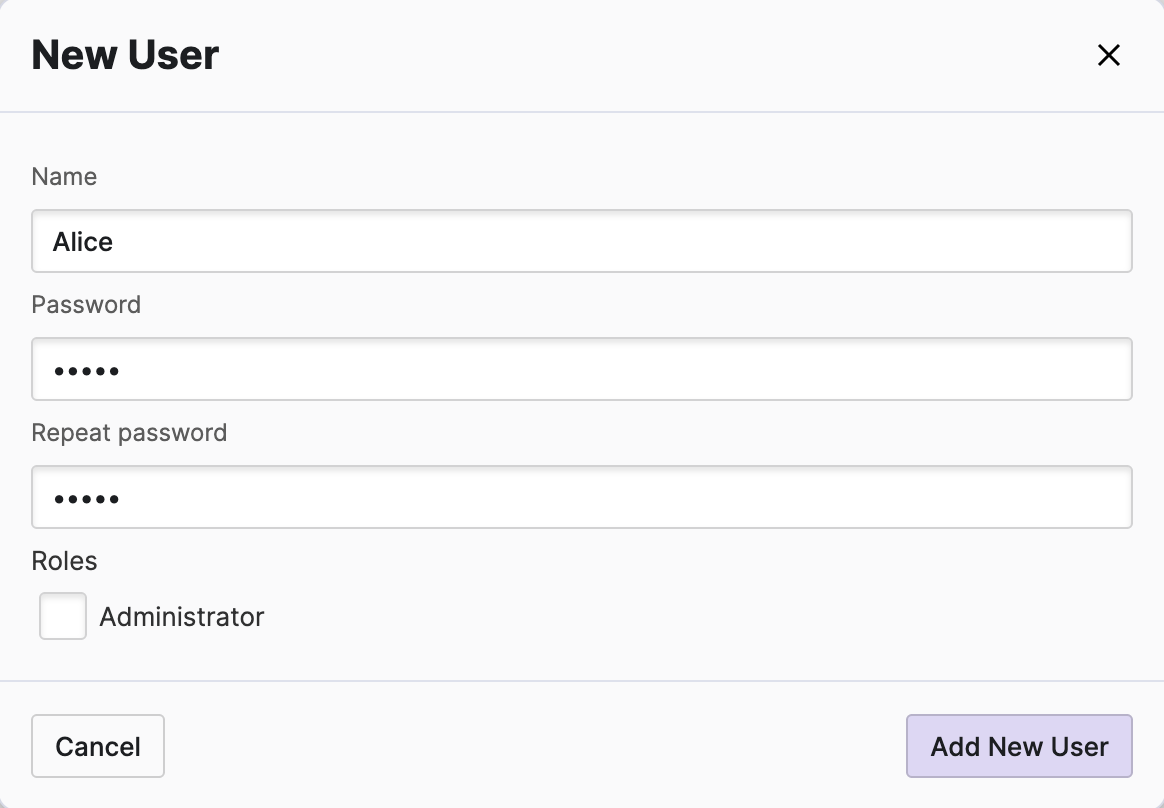
- Create your first
HMI User
- Add a place to display user information
To do so, switch back to Content View and follow the steps to create a Header Cell that displays information about the current user:

Add your first Header Cell to the
Headerslot of your HMI.Set the type of the
Iconproperty to Icon and search for a icon that will communicate the purpose of this cell, e.g.User.
- Add the ability to sign in
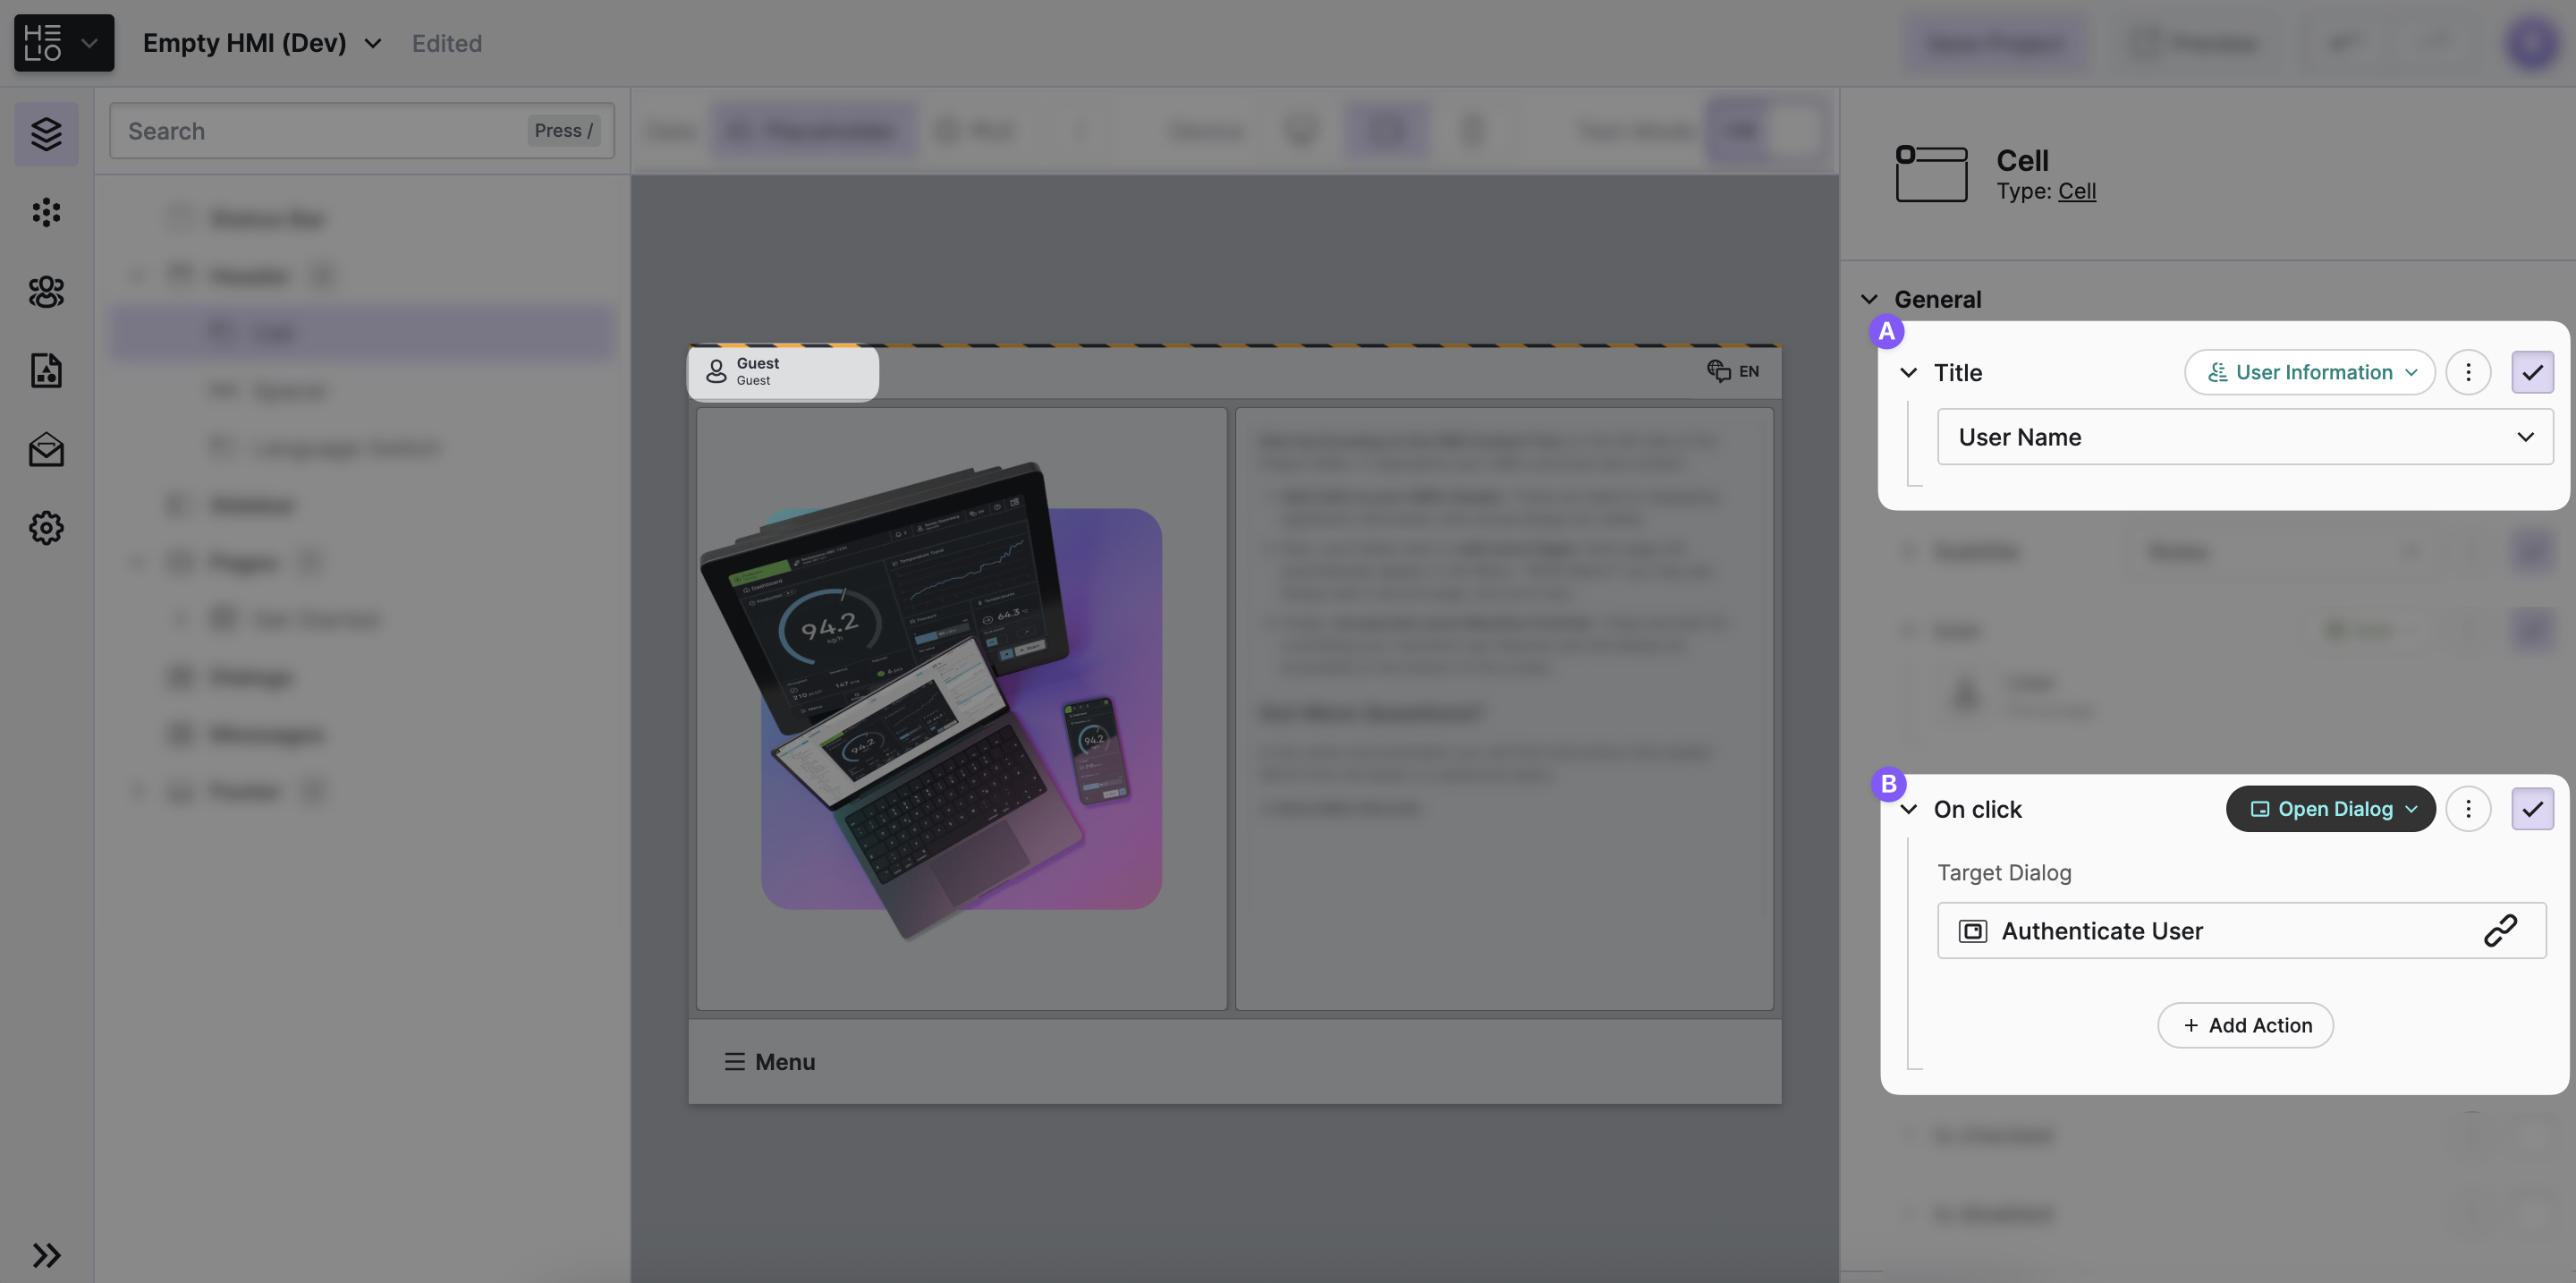
Change the type of the
Titleproperty to User Information and chooseUser Nameto display the name of the currently logged in user.If you check the header, it will display
Guestsince we haven't signed in yet.Next, we aim to add the sign-in functionality. Using the type chooser of the On click property of the Header Cell, select an appropriate action that will respond to the click event.
We'll choose the Show Dialog Action action and use one of the built-in dialogs: the
Authenticate Userdialog.
- Test the authentication
Seems like we're ready to give our HMI a test drive. Switch to the
Test mode and and play with the new header cell:
You've just added your very first HMI User and enabled authentication
within your HMI!
- It may not seem like a big deal, but it forms the foundation that allows us to tailor and restrict different parts of our HMI to various user roles.
- And guess what? You're in luck, because this will be the topic of the next steps in our authentication learning journey. So, go take a look!