Get Started with HELIO by Taking a Quick Tour
How Does HELIO Look and Feel?
Meet A Typical HELIO HMI
This is what an HMI typically looks like: a touch panel mounted to the machine. You've got a header for status display, machine controls at the bottom, different pages for different needs, and a navigation to switch between them.
Meet the HELIO IDE
Now let's have a look at the tool that you use to build and configure your HMIs. It also runs inside a browser and can be accessed with any PC with a Chromium-based web browser.
Architecture
Let's put these first impressions into a bigger picture and have a look at the high level architecture of HELIO to better understand how it works.
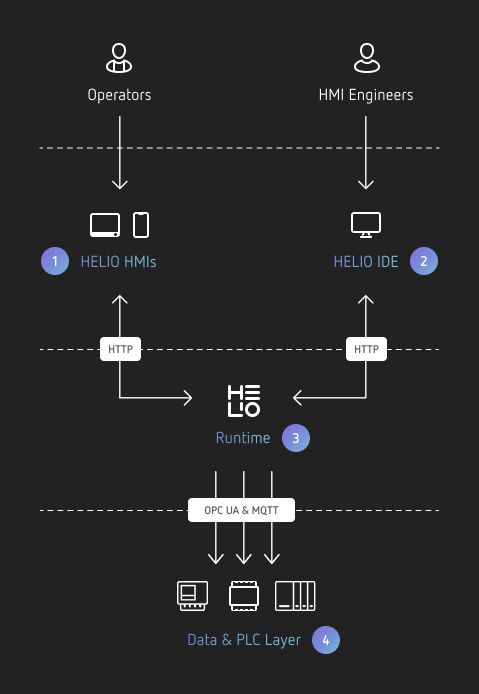
HELIO HMIs allow operators to control machines from any device with a Chromium- or Webkit-based browser. For example web panels close to the machine or mobile devices like tablets or smartphones.
The HELIO IDE lets HMI engineers build and configure HMIs directly from any desktop or laptop with a Chromium-based browser.
Technically speaking……both, IDE and HMI, are web applications running inside a browser that communicate with the HELIO Runtime via an HTTP-API.
The HELIO Runtime is the only piece of software that runs on your target devices. It delivers your HMIs as well as the IDE to different clients. It is also the only component that communicates with the Machine Control and Data Source layer.
The Data & PLC Layer provides the 'Source of Truth' for your HMIs. HELIO is a multi-user and multi-device HMI layer. As a result, all logic and actual data should reside within your data sources such as the PLC on your target device or centralized backend services. HELIO leverages standard interfaces, such as OPC-UA, to access those data sources.
A Closer Look at the HELIO IDE
The Home Page
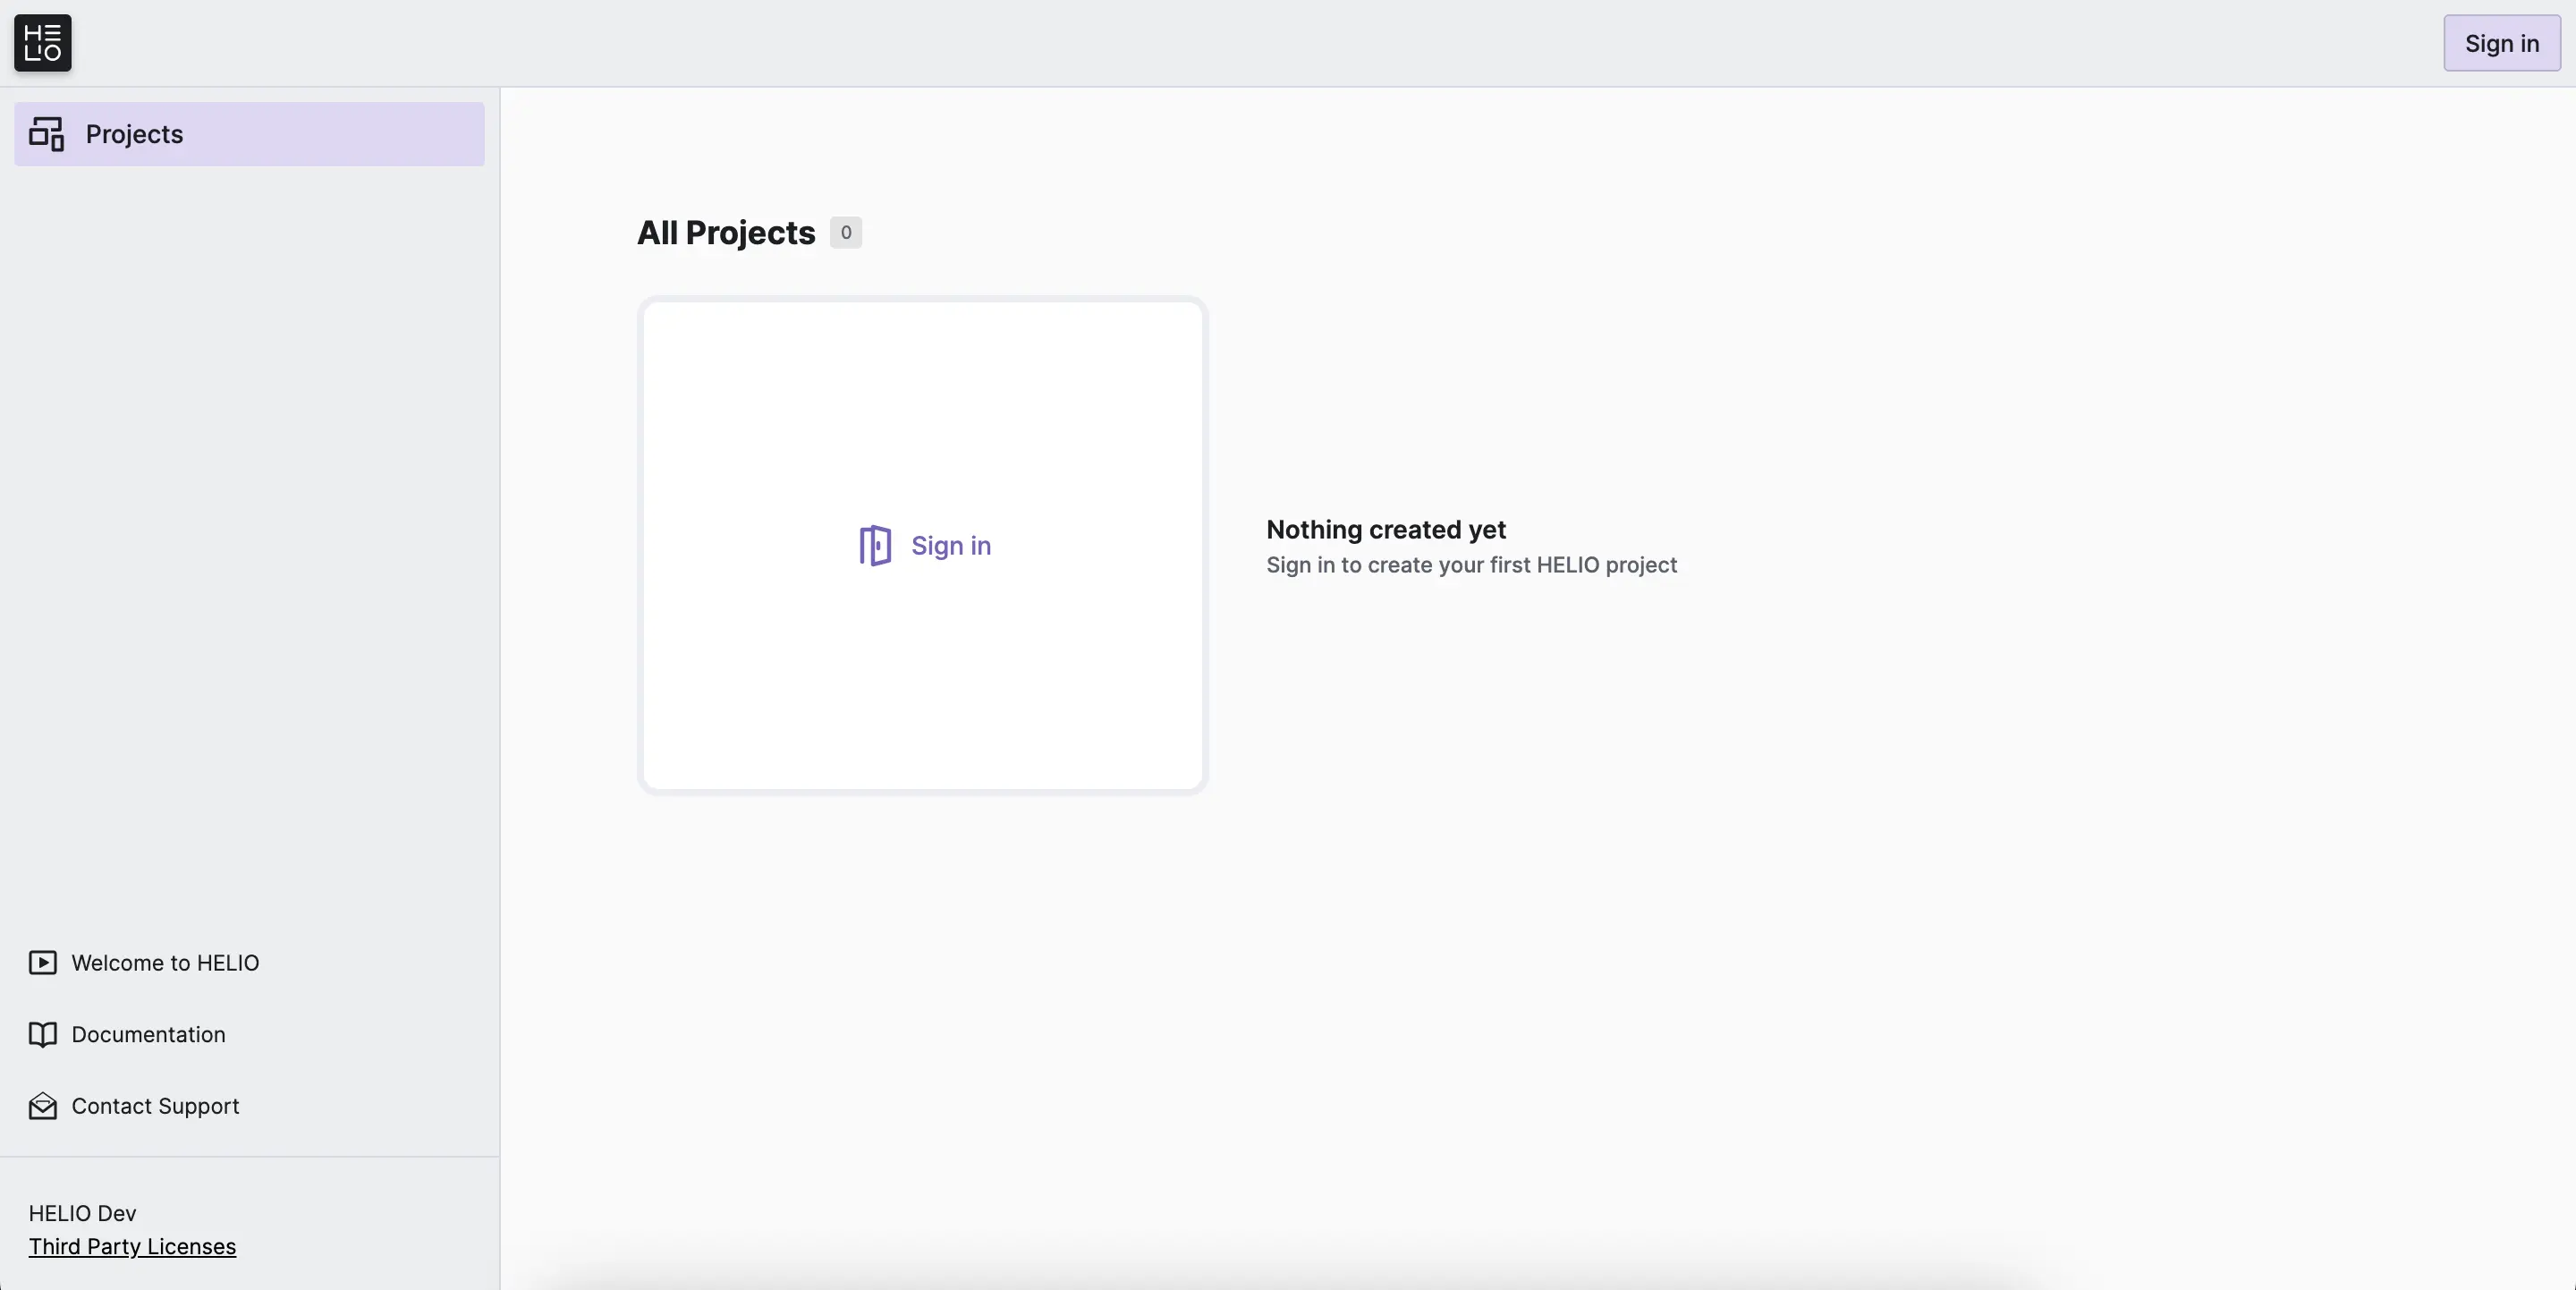
When you open the HELIO IDE, you will start on the Home Page.
Typically, you can view all your existing projects here, run and edit them,
as well as create or import new projects.
But in order to do this, you first need to sign in using your or the default IDE user. Take a look at Sign Into the HELIO IDE for the First Time to snag the right default credentials.
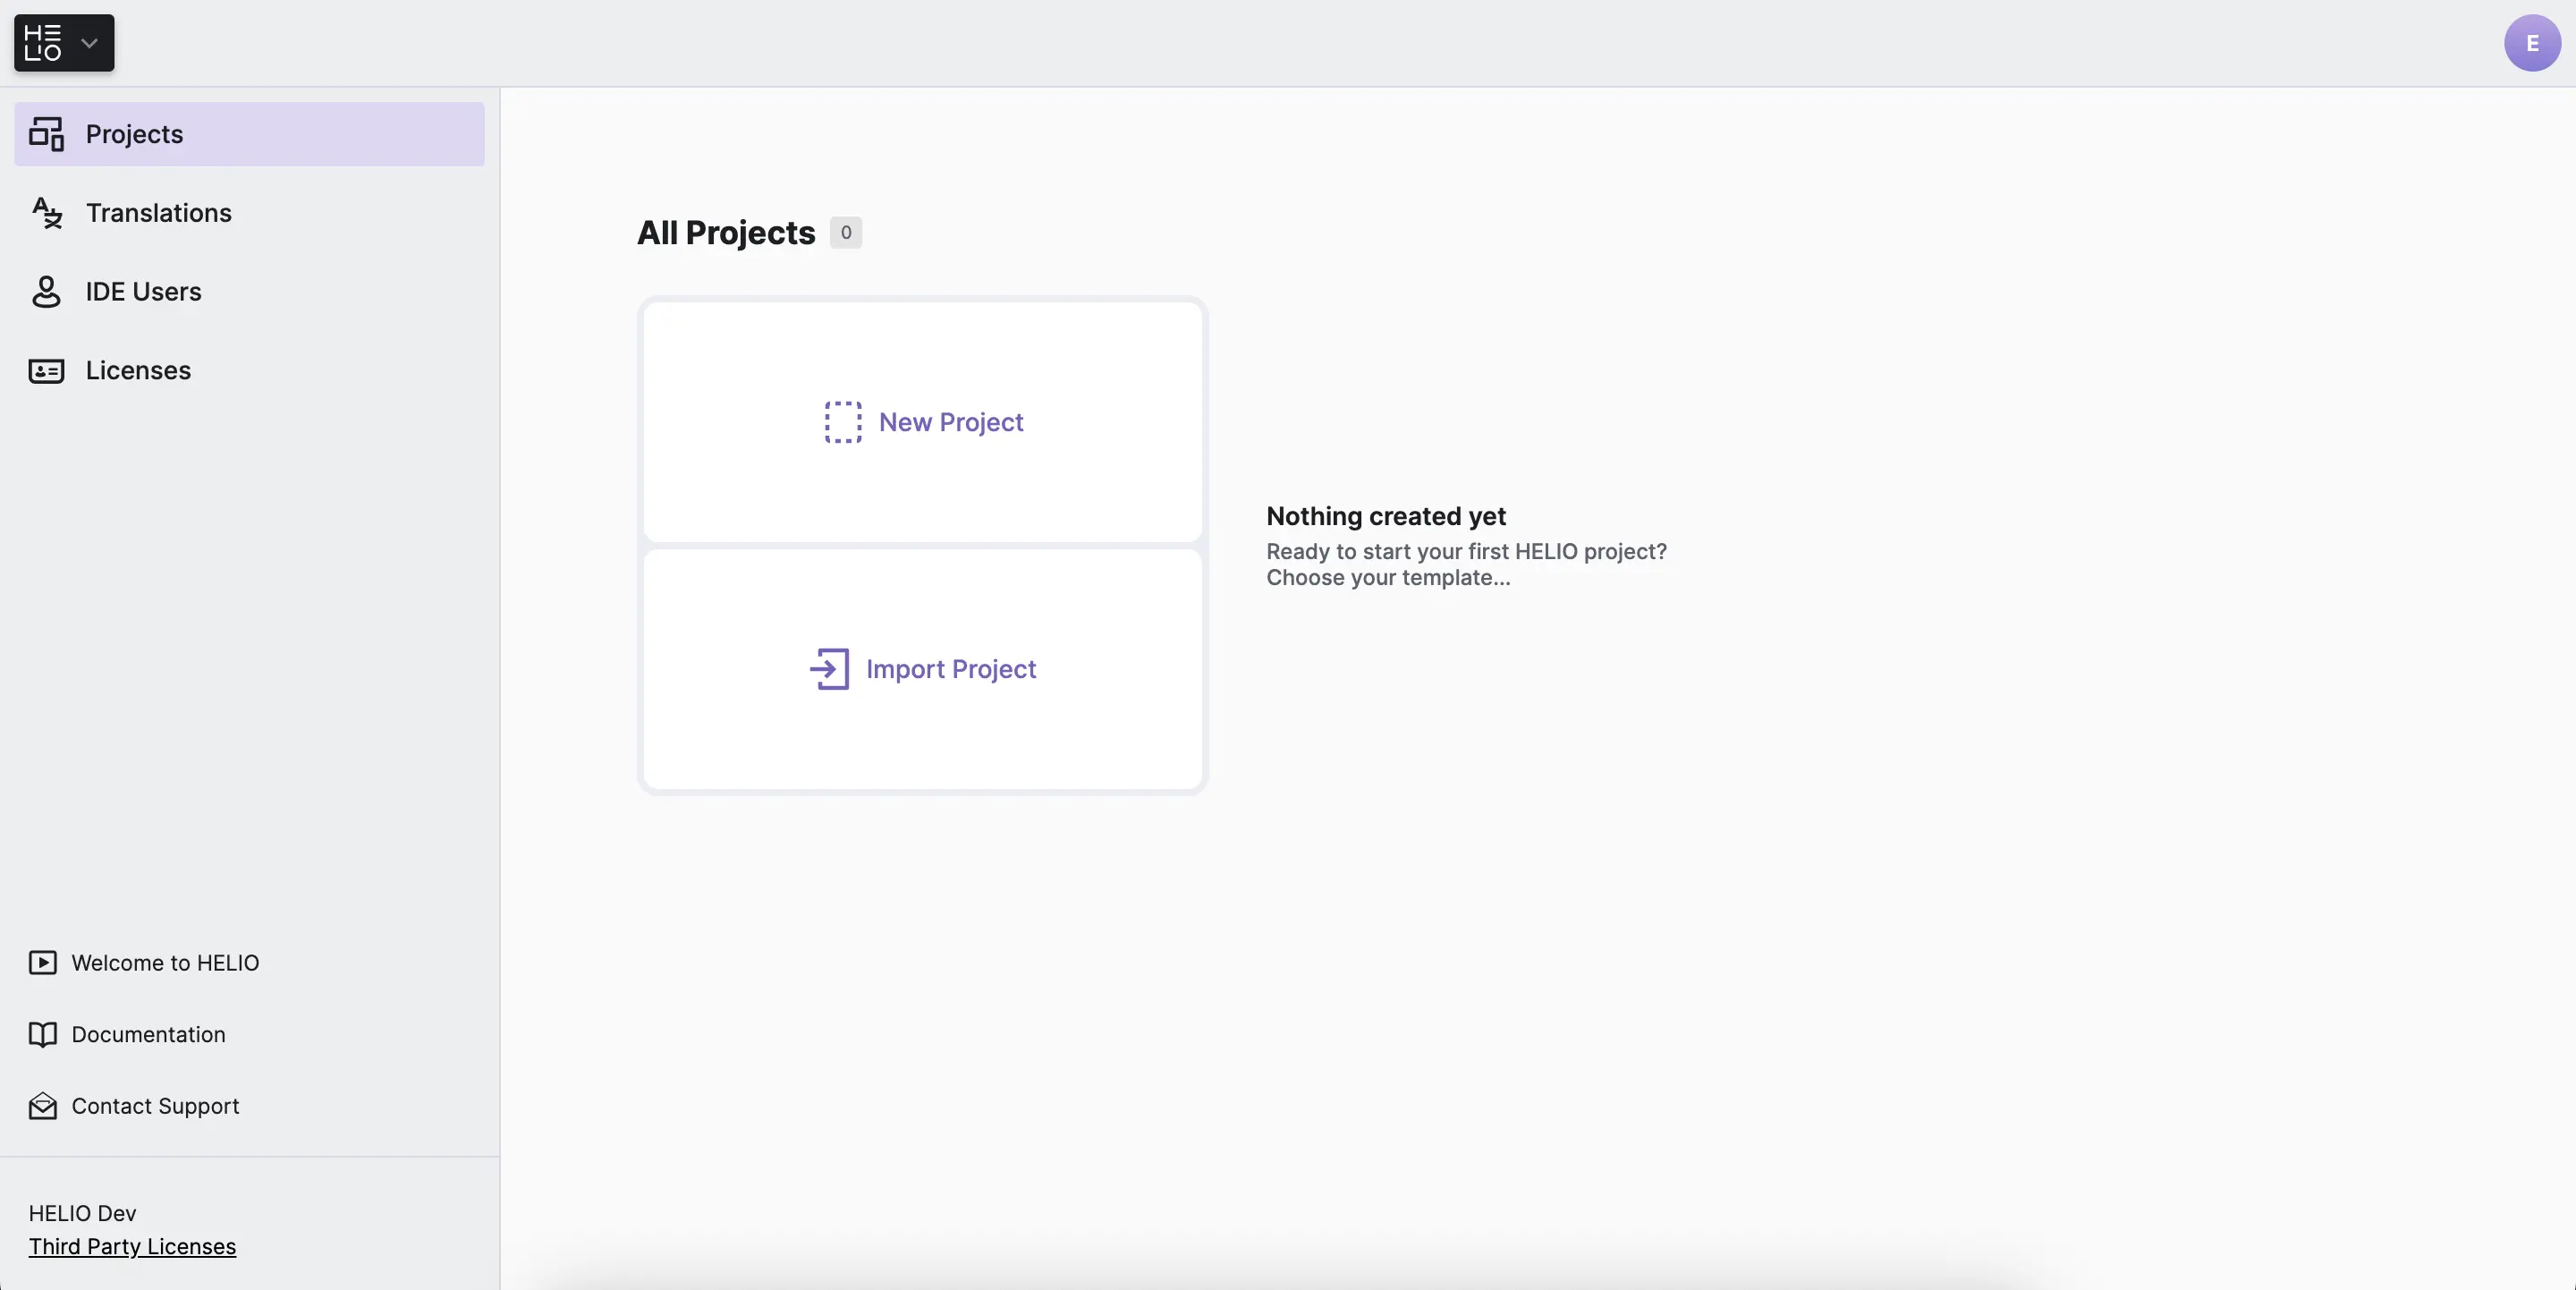
Once you're in, you'll see there aren't any projects yet. But no worries, HELIO has got you covered with some builtin templates to get you started.
The Project Editor
Select any of the built-in templates to create a new project and press the
Edit button to open it. This will take you to the Project Editor with its
different views.
1. The Content View
When creating your HMI, you will likely spend a lot of your time in the
Content View. Here you'll define the architecture, structure, and content
of your interface. This structure can then be filled, populated, and changed
with dynamic data. This view is divided into three main areas.
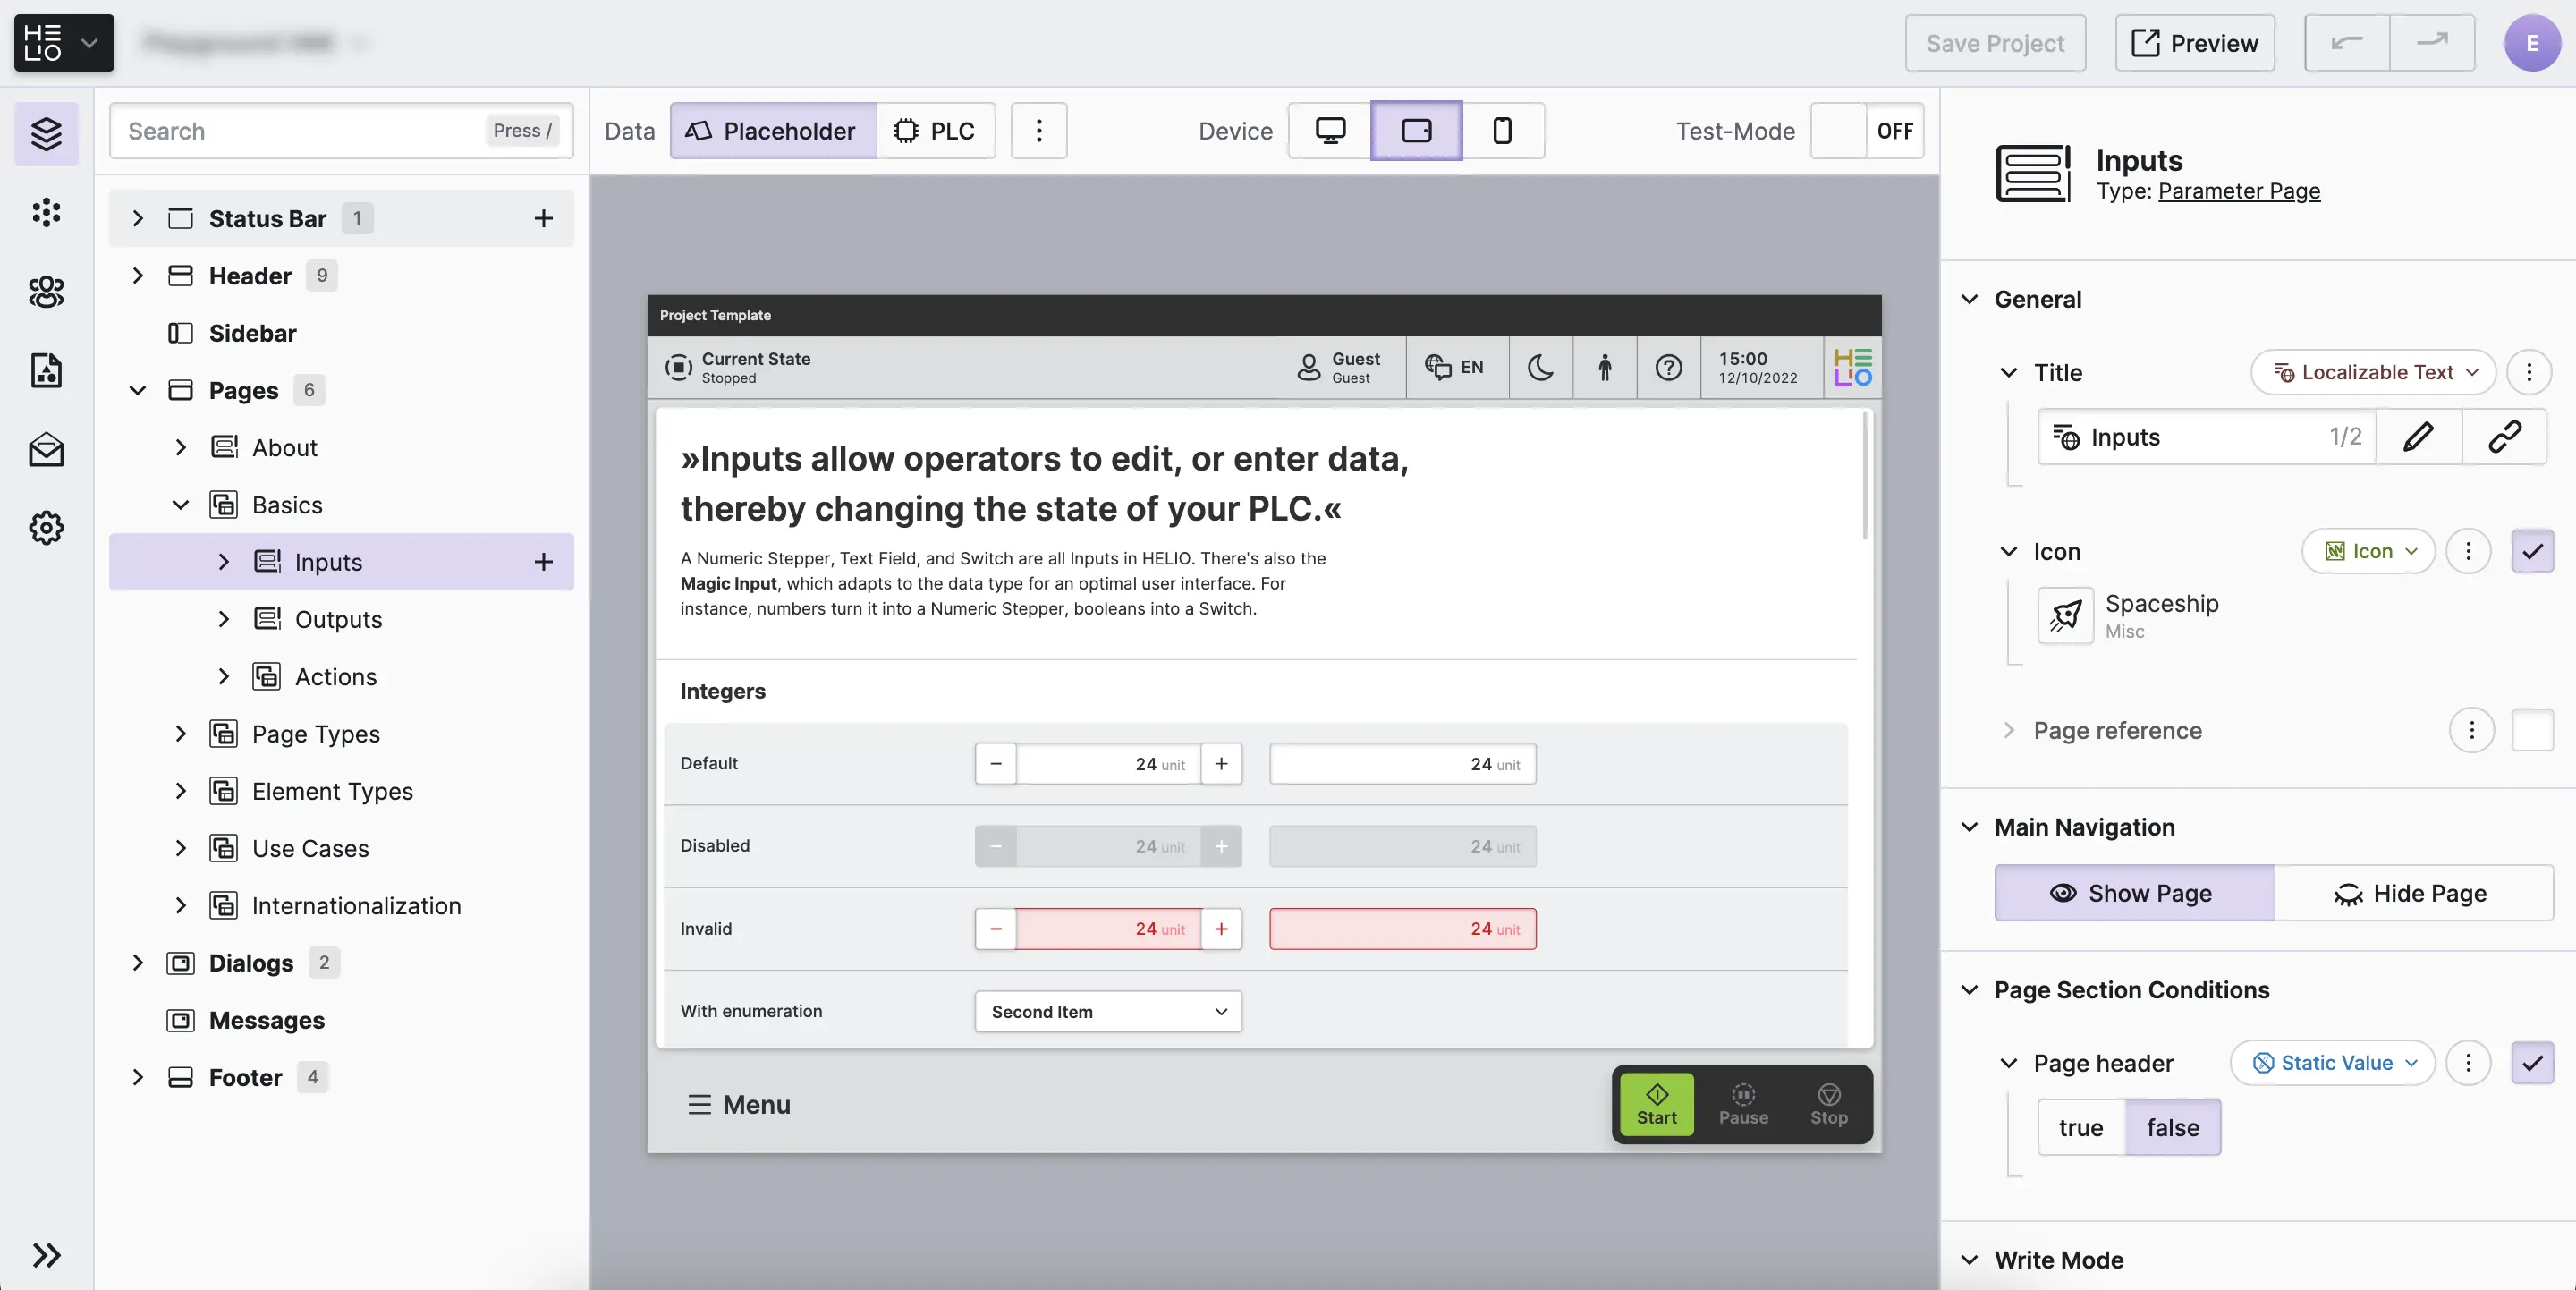
The Content Tree is located on the left of the screen, here you can see
every page and element contained in your HMI.
The Preview Panel shows a live view of your HMI. You can switch between
Placeholder and PLC Data and view your HMI in different screen sizes. The
buttons on the right side of the preview bar allow you to switch between
Edit and Test mode. Use Test mode to interact with your HMI.
The Properties Panel on the right side contains the settings for your
pages and elements. Here, you can edit these properties as needed.
2. The Data View
This is the view where you manage all of the data that makes your HMI dynamic. You can connect to different data sources, such as your PLC, as well as structured JSON files on the target device.
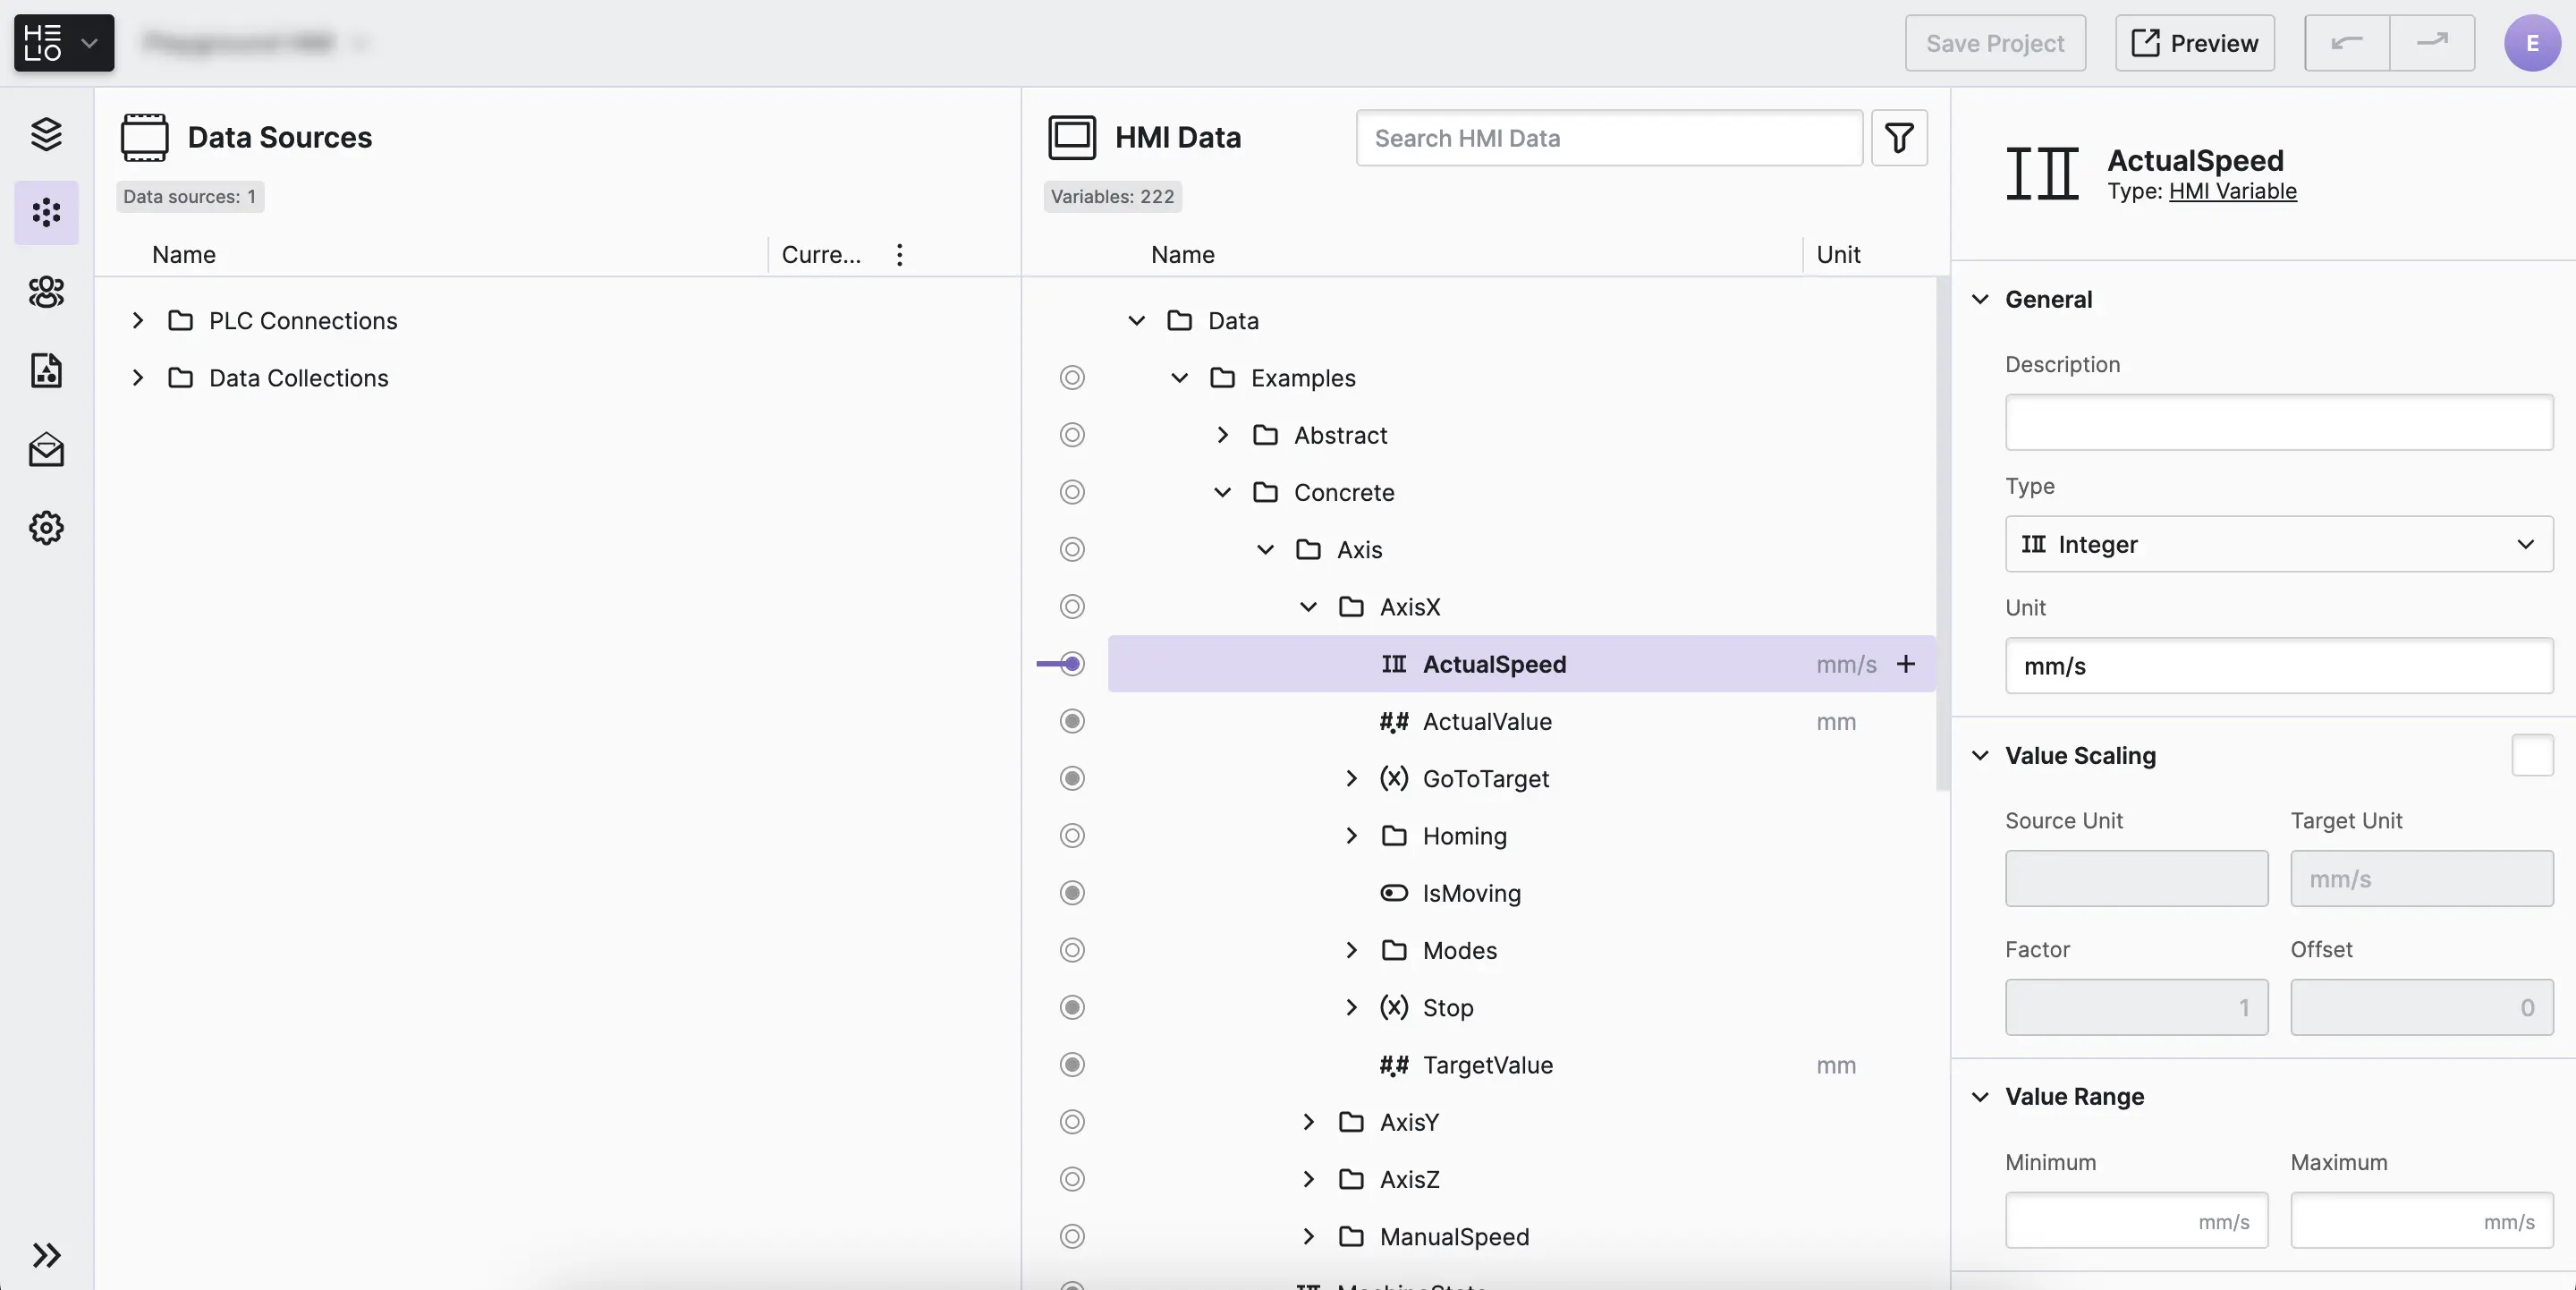
To set up new connections to data sources like your PLC, use the Data Sources Tree.
With the HMI Data Tree, you can create and customize the ideal data
structure for your HMI's needs. Think of it as your View Model. You
import variables or parts of the Data Source Tree using drag and drop.
The Properties Panel displays the settings of the currently selected
connection, variable, or object.
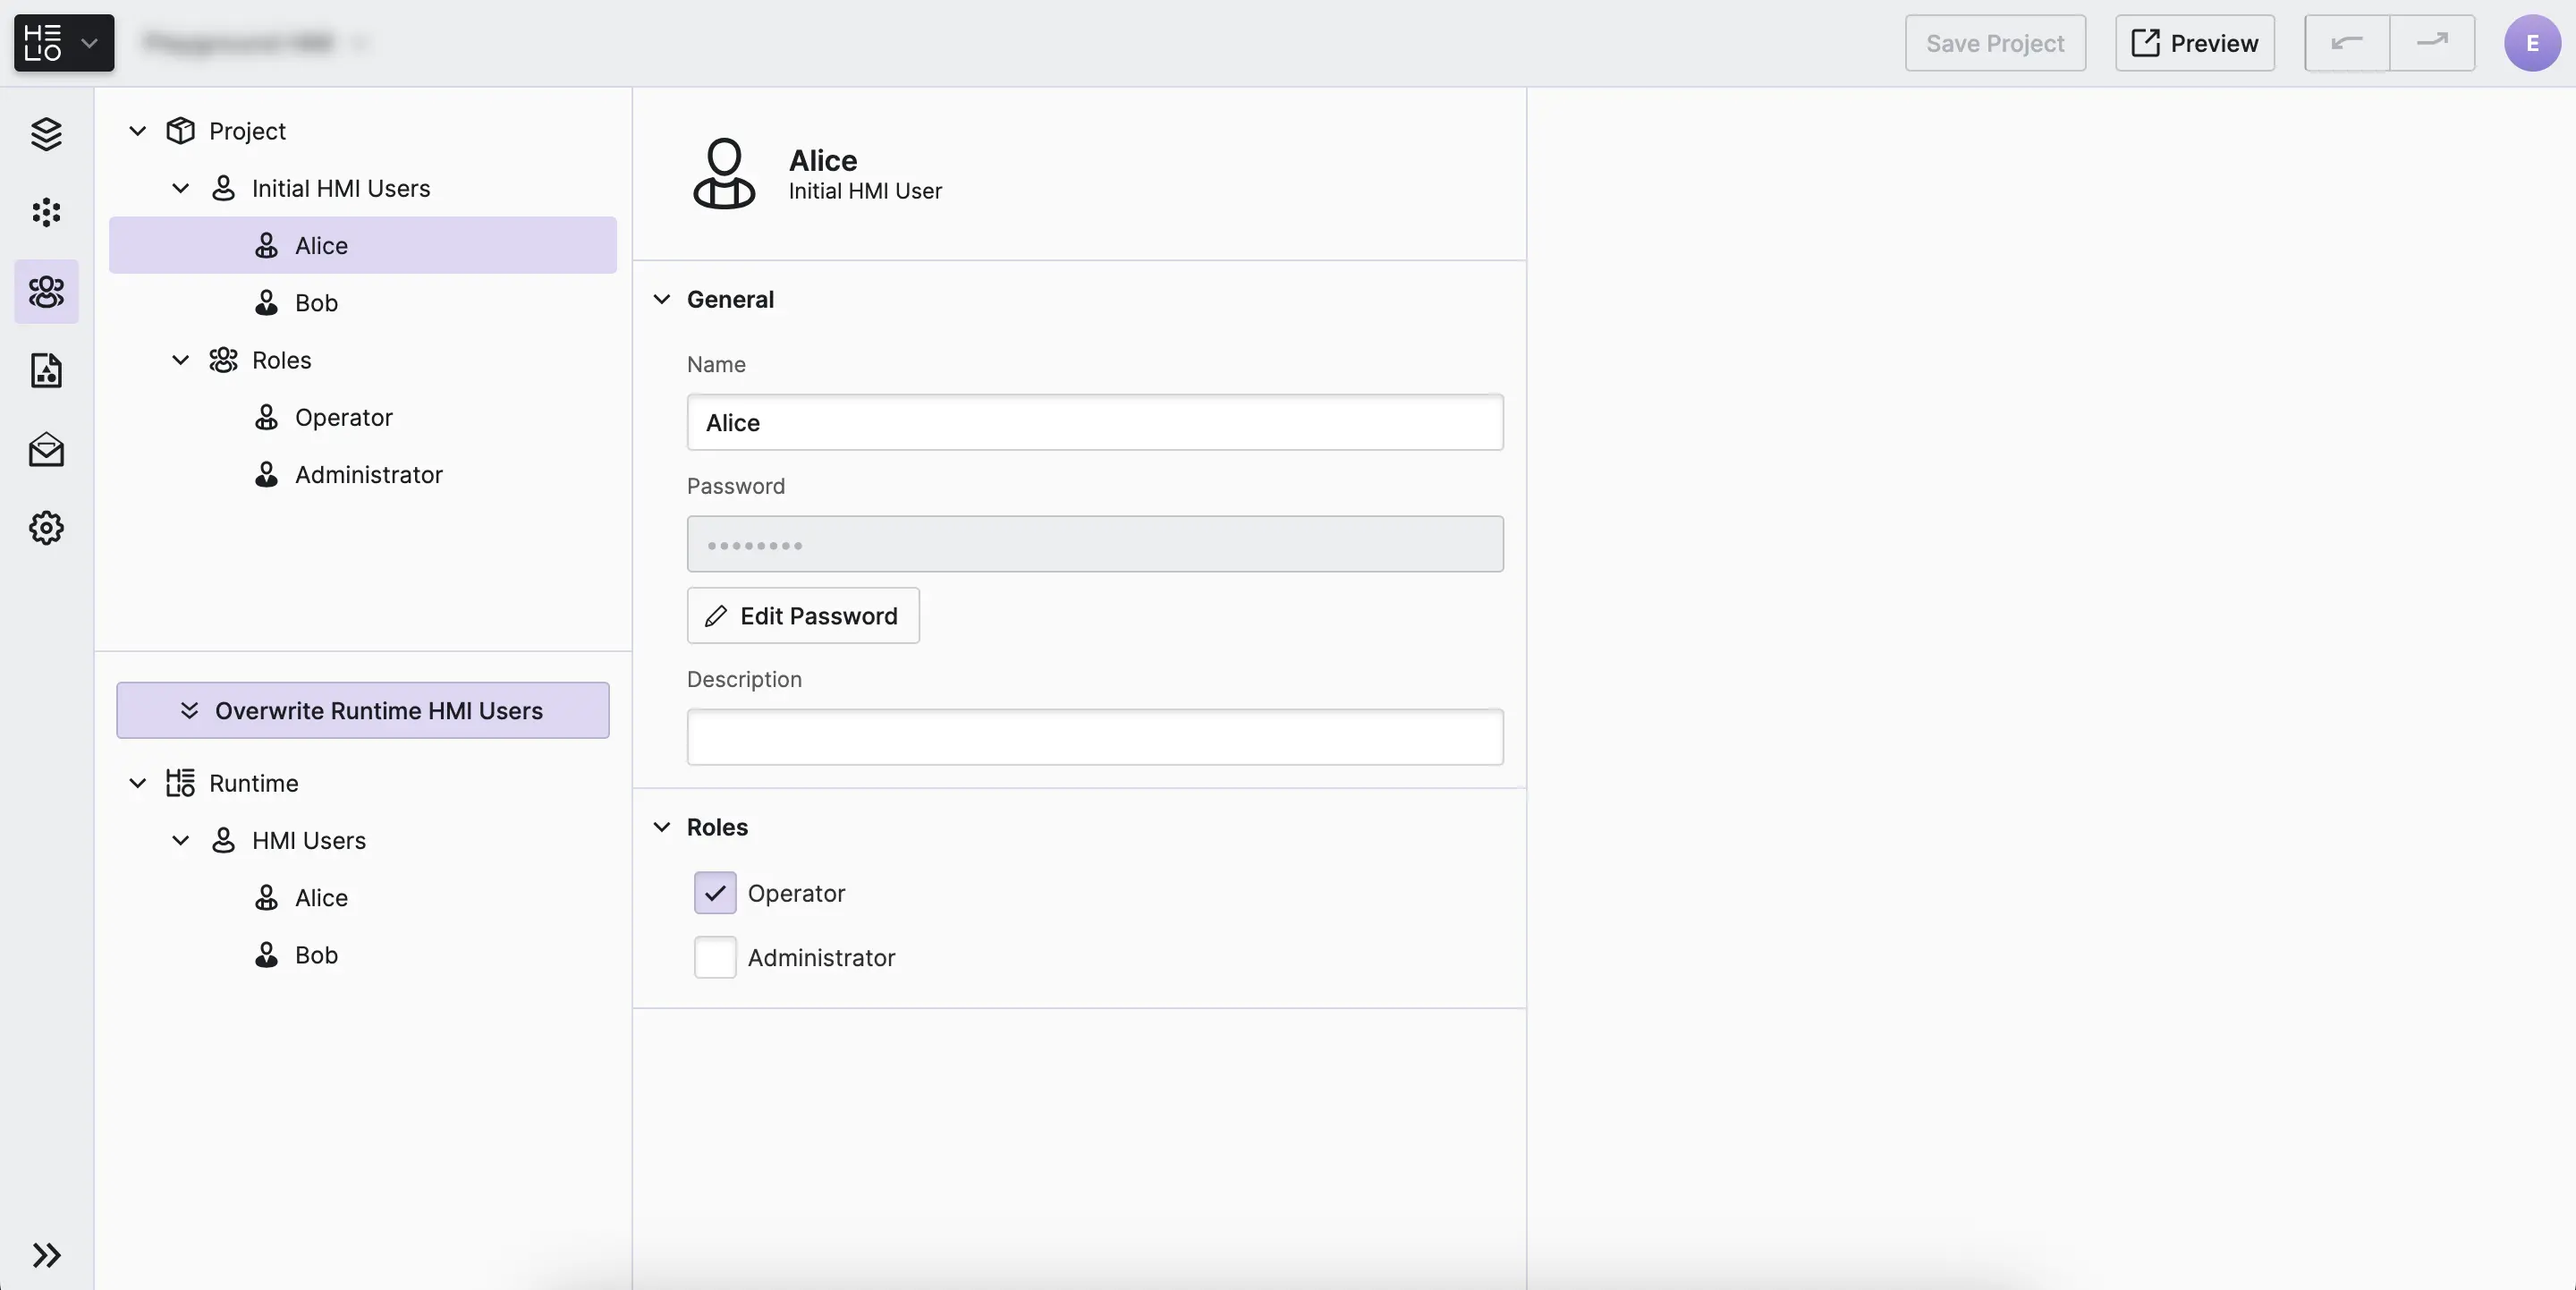
3. The HMI Users View
Use this view to configure the initial HMI users and roles for your project. Roles allow you to control and limit access to specific pages or page sections within your HMI.
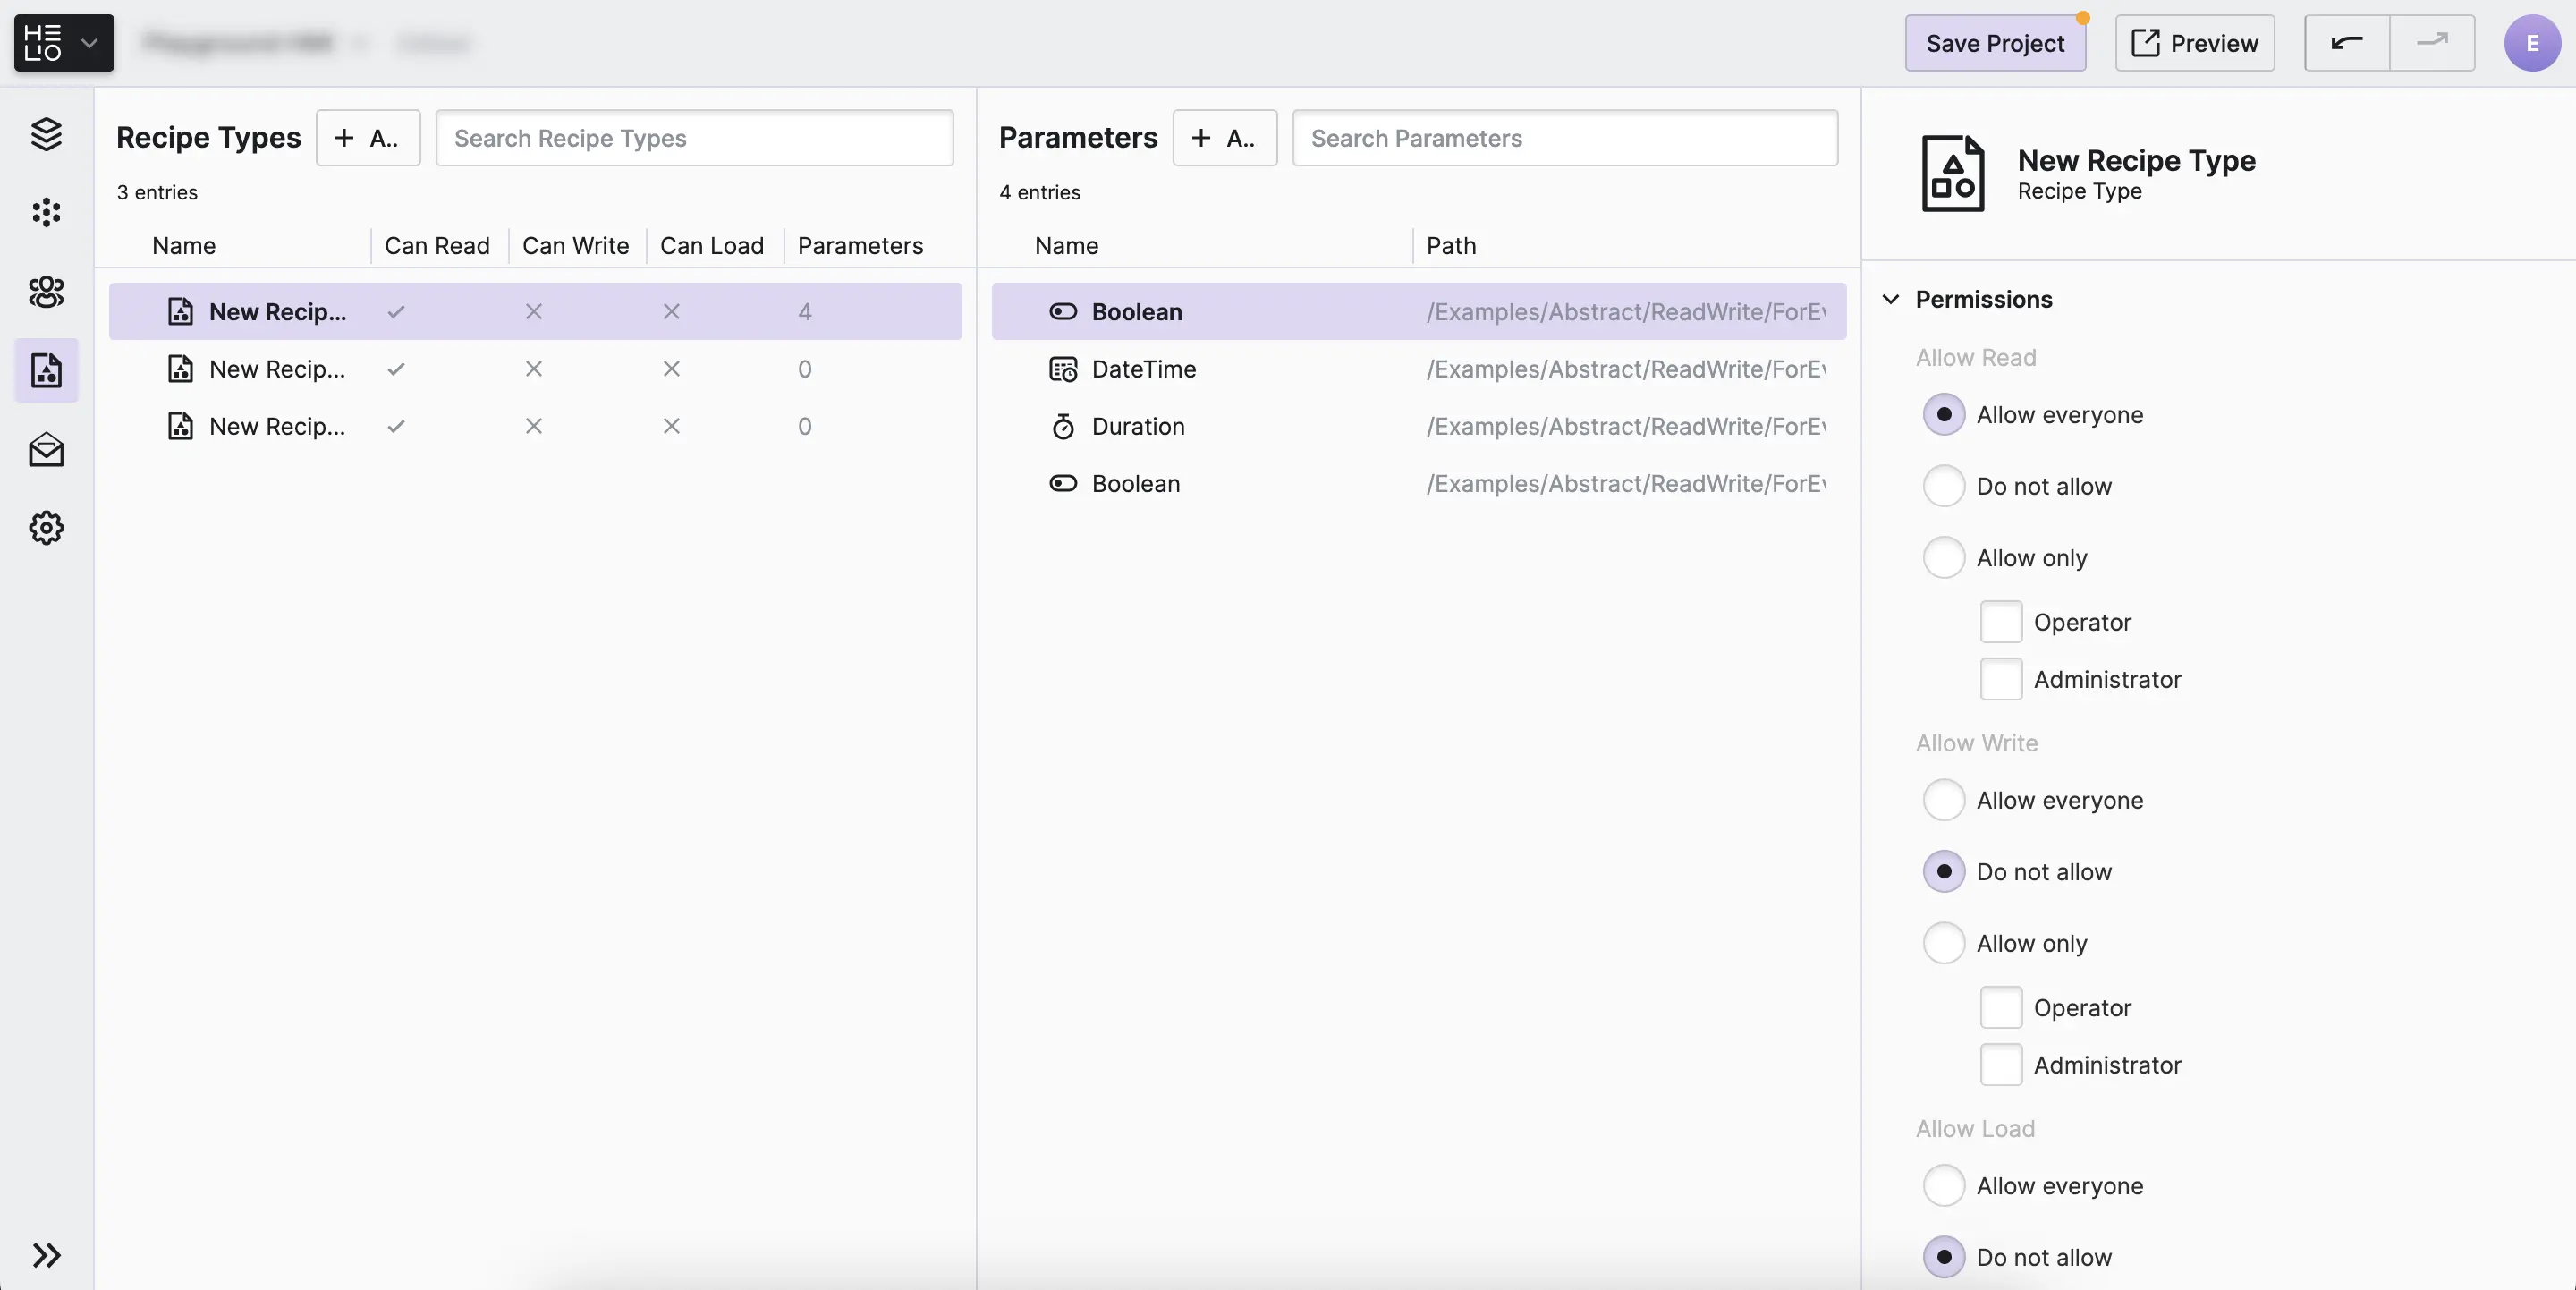
4. The Recipes View
You use this view to define your recipe types and add parameters
to them using the data model you have set up in the Data View.
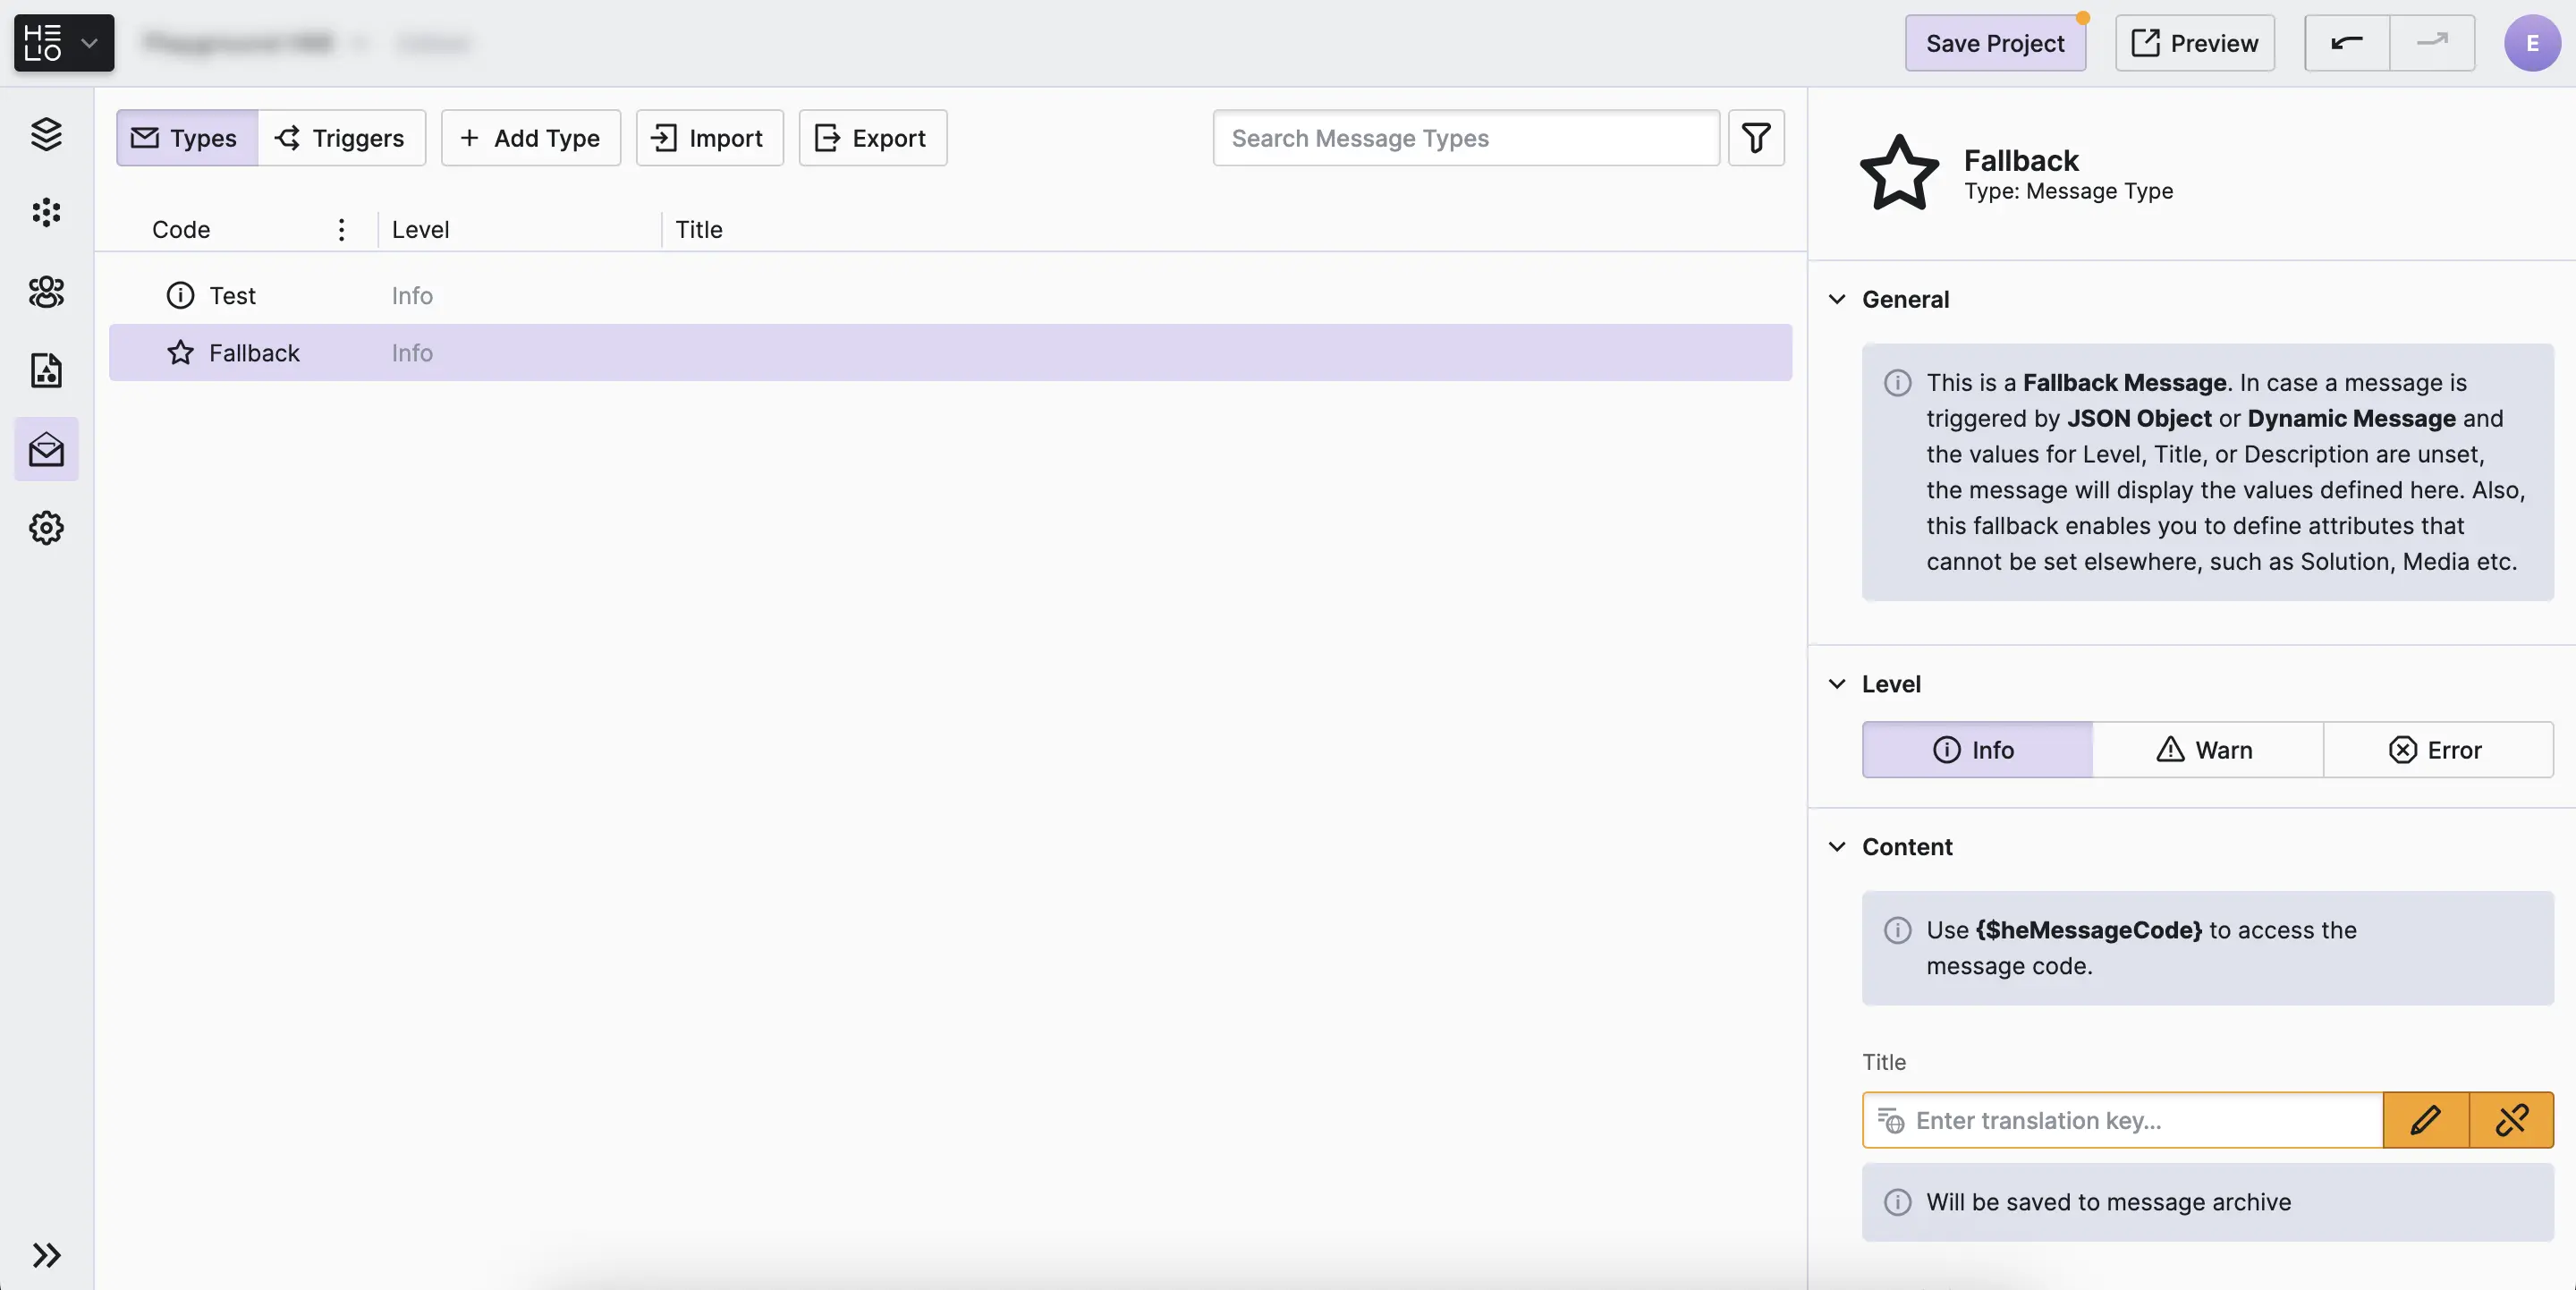
5. The Messages View
With this view, you can set up message types to let operators know about significant errors, warnings, and other information.
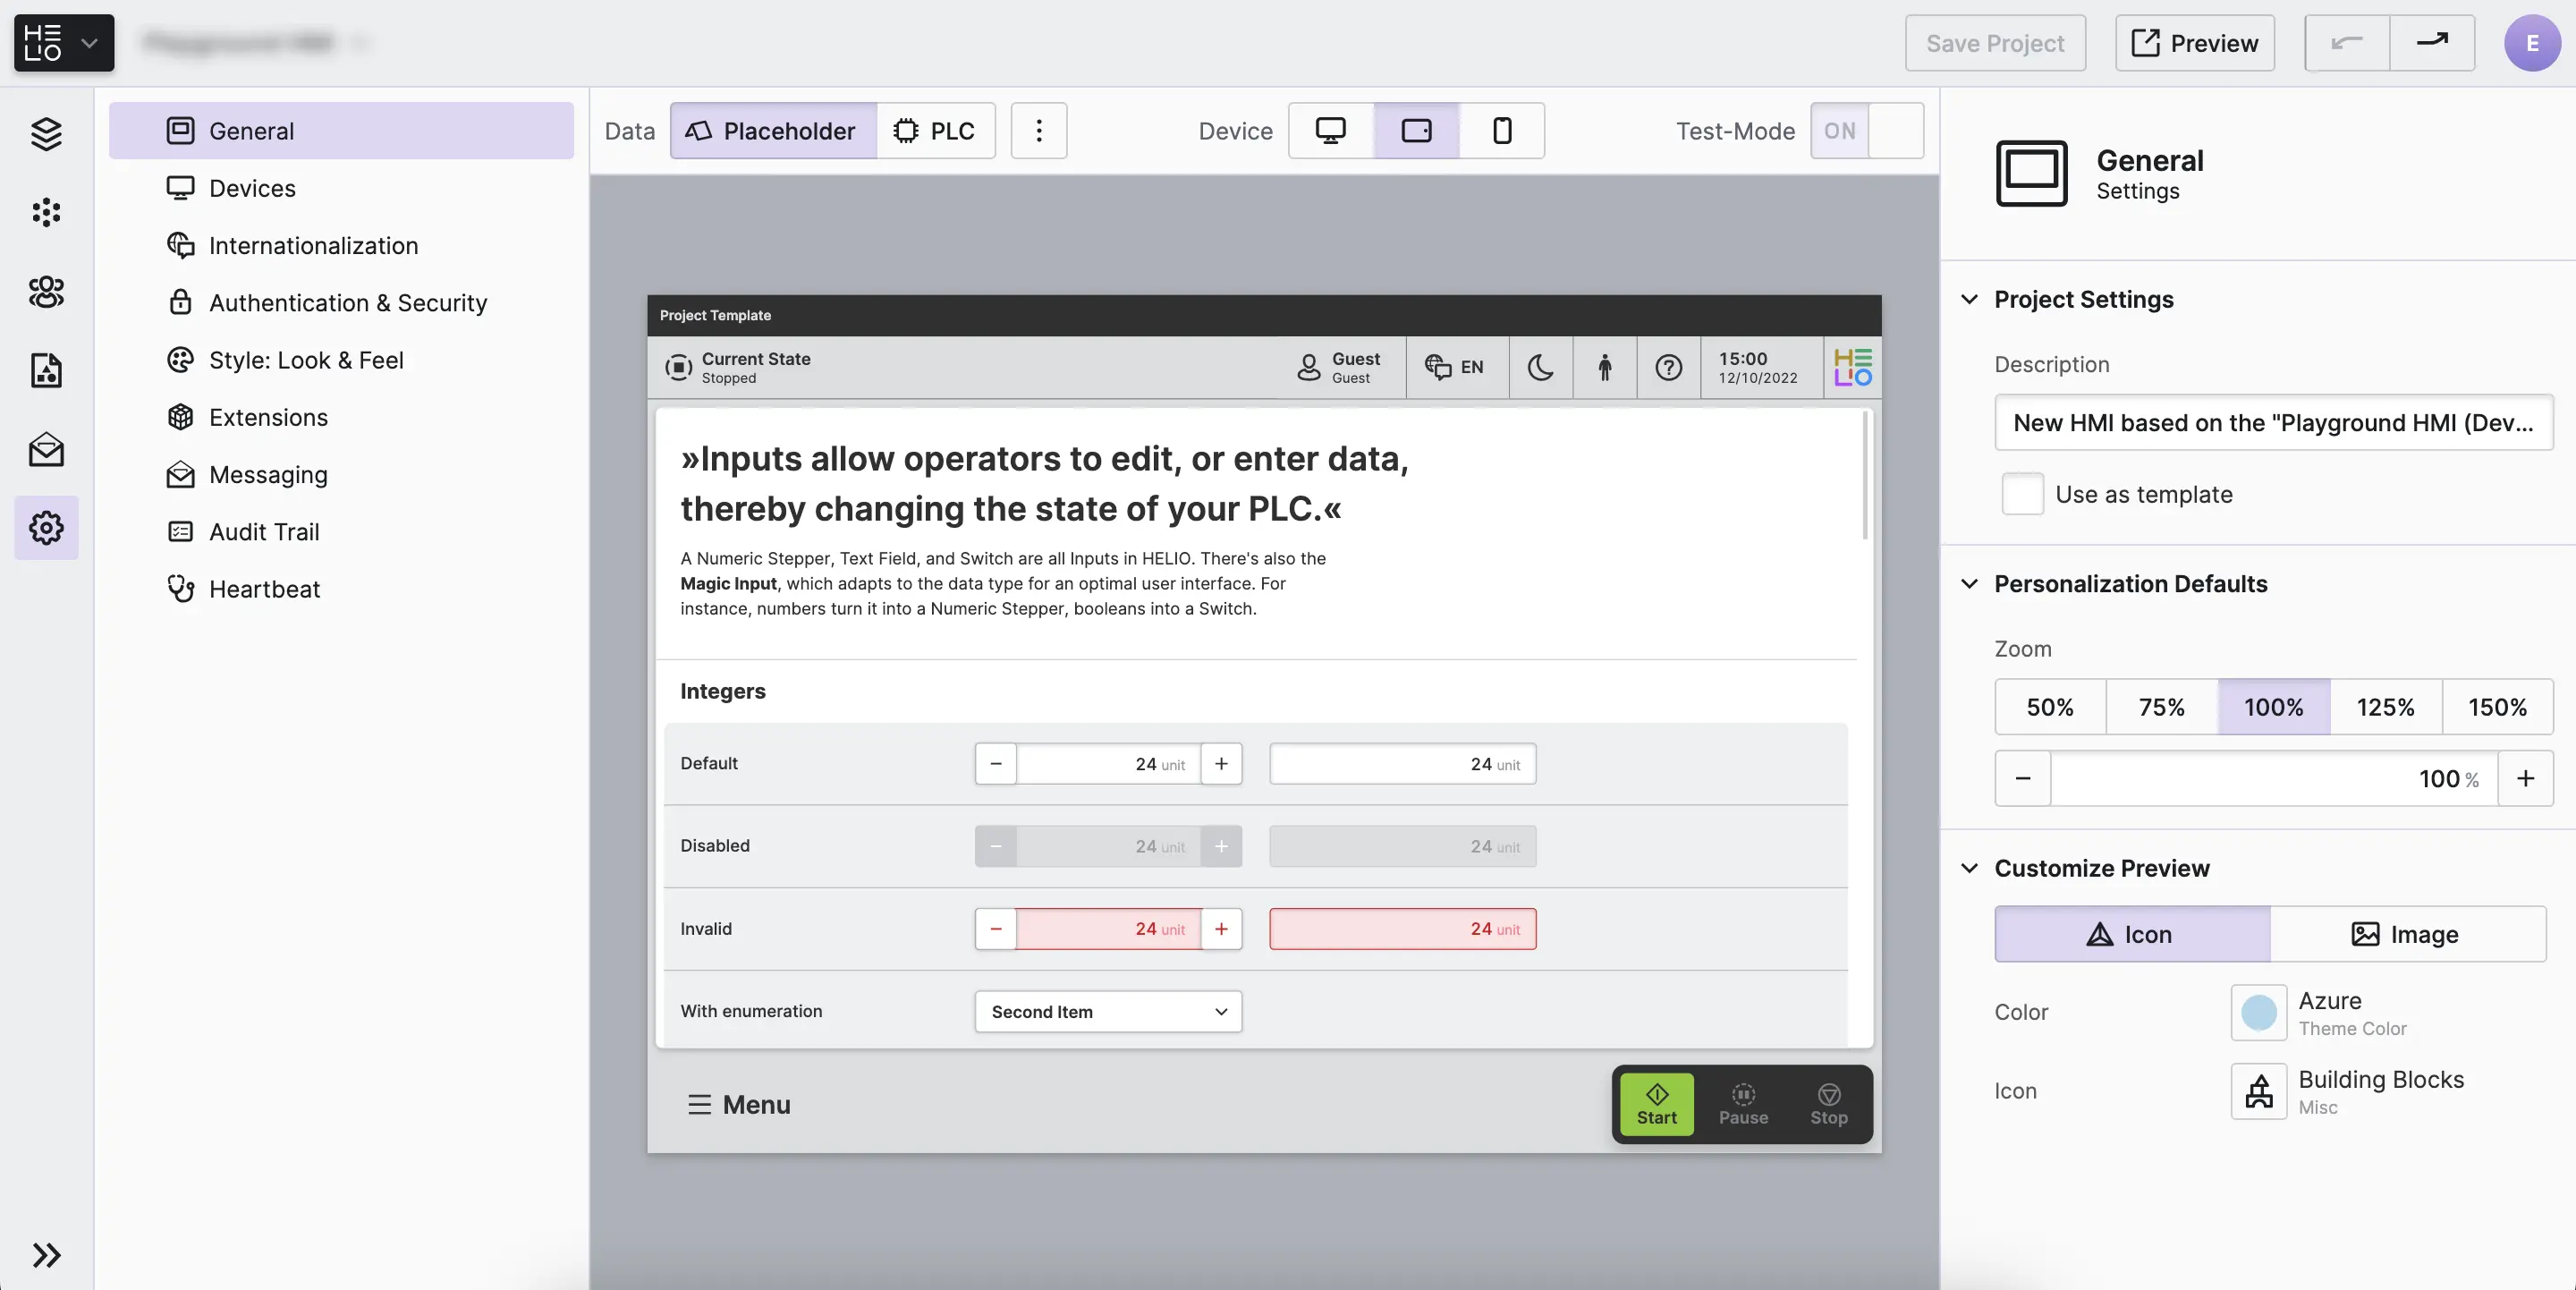
6. The Settings View
This view will help you set basic settings for the project. Select which devices your HMI should be previewed on, set a description for your project, choose what you want your HMI to look like, and much more.
Ready To Start Engineering HMIs?
You've made yourself familiar with HELIO. It's time to deepen your knowledge, download HELIO and actually run your first HMI.